
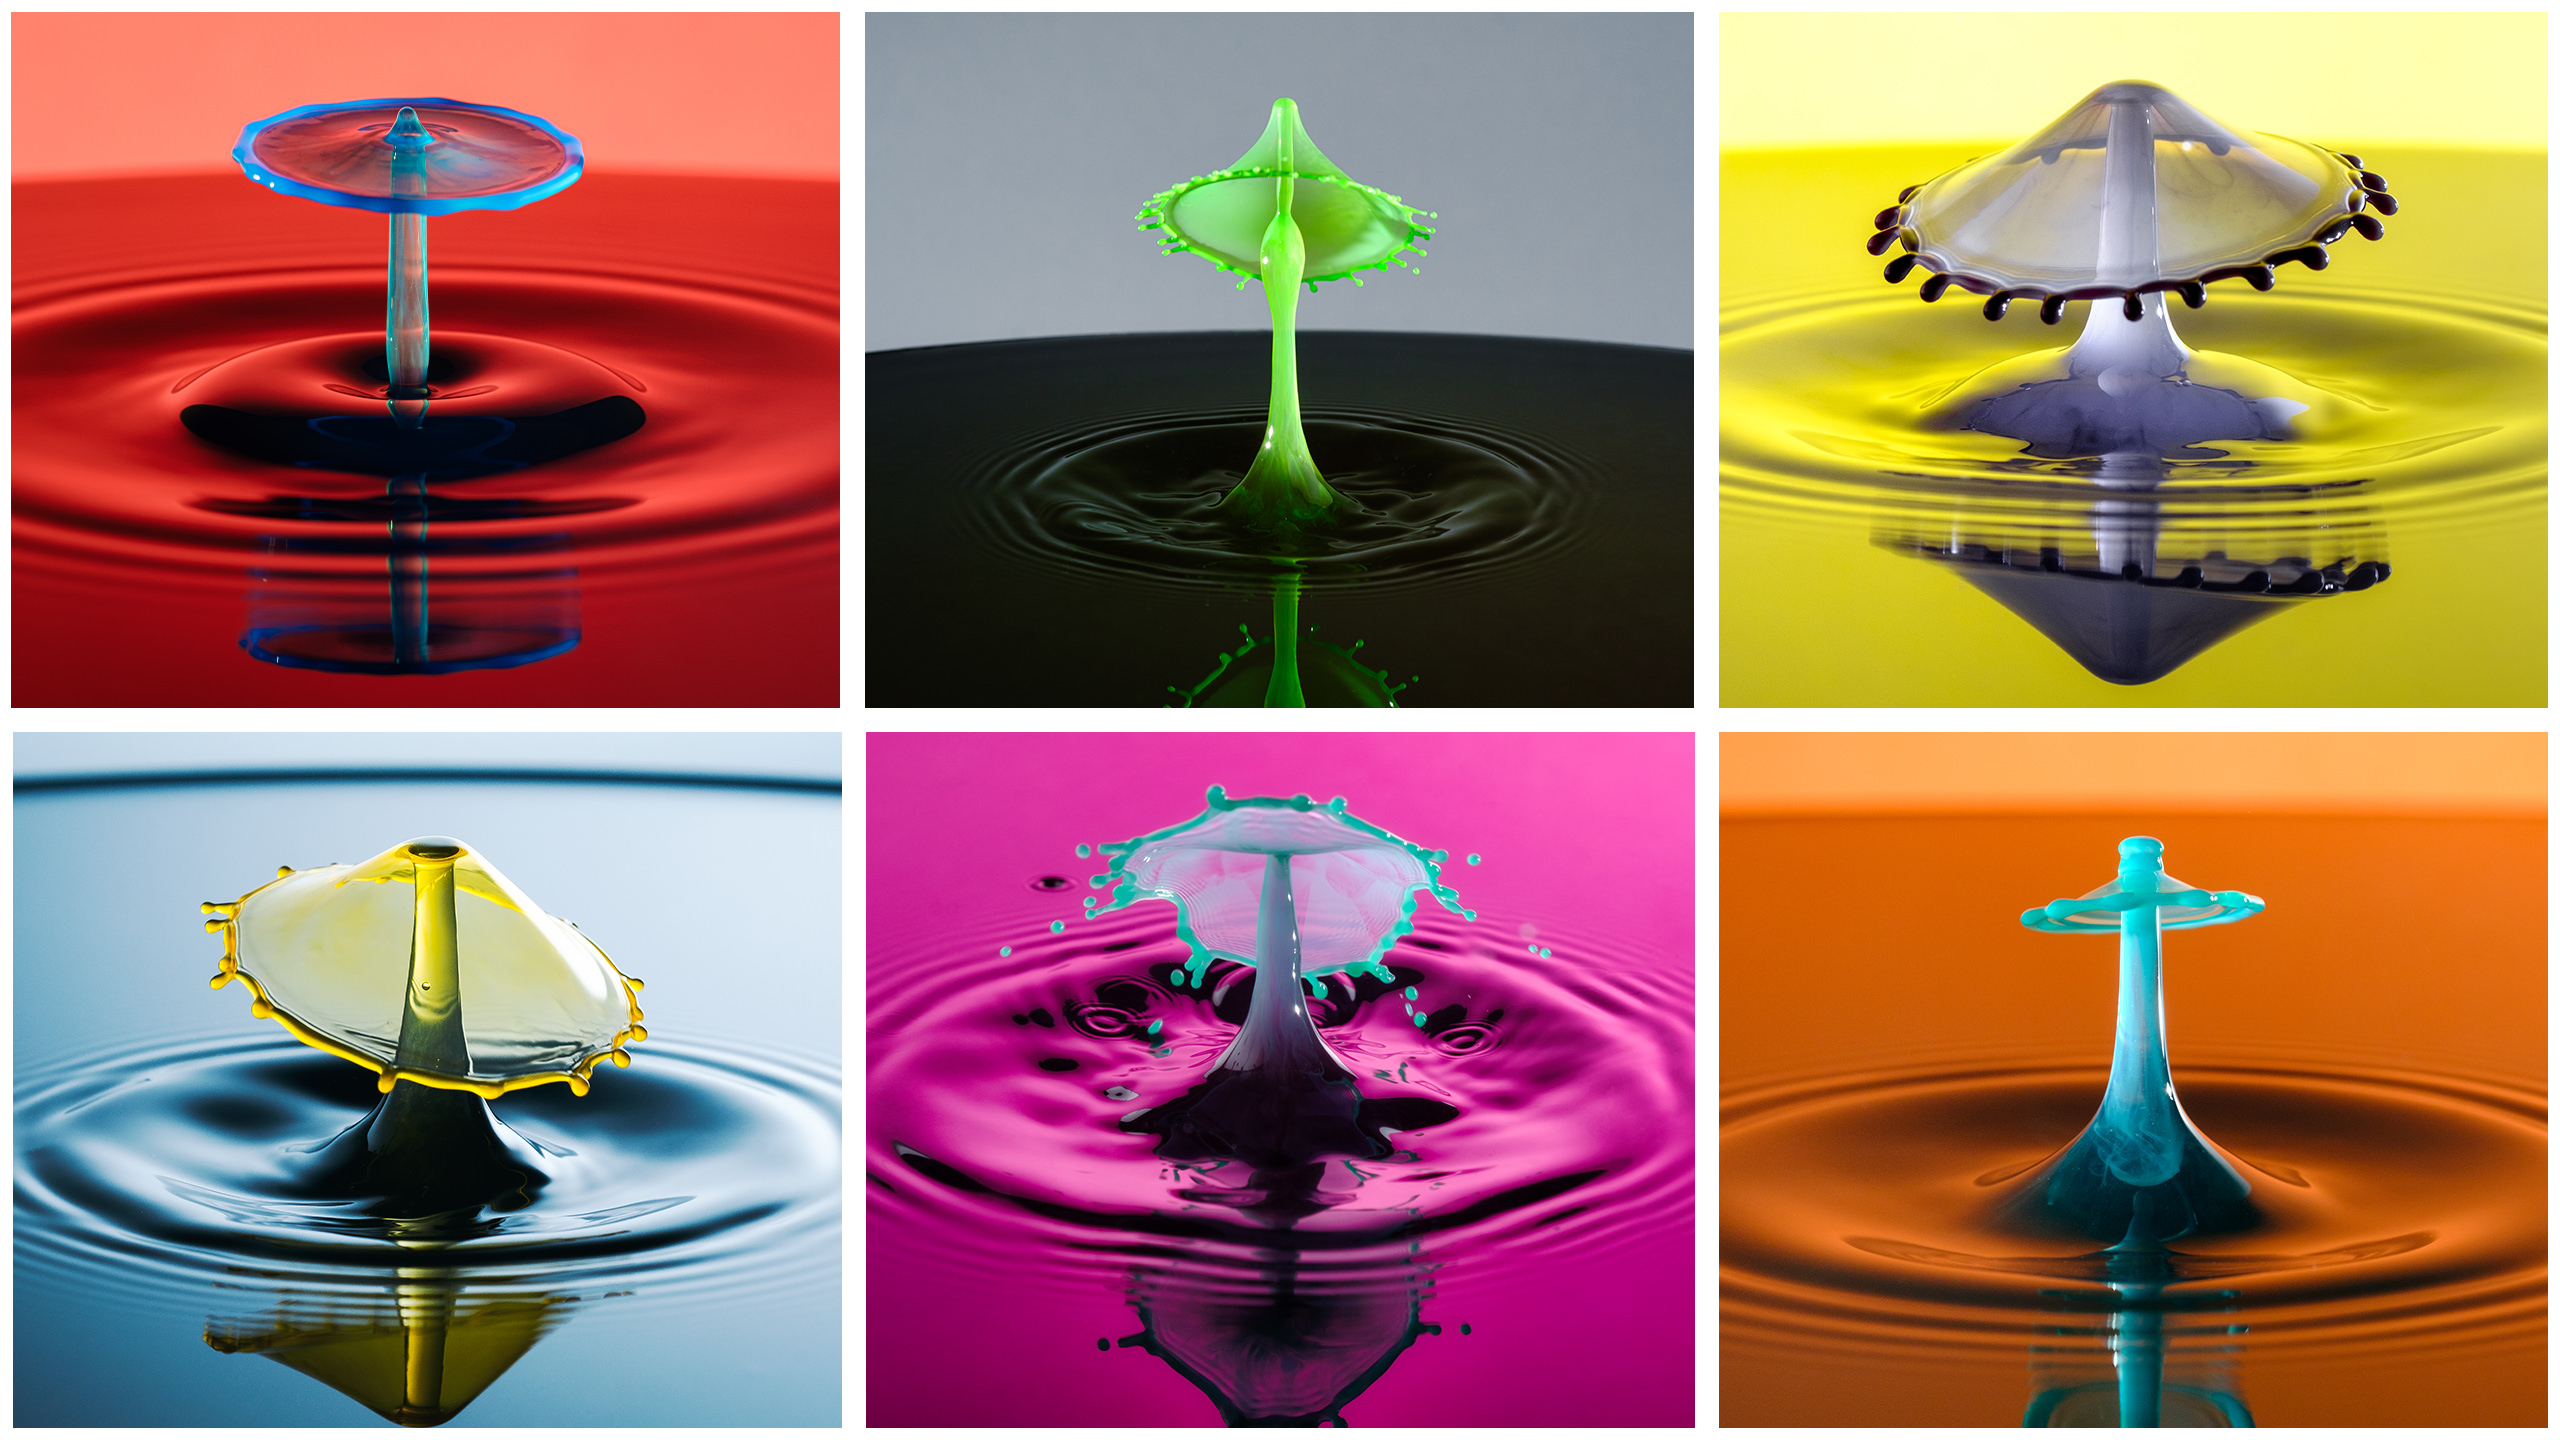
If you’ve wanted to create your own photo grid collages, Photoshop is a great tool to use. Using guides, you can quickly set up perfectly-even grid shapes by setting up the number of rows and columns you wish to use. Then, you will use shapes and clipping masks to finish your collage.
Want to learn how to create a custom photo collage in Lightroom? Go here to watch a video tutorial.
How to create a collage in Photoshop
Below is a step-by-step tutorial on creating a custom Photoshop collage.
Step 1: Create a new document
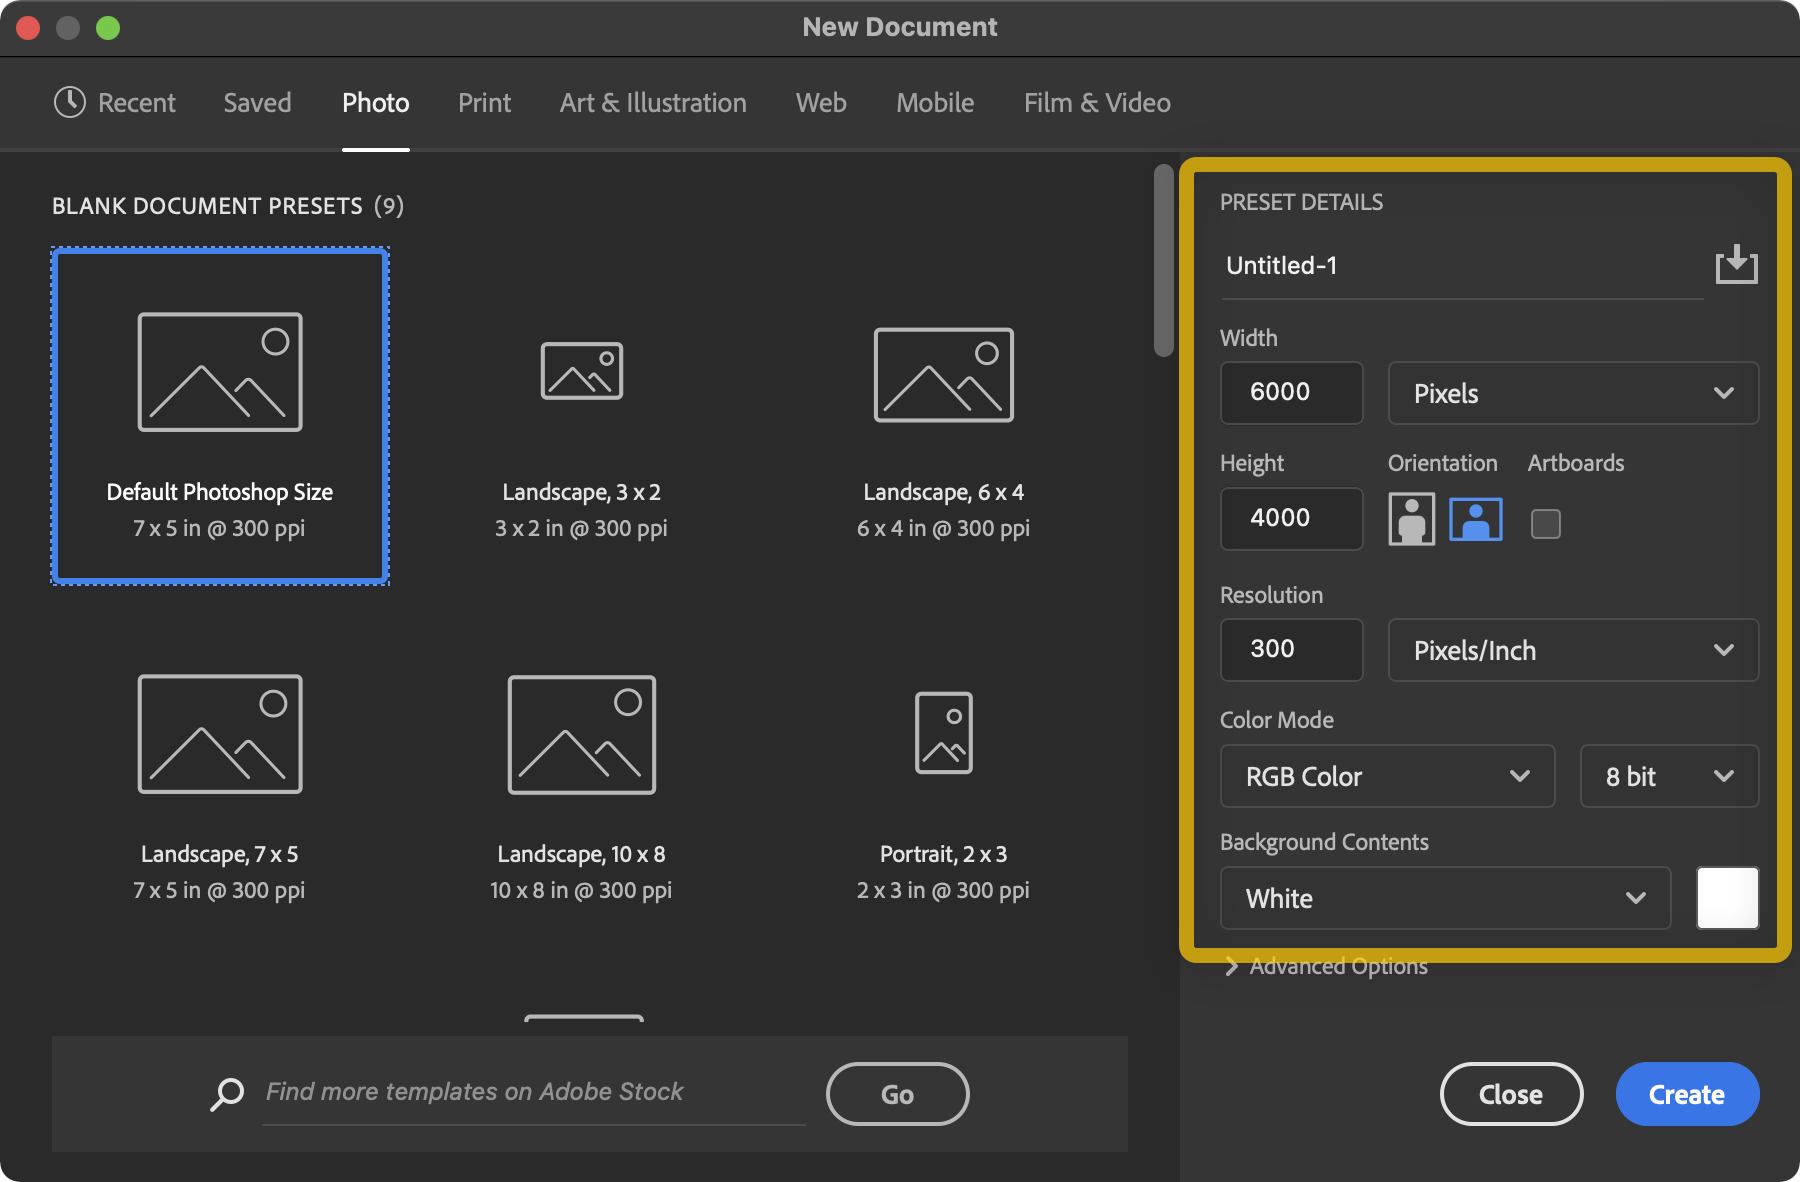
Open Photoshop and go to File > New. Then, choose a document size you’d like to work with. This tutorial will work with all image sizes, so go ahead and pick a size that works for you. Here I created a document with a white background of 6000×4000 pixels in size and 300 PPI.
Step 02: Create a grid using guides
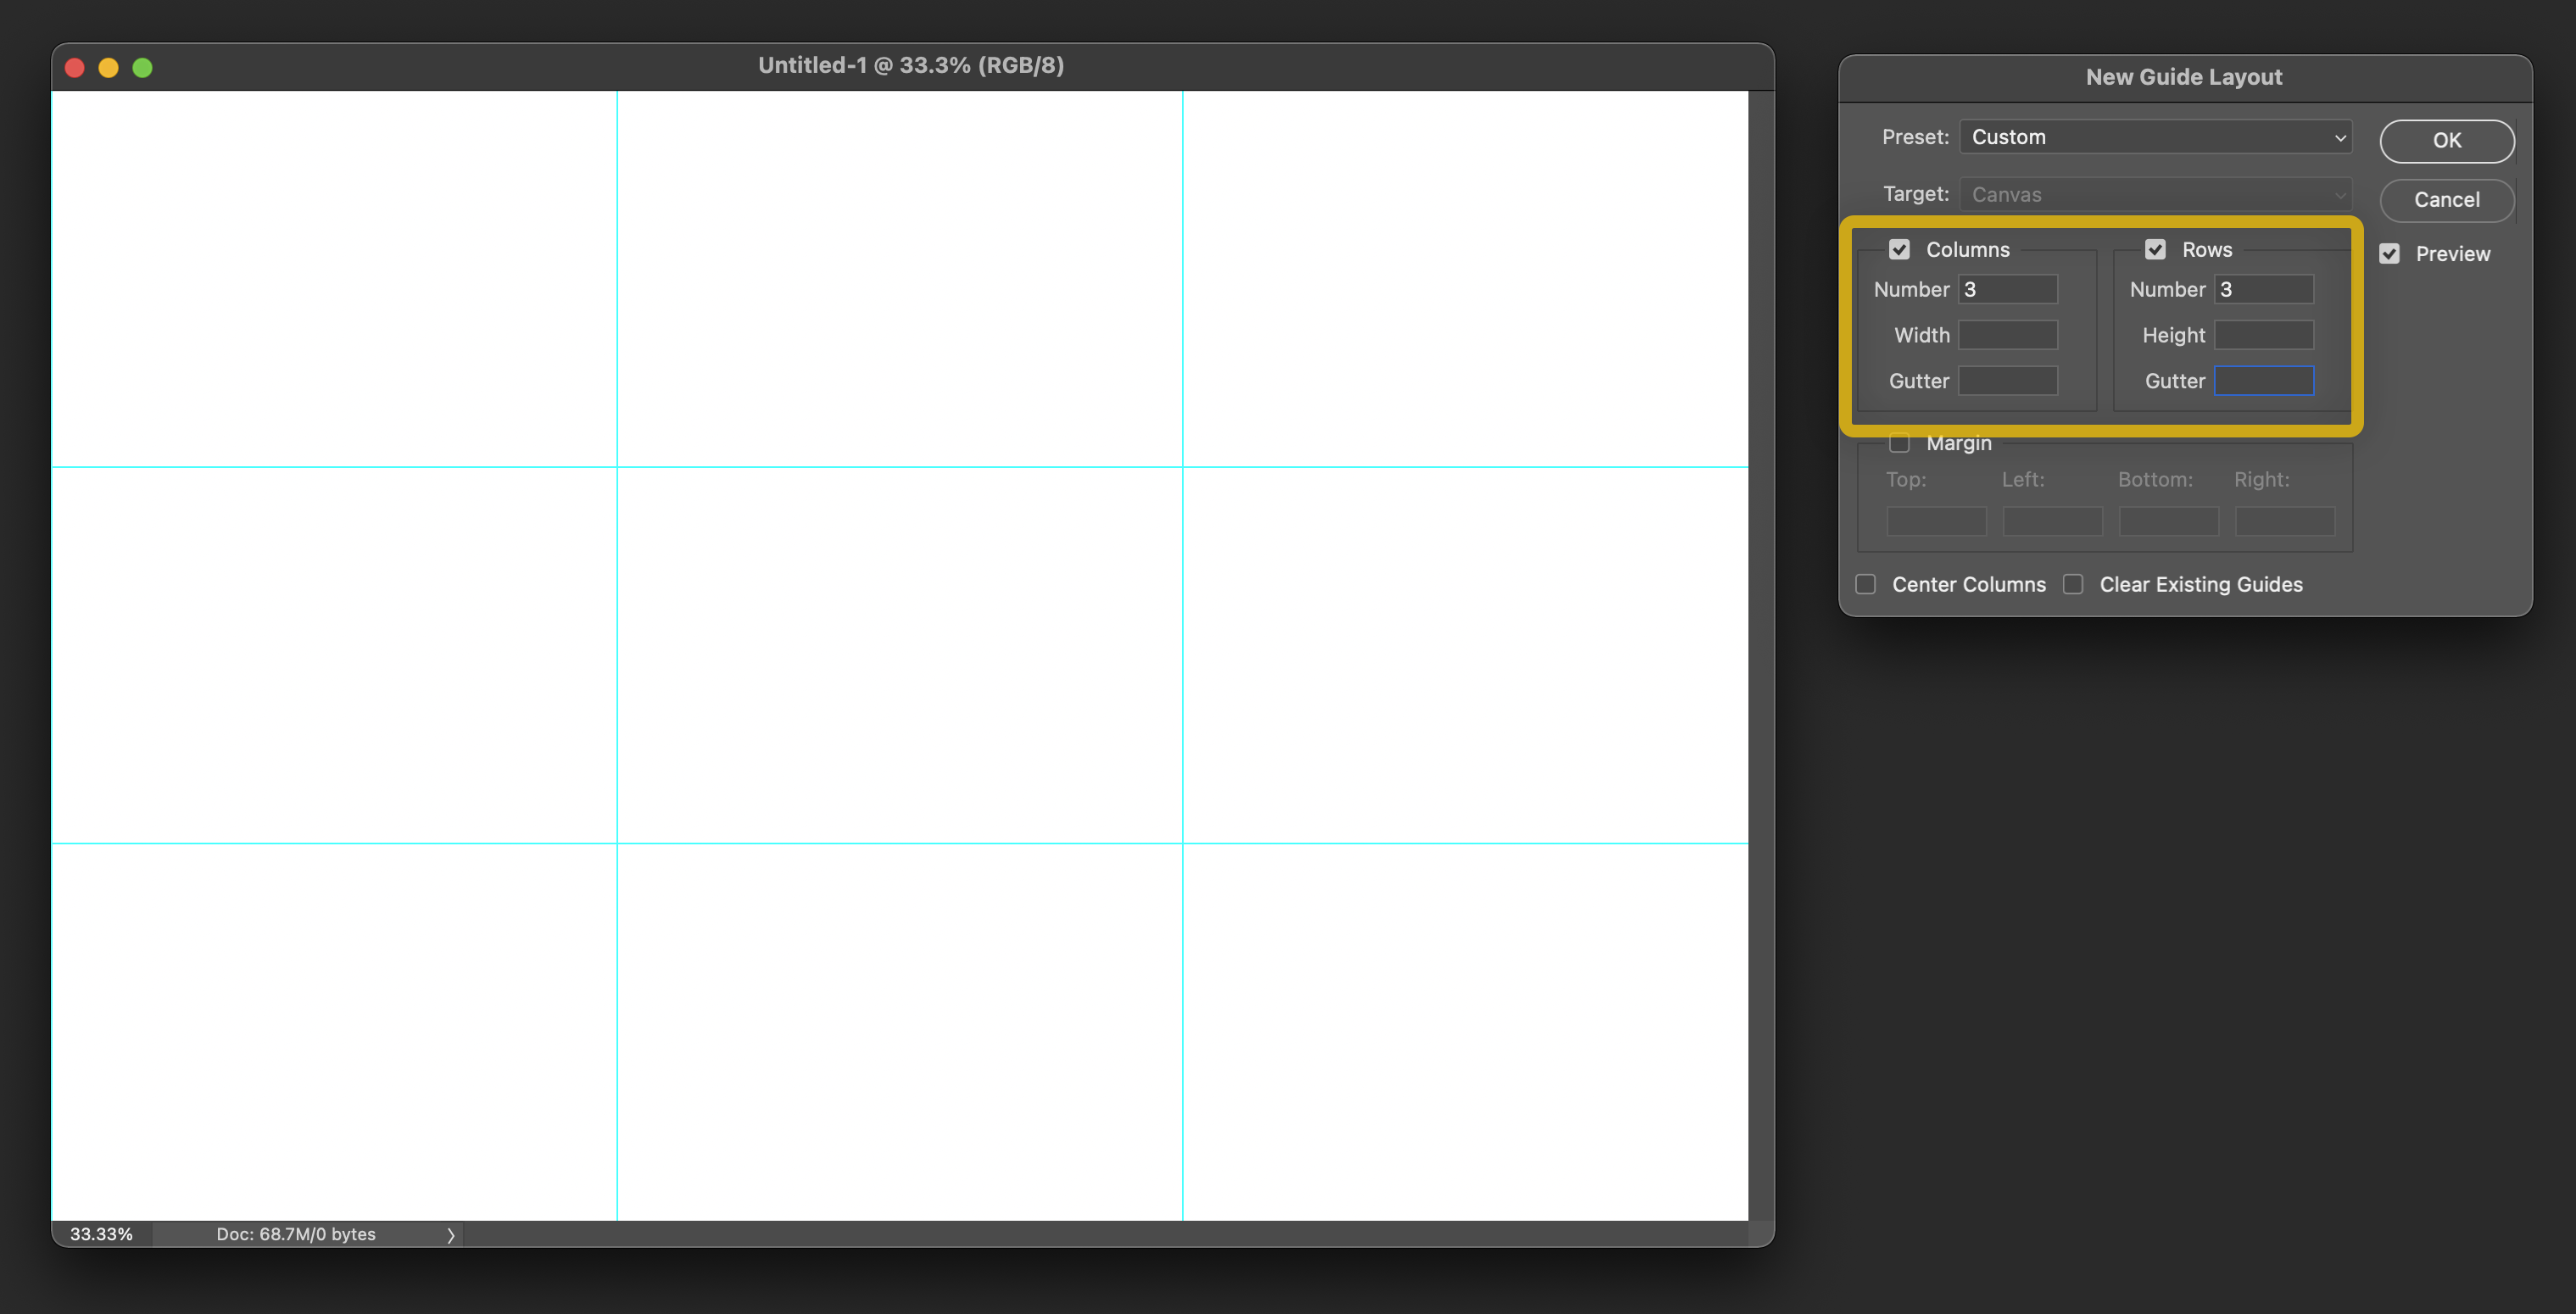
After you create your new document, go to View > New Guide Layout. Then, use the Columns and Rows sections to create your grid, and make sure the Preview box is checked so you can see how it looks. This sets up evenly-spaced guides that make it easy to create the shapes you will use to place your images for your photo grid collage.
Step 03: Set up the Rectangle tool before creating your grid shapes
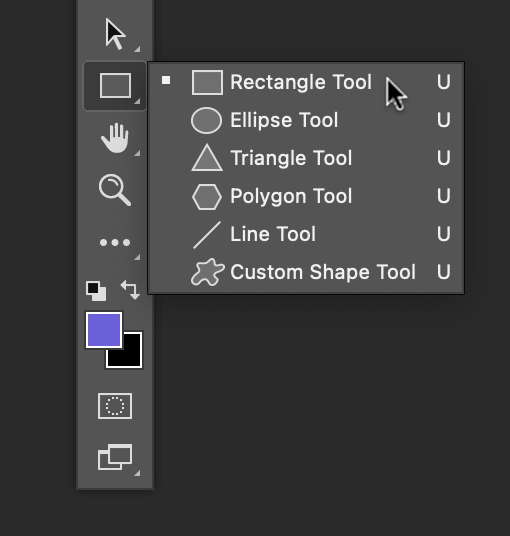
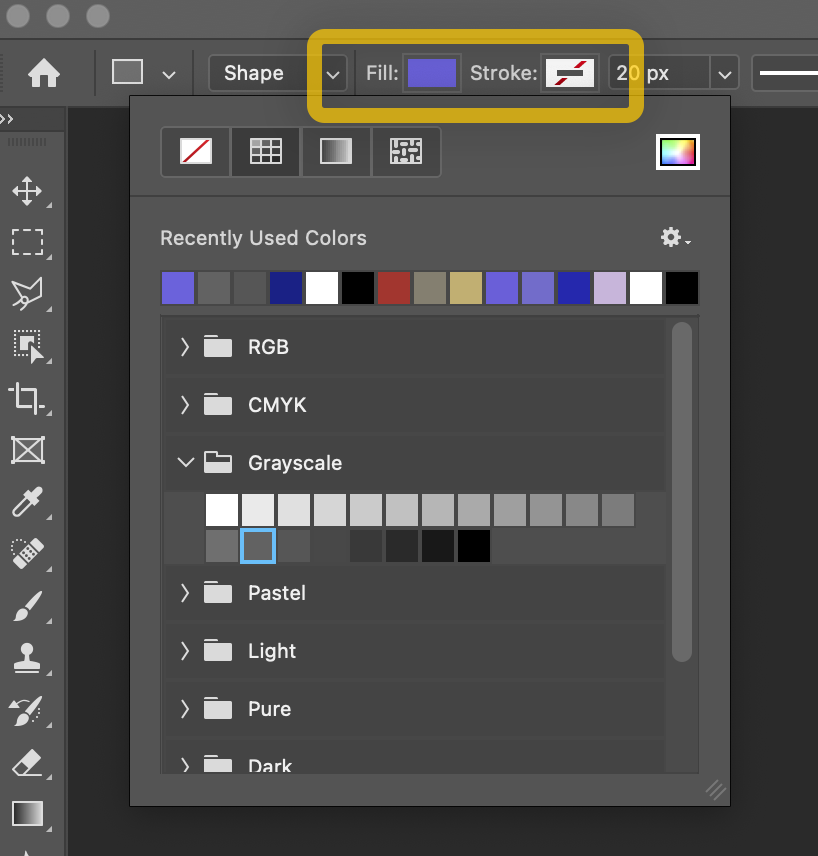
In the toolbar, go to the Rectangle tool. If you don’t see it, you might need to right-click over the existing shape and set it to the rectangle.
Then, at the top, make sure that the default shape has no stroke, and choose a color for your shape. You can choose any color you like, as a photo will replace it once you’ve created your photo grid collage.
Step 04: TitleAdd the first shape template
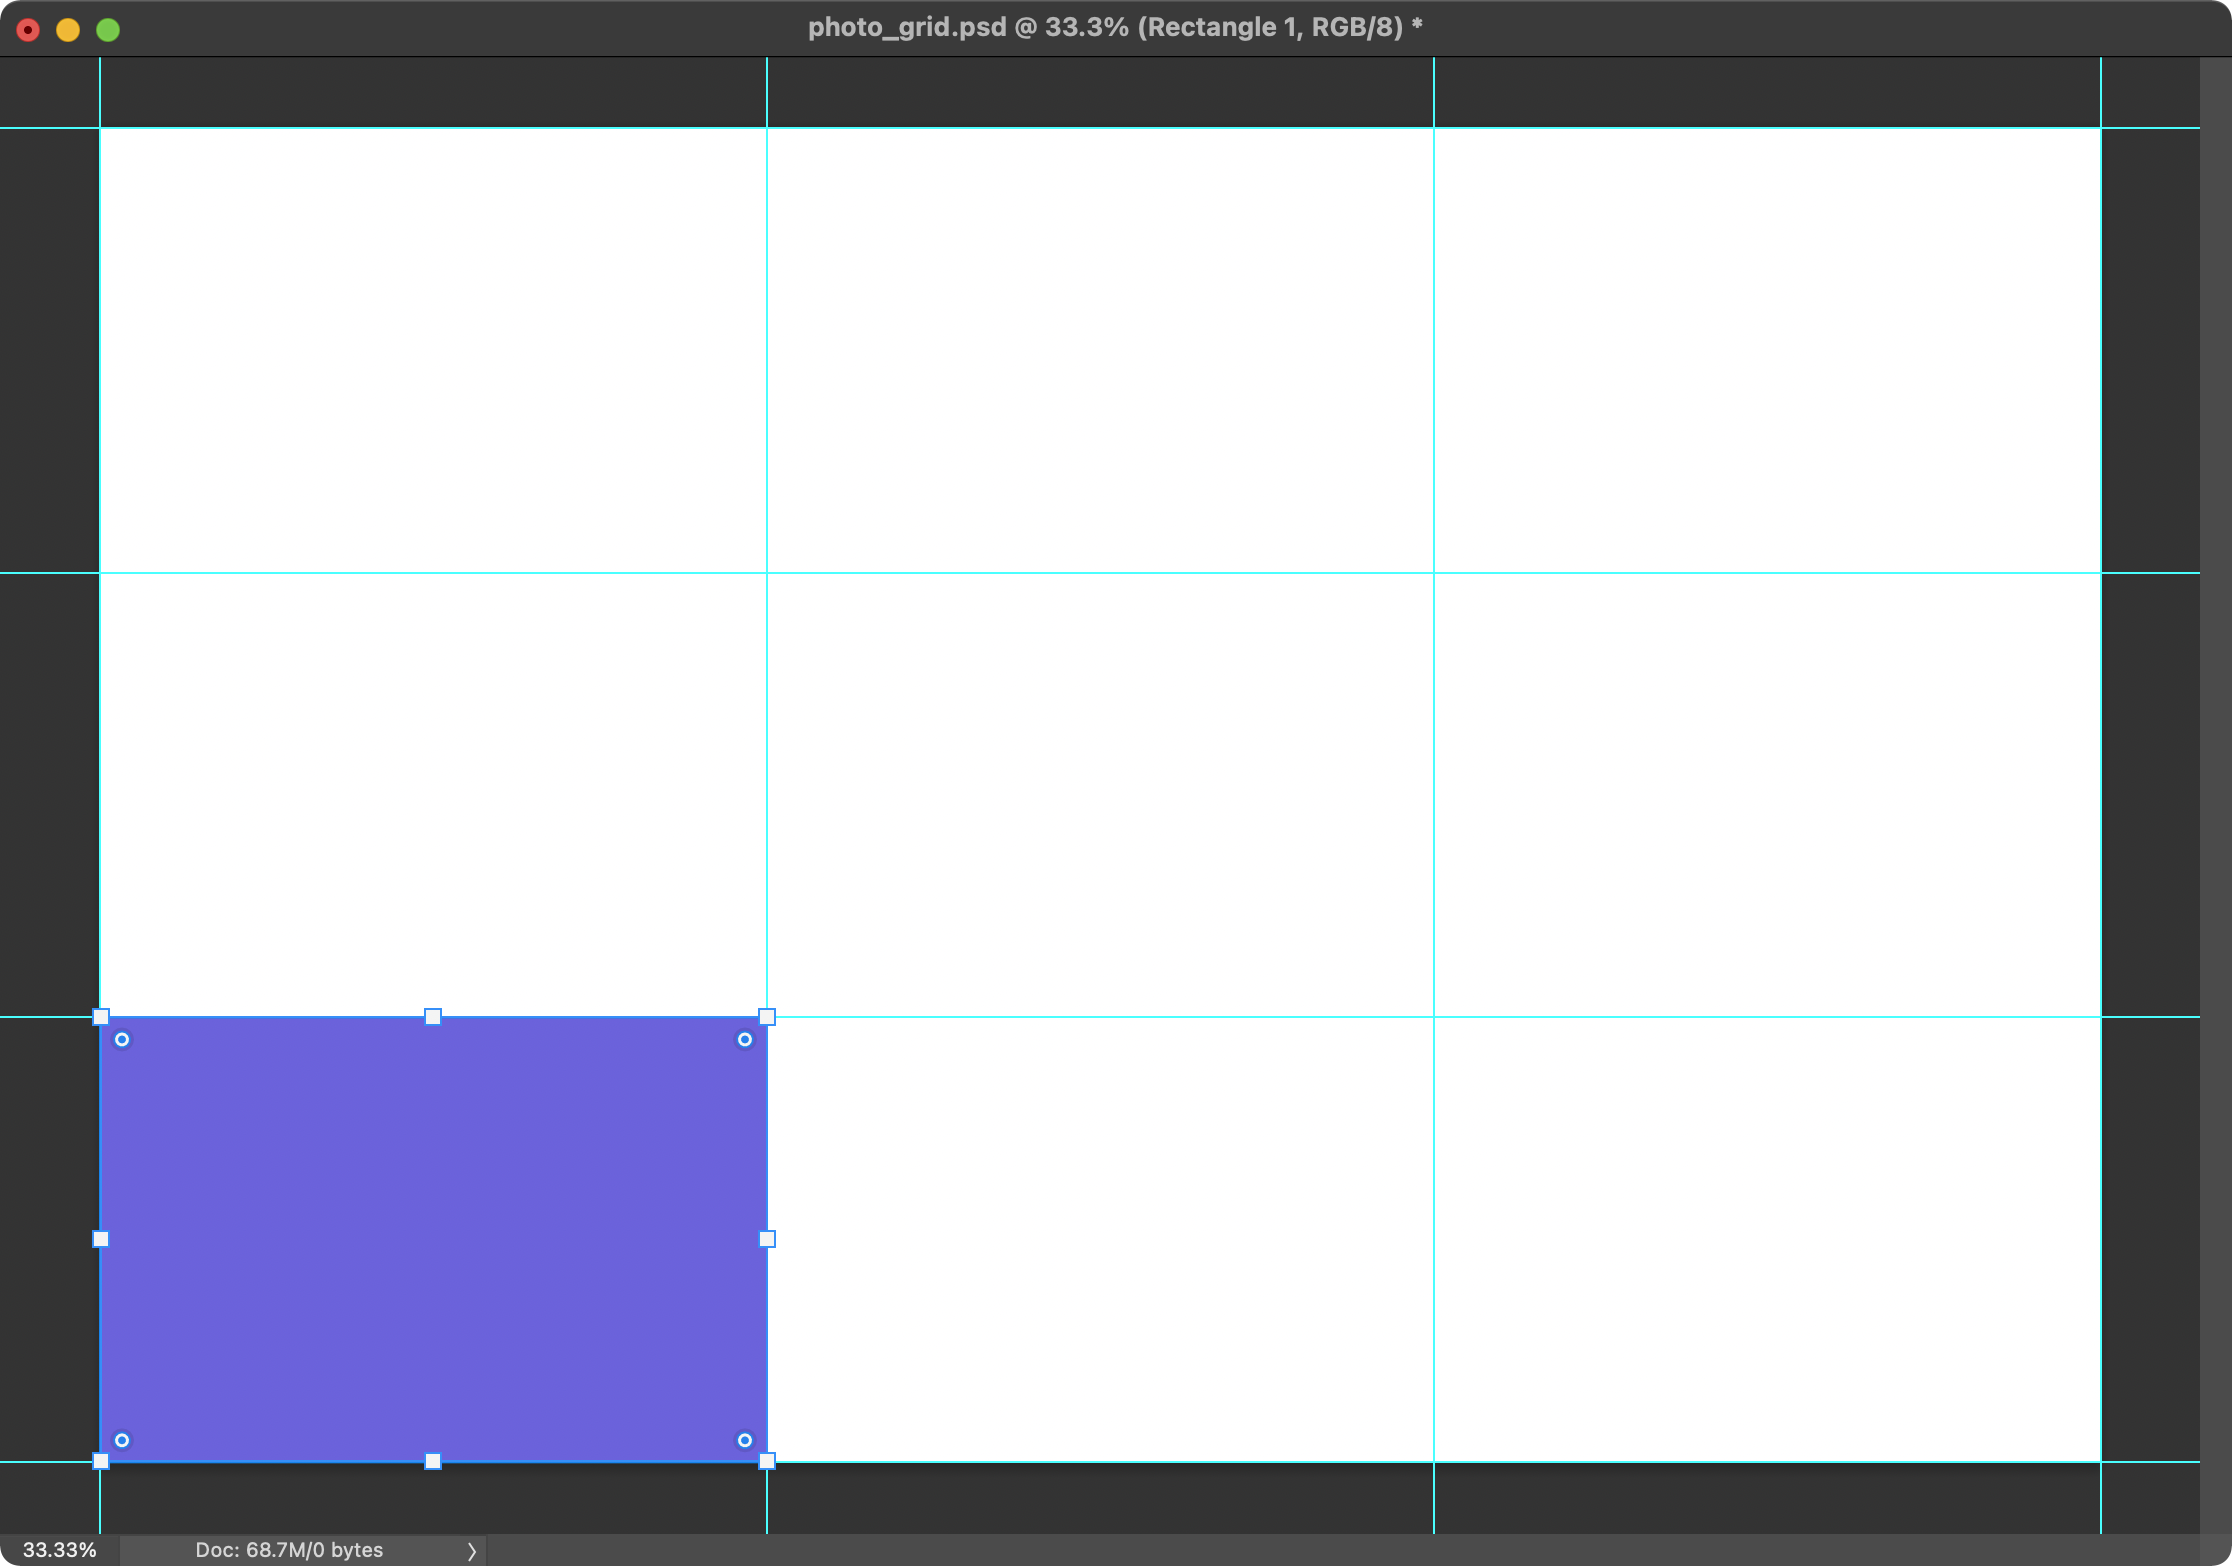
First, make sure that you have the Snap option checked in the menu. You can check this by going to View > Snap, as well as View > Snap to > Guides. This will ensure that your shape is set up against the guides you created in the second step.
Then, using the Rectangle tool, draw a shape, make it fit inside one of the guide boxes, and snap it to the guides in the document.
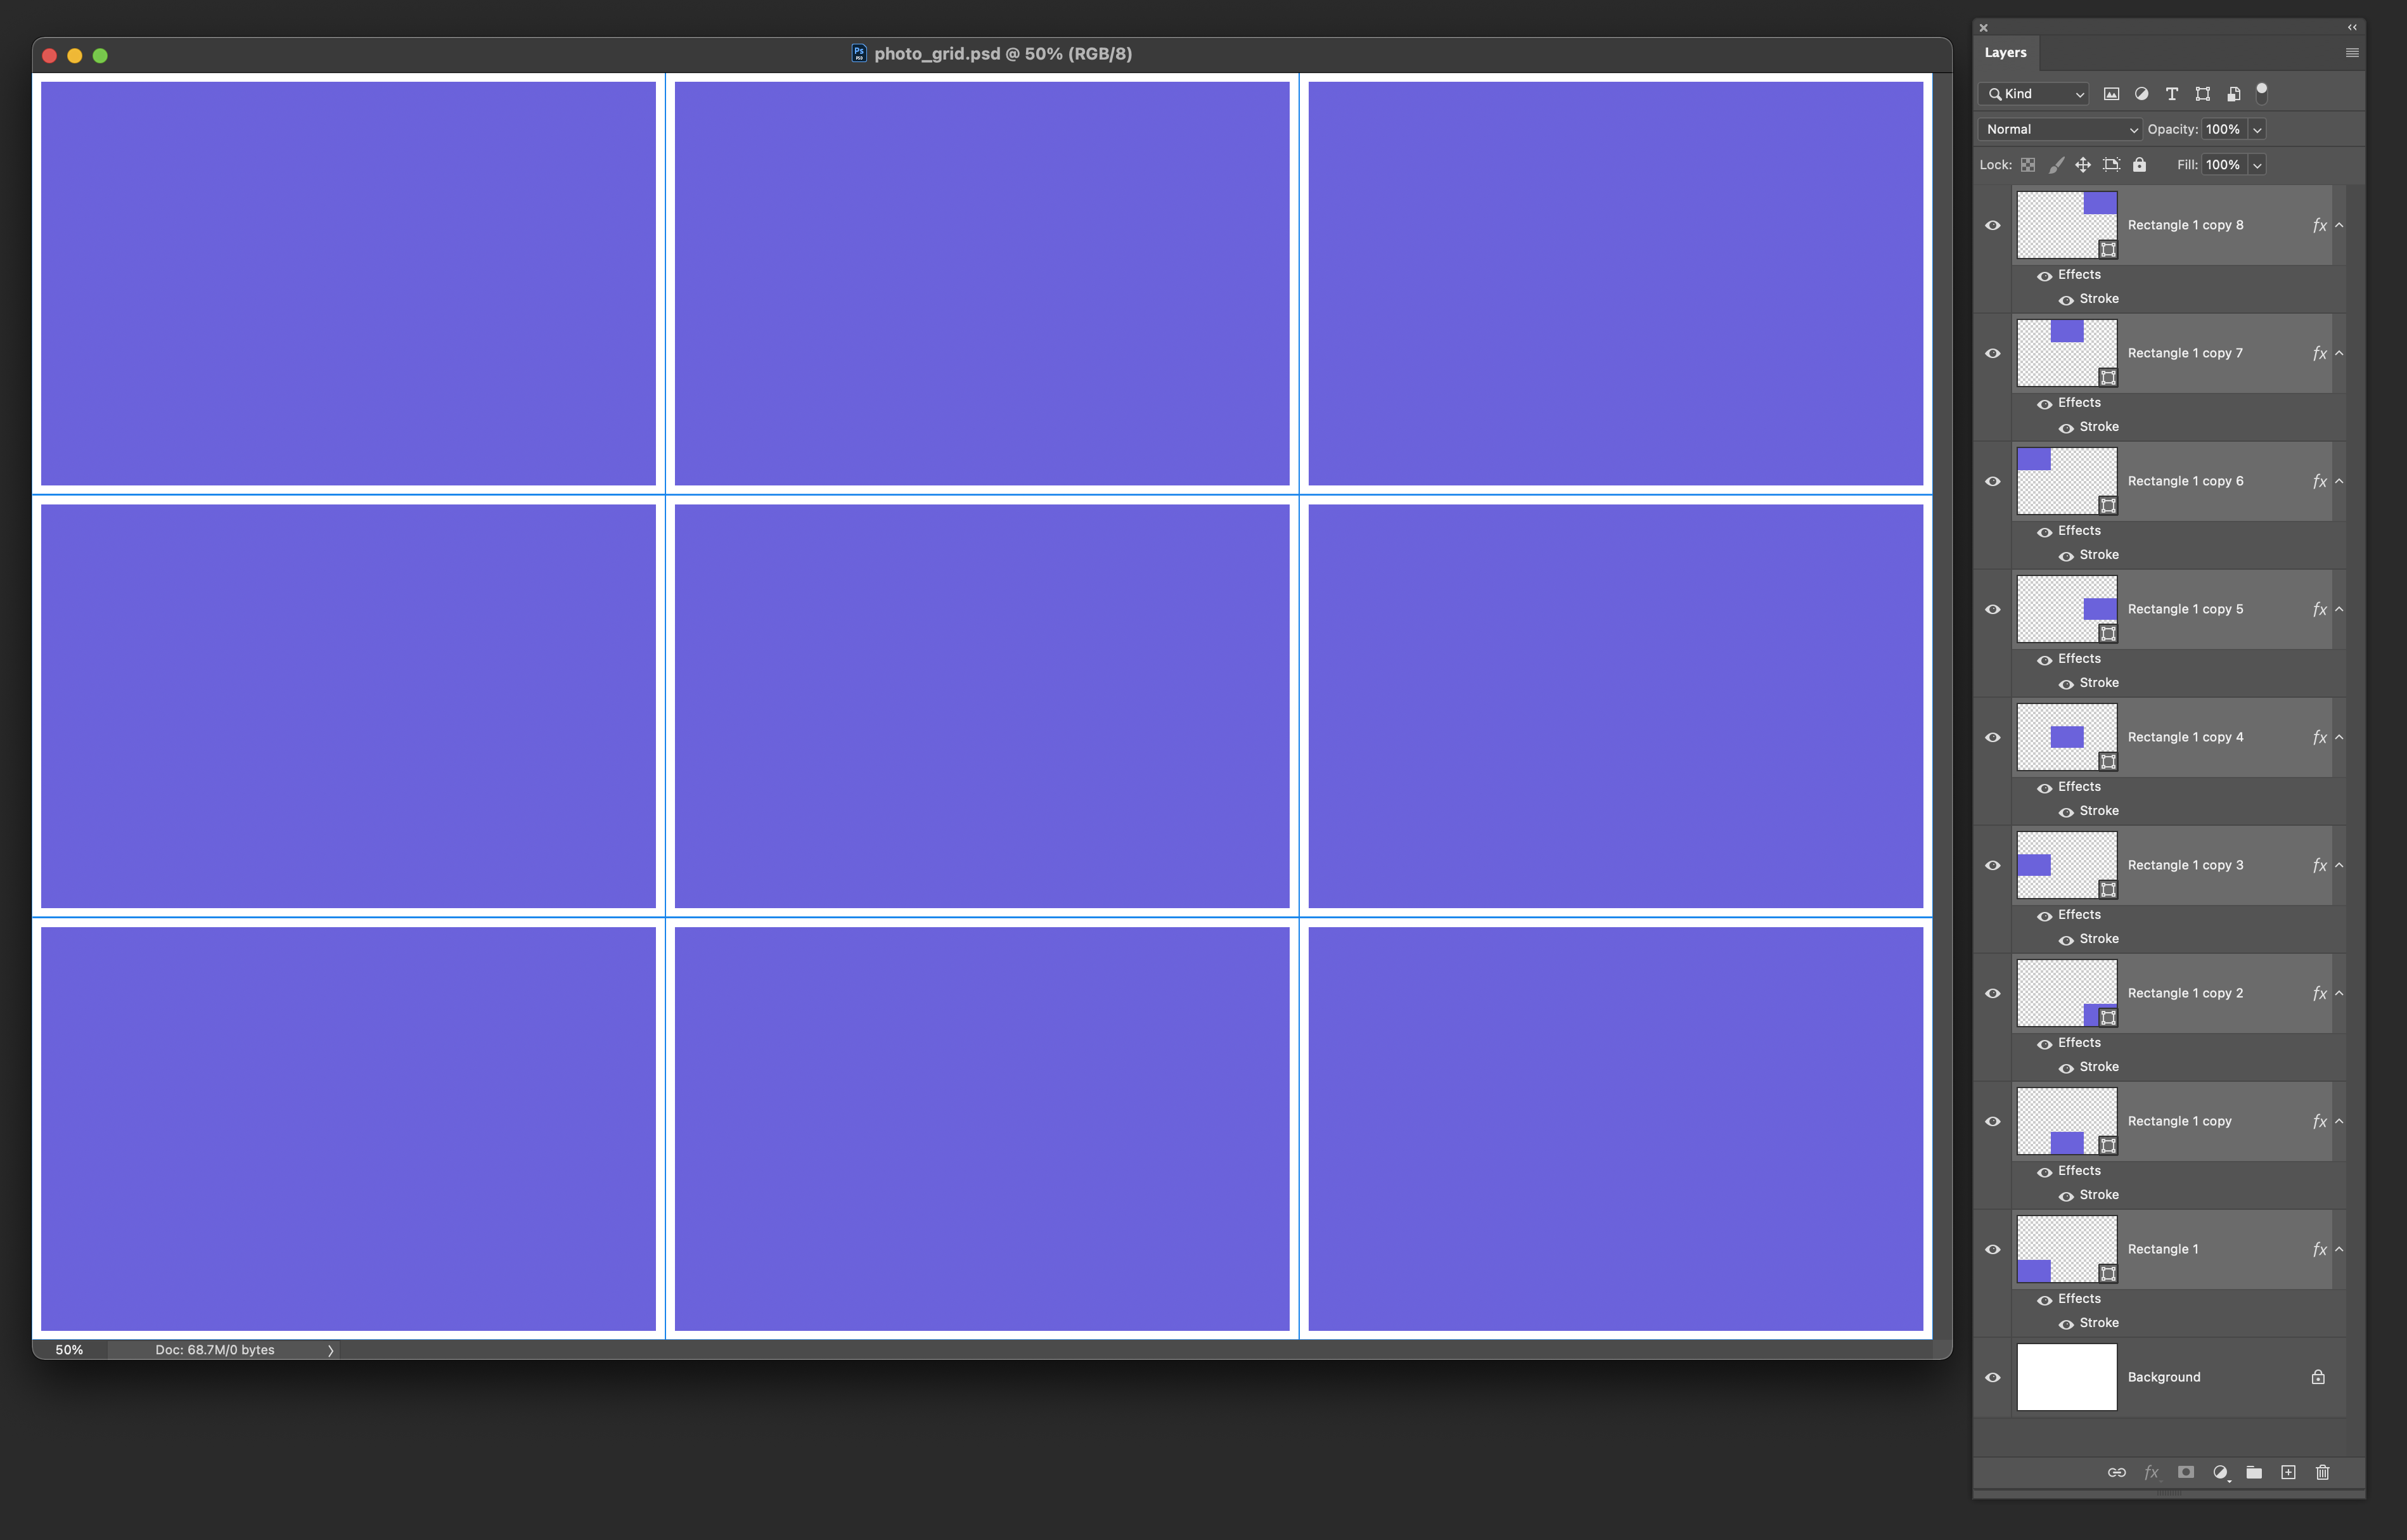
Step 05: Duplicate the shape and fill the other photo grid boxes
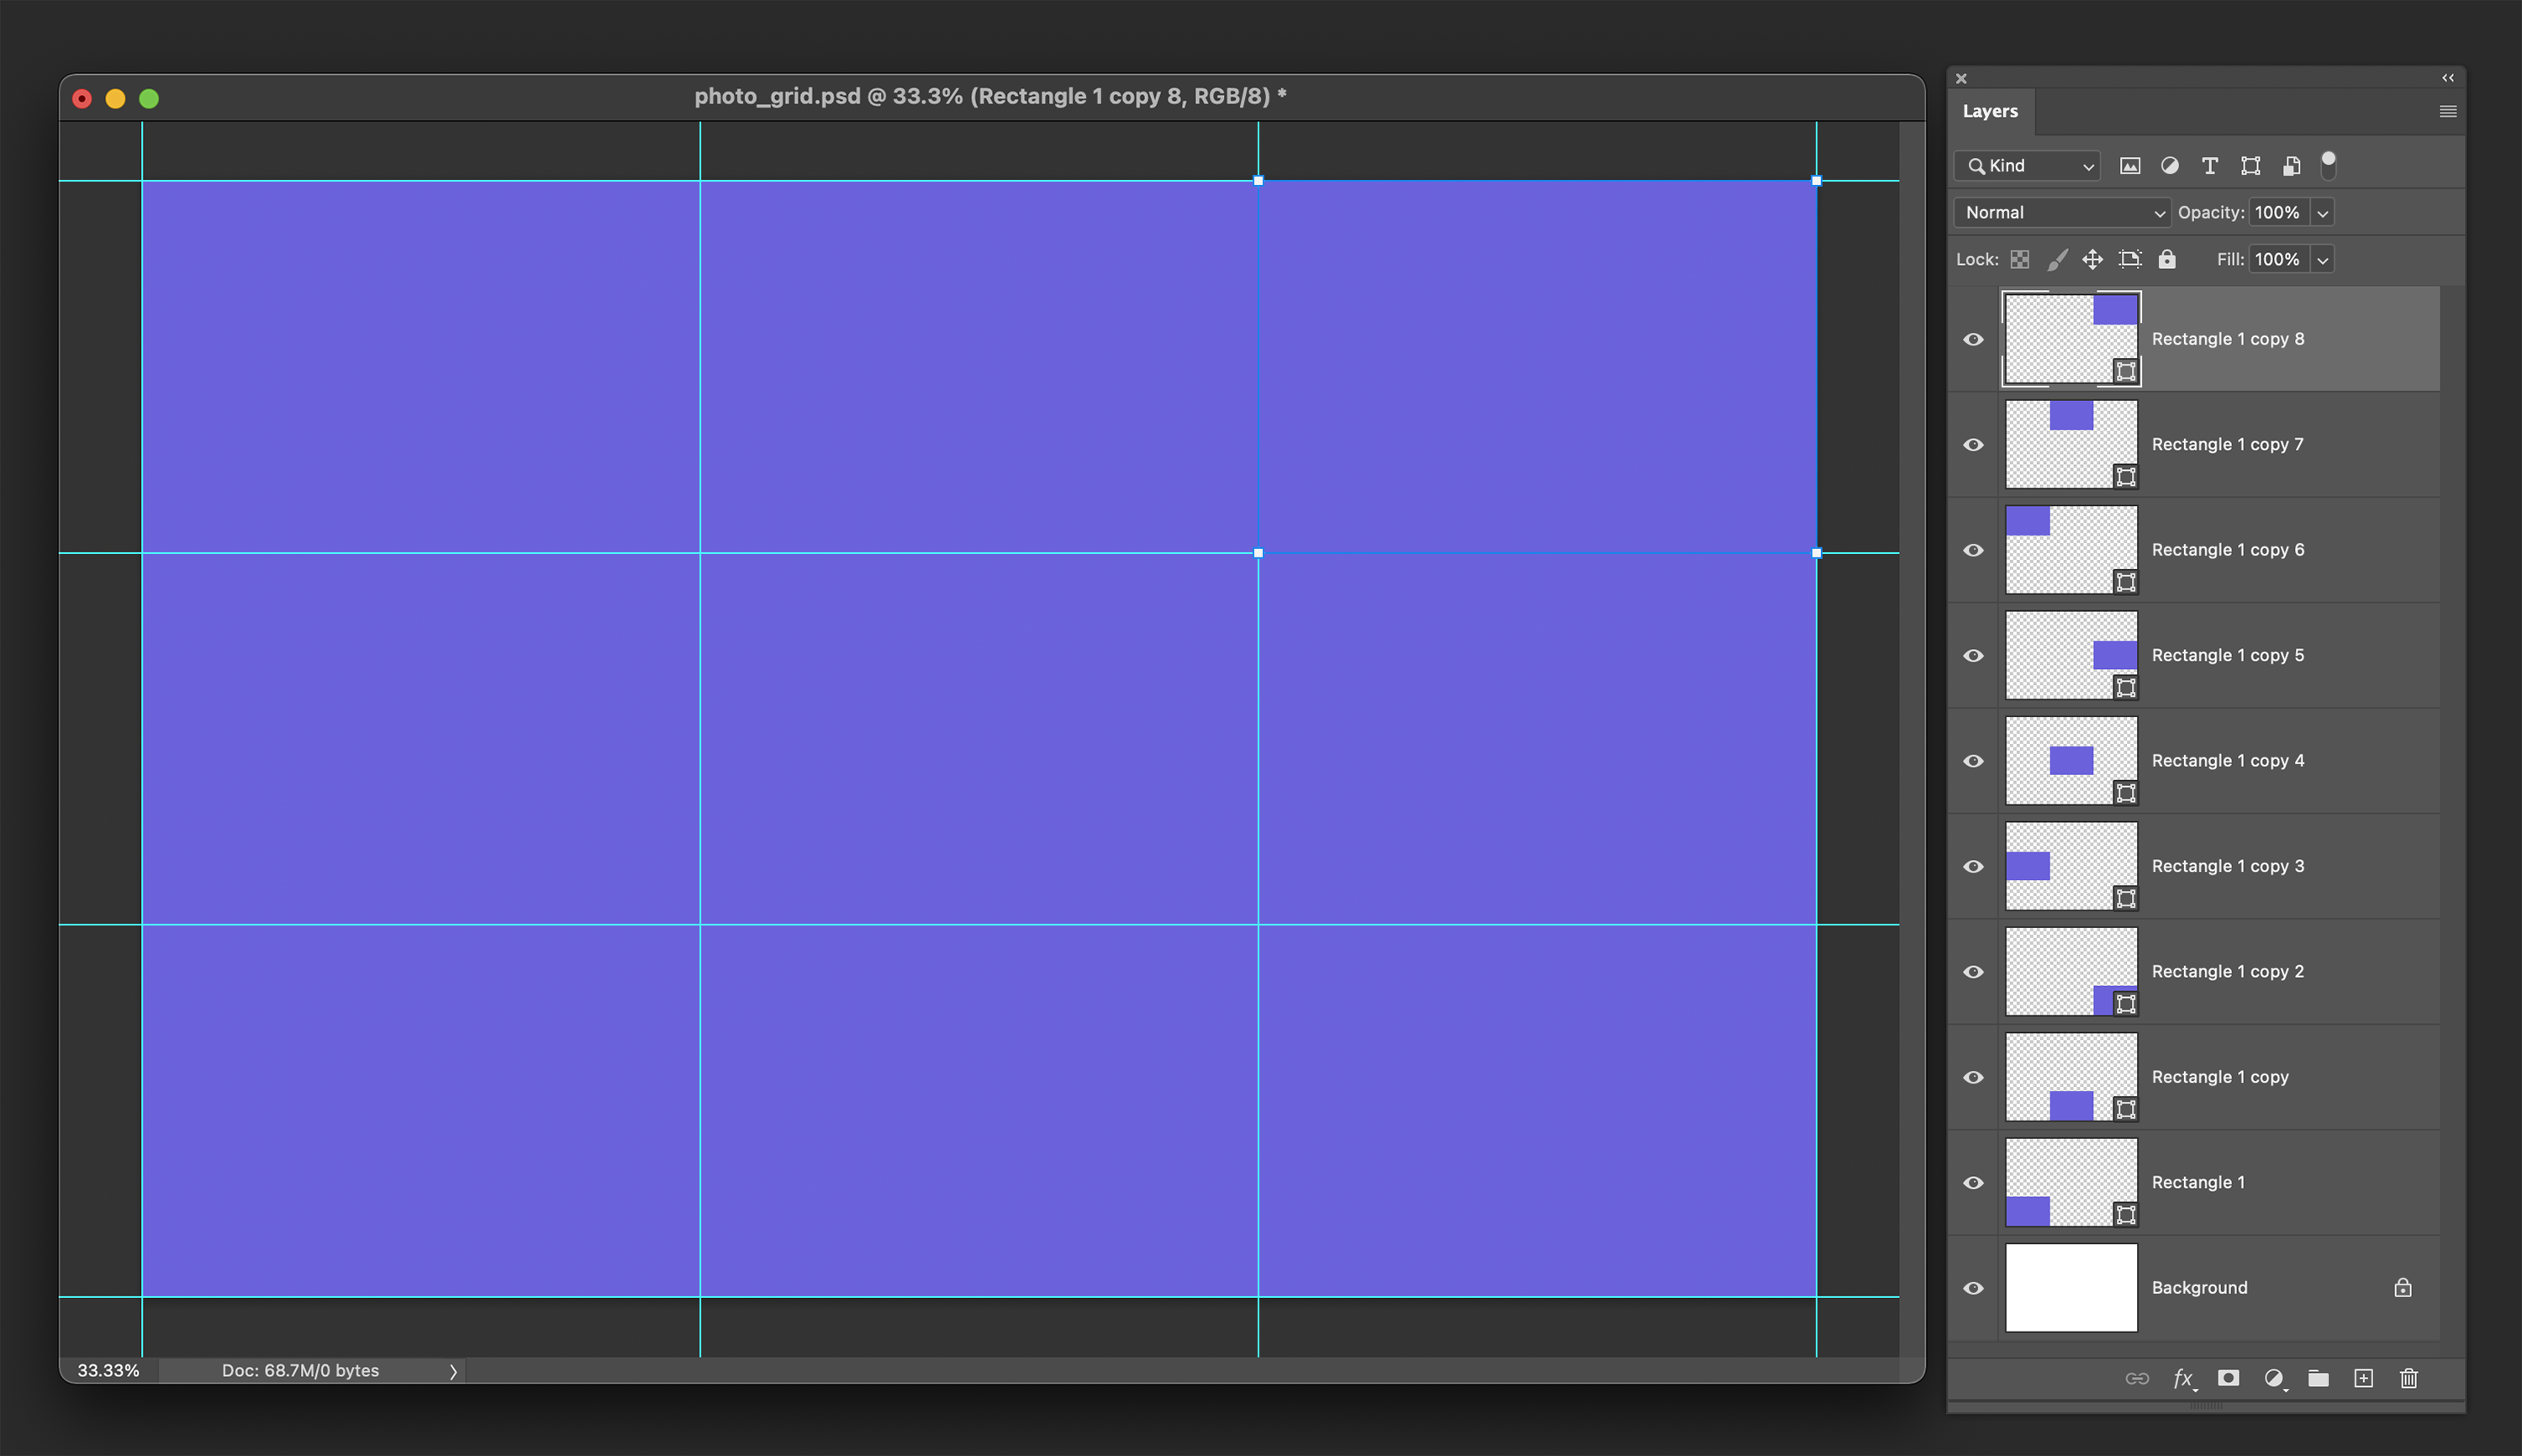
Now that you have your first shape created, it’s time to add rectangles to the other boxes. Instead of drawing the shapes over and over, you can duplicate the layer and drag it to the grid box.
The quickest way to do this is to select the Move tool (keyboard shortcut: V), then press the Opt (Mac) or Alt (Win) key and drag the rectangle shape. This will duplicate and move the shape at the same time. Continue duplicating and moving the shapes until the entire grid is filled.
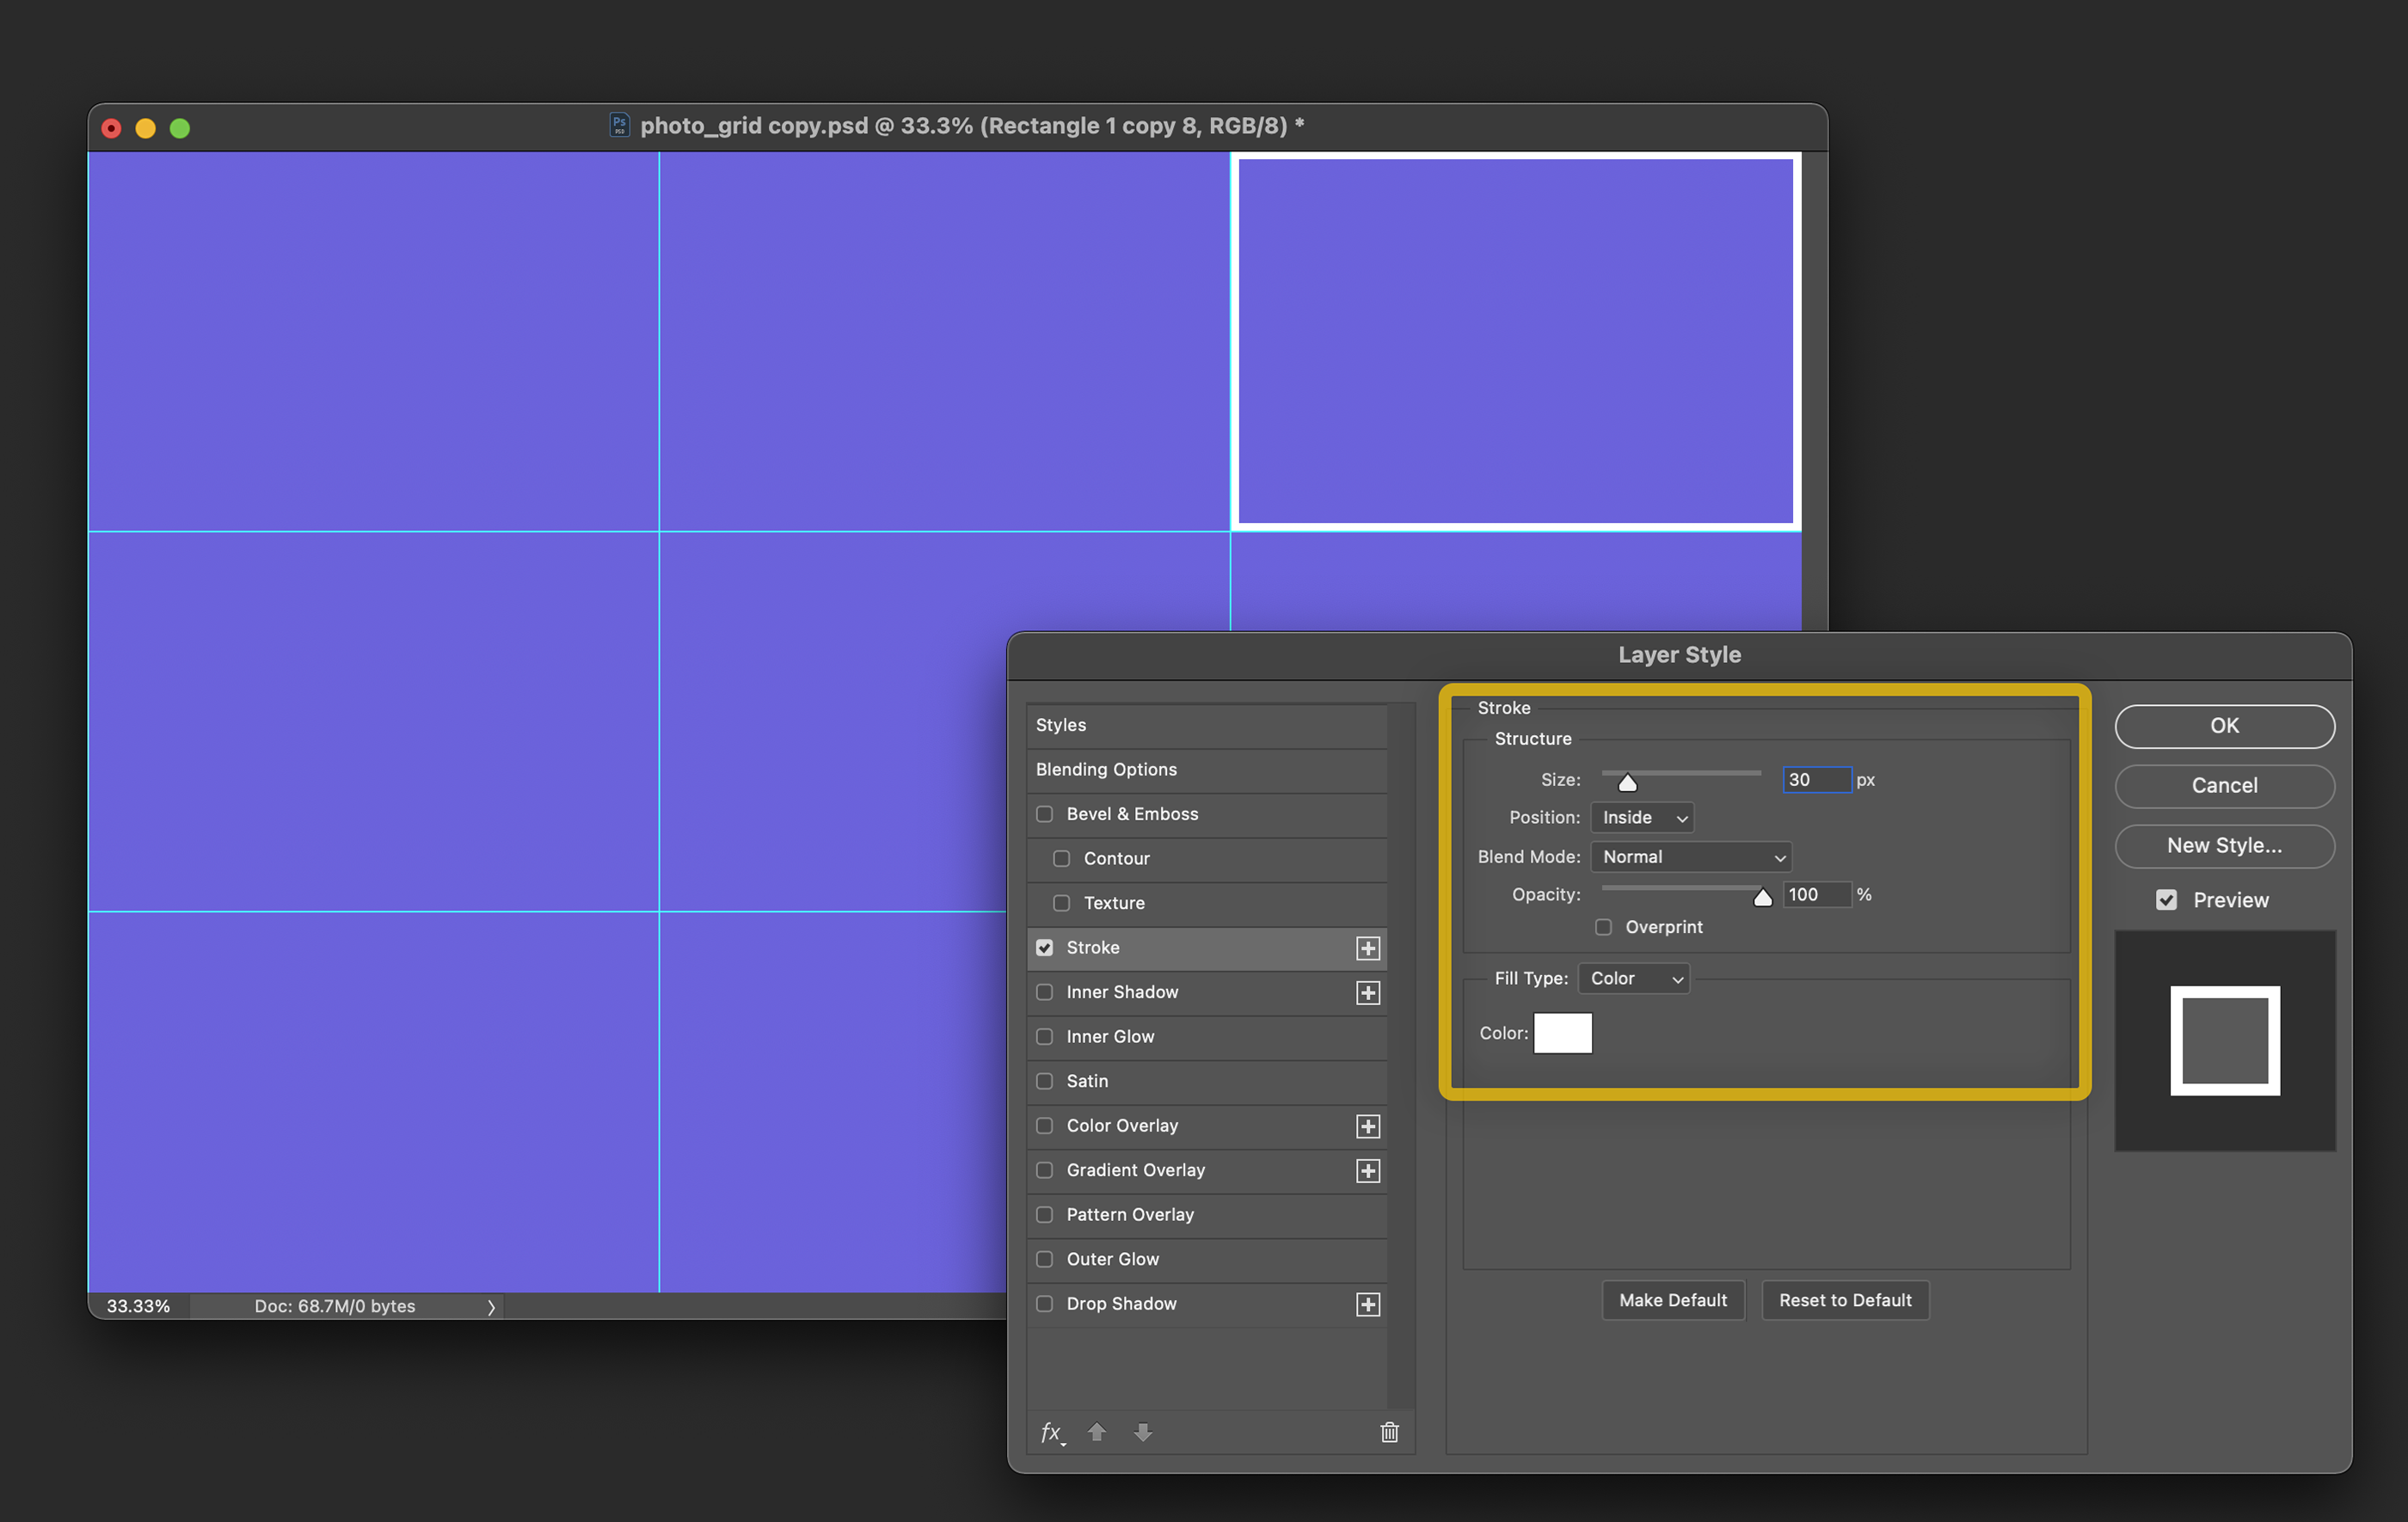
Step 06: Add a border to the shape
If you want to add a border to the outside of your grid photos, you can do that easily with Layer Styles. Select the top layer in the Layers panel, and use the Layer Styles button to add a stroke.
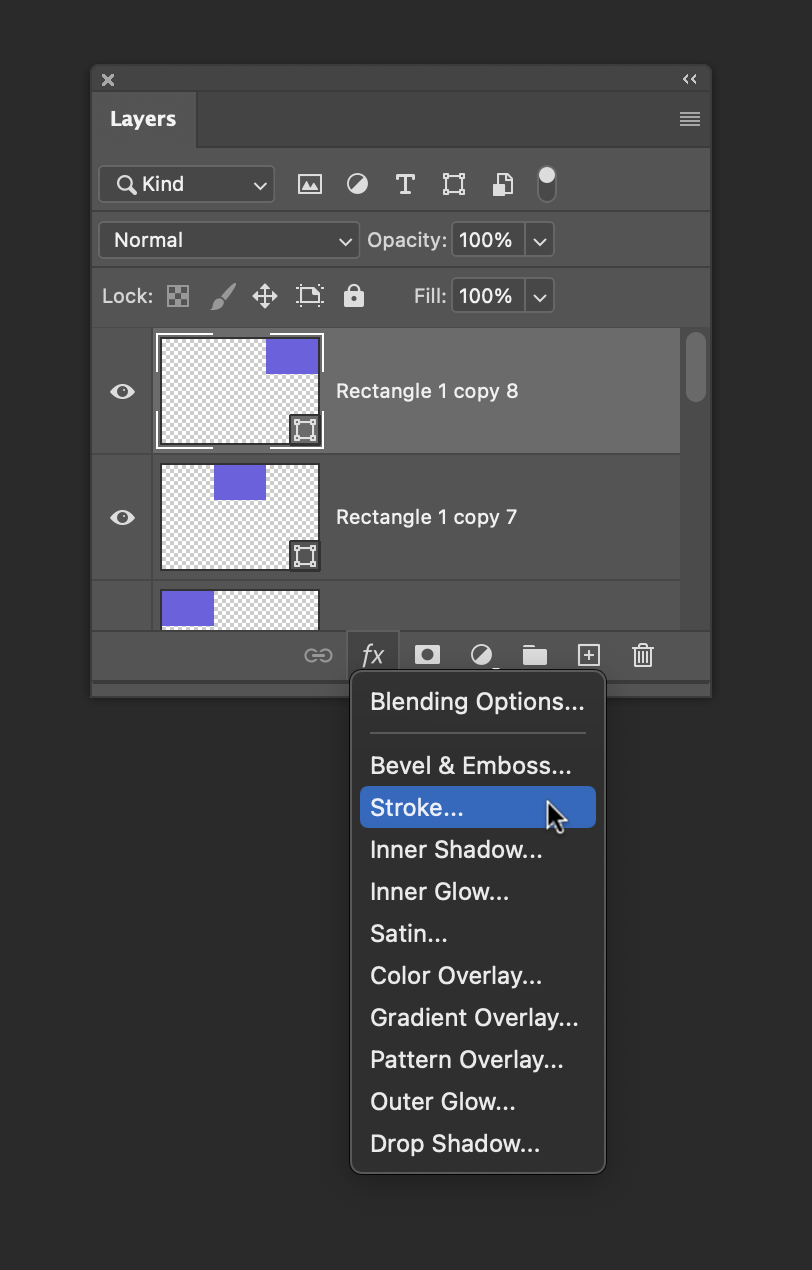
Then, set the Stroke size and color to whatever works for your setup. Here I chose a 30 px white stroke set inside the shape.
Step 07: Copy the Layer Style to the other layers
With the top layer still active, go to Layer > Layer Style > Copy Layer Style. Then, in the Layers panel, press and hold the Shift key. and click the bottom shape layer (this selects all shape layers). Next, go to Layer > Layer Style > Paste Layer Style, and the stroke/border will be applied to all the shape layers.
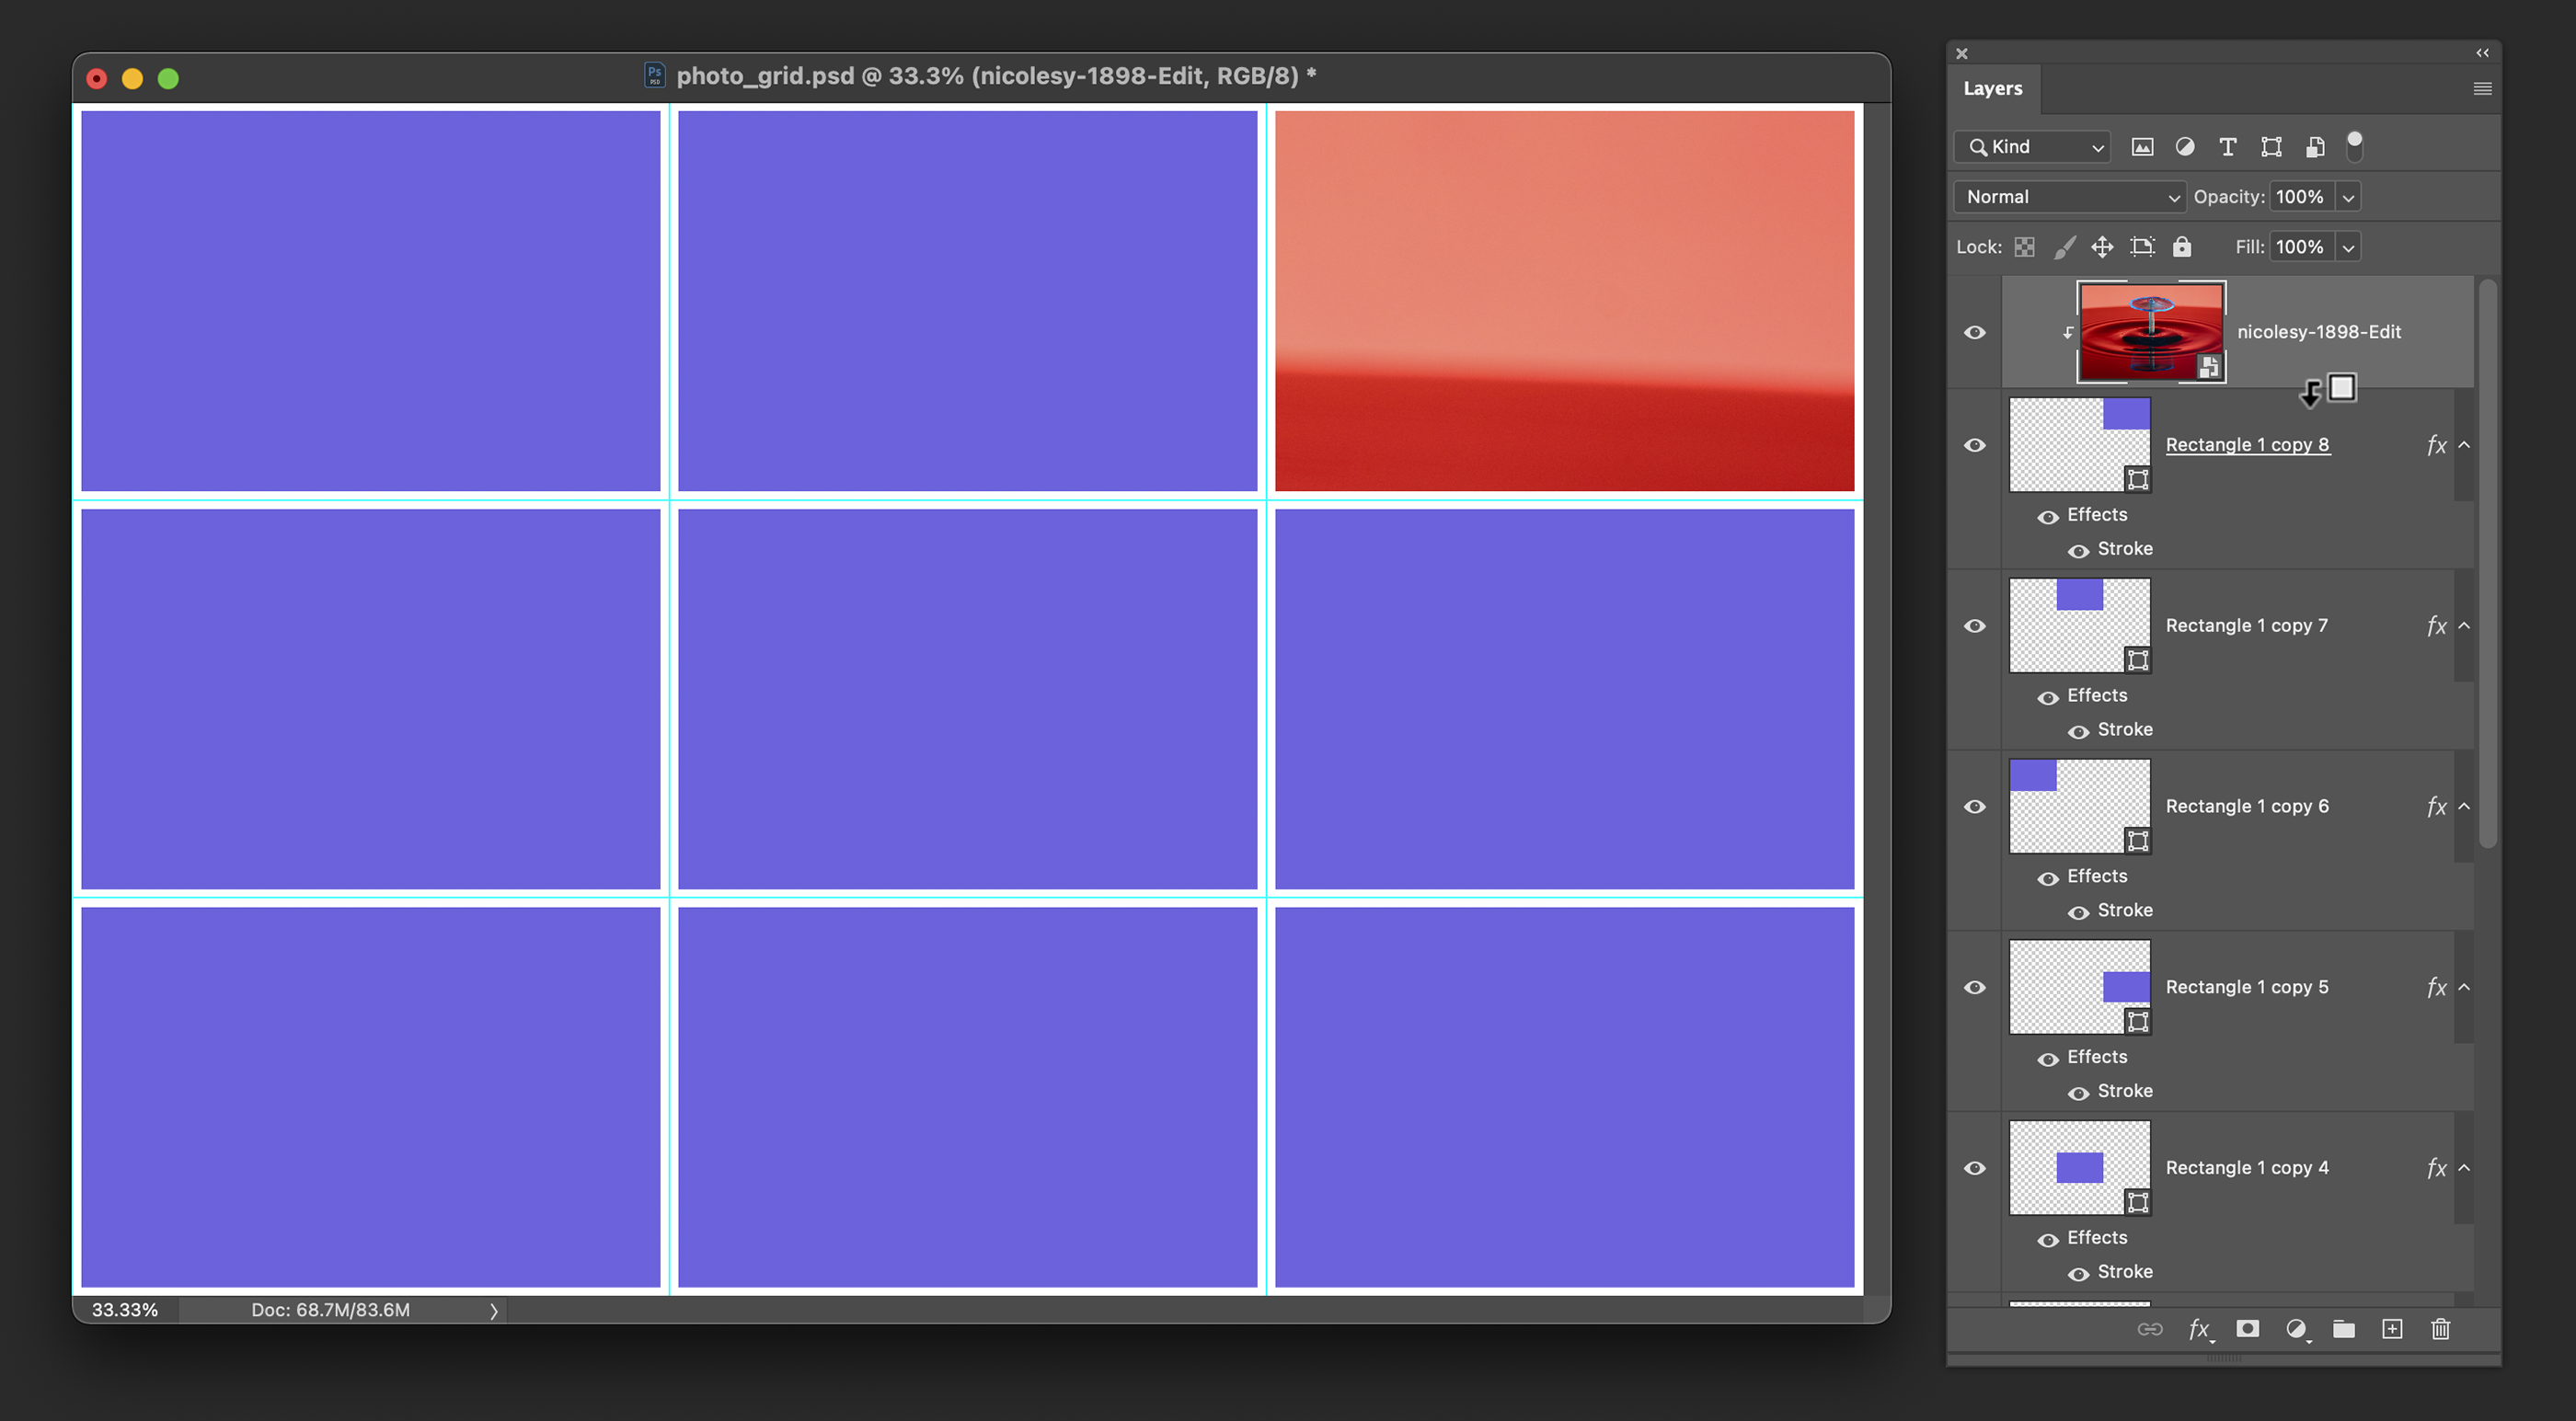
Step 08: Fill the shapes with photos to finish your Photoshop collage
Now it’s time to fill your shapes with your image to create the photo grid! First, you might want to clean up the preview and hide the grid view by going to View > Clear Guides (don’t worry, you can leave it on if you like, and it won’t affect your printed or exported file).
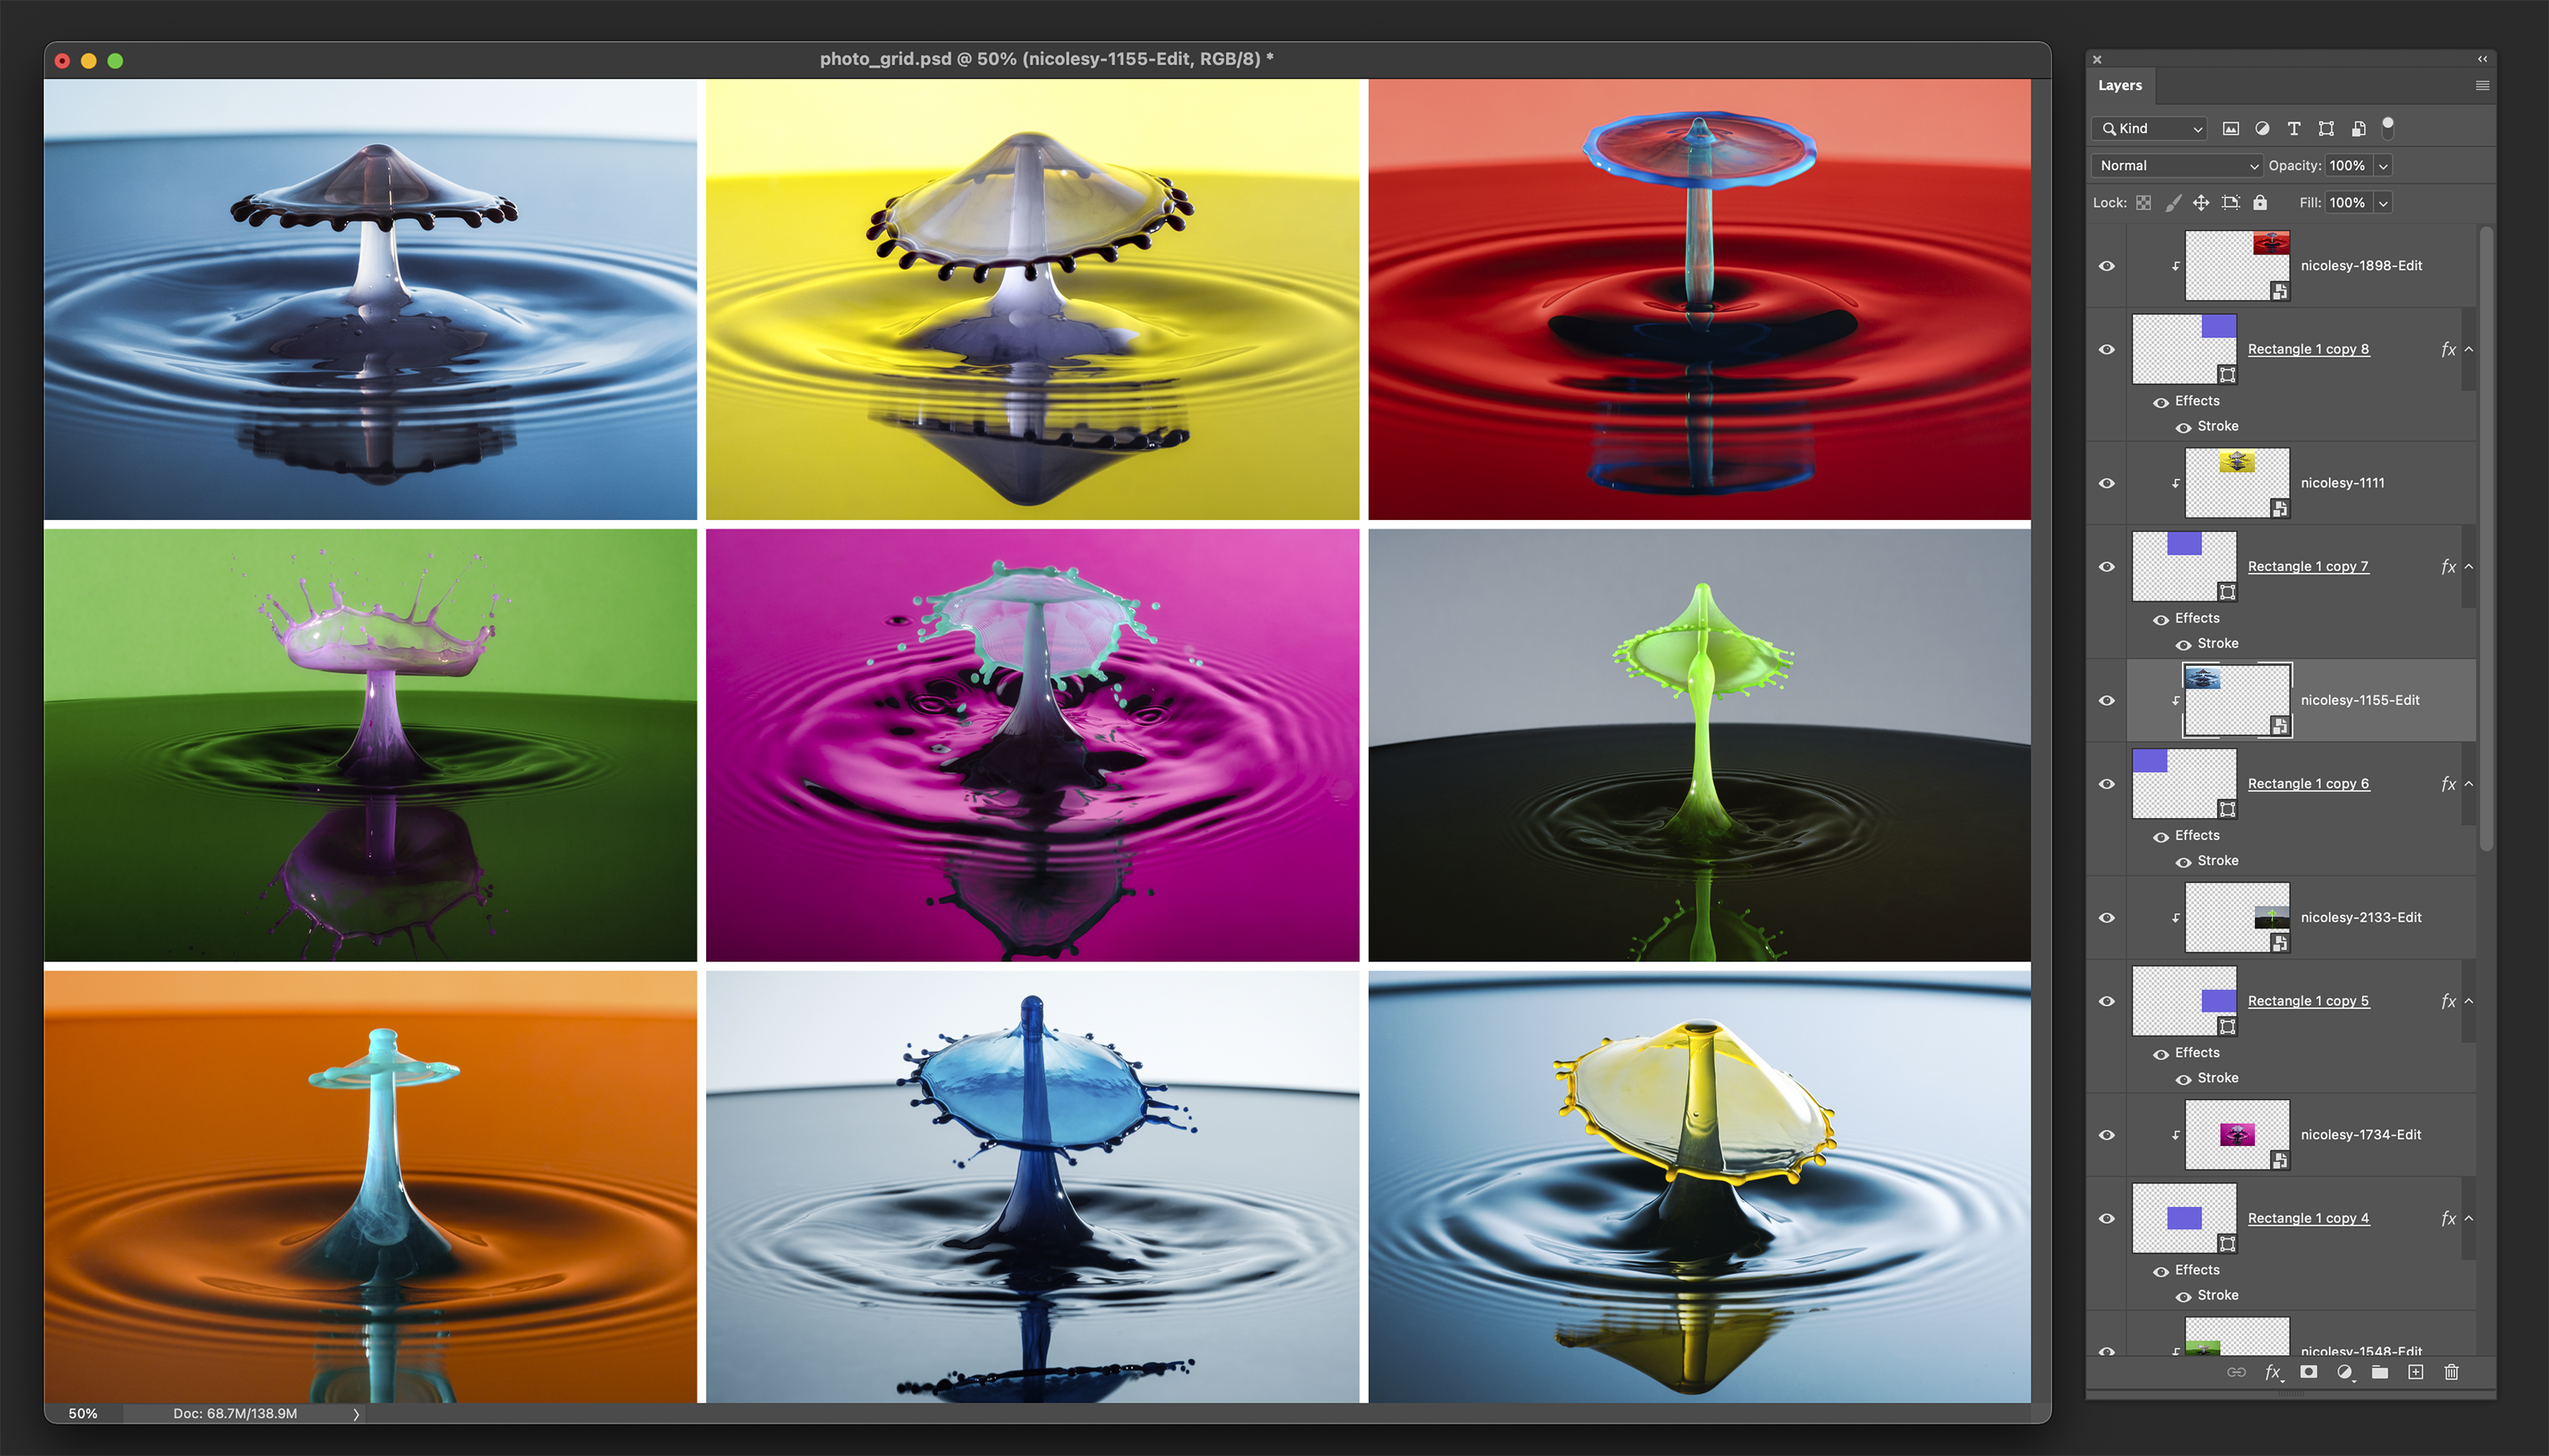
Now, open a folder on your computer with the photos you want to use in your photo grid. Then, select one of the shape layers and drag/drop your photo to the preview window. Press and hold the Opt (Mac) or Alt (Win) key and hover in-between the shape layer and the image (just below the image you just added), and click when you see the icon change. This will create a clipping mask, so the image you added is only visible within the confines of the shape layer. Now you can resize the image layer (select the layer and go to Edit > Free Transform) to fit better within the shape.
Continue adding your images above the shape layers and clip/transform them until your entire photo grid is filled.
If you’ve wanted to create your own photo grid collages, Photoshop is a great tool to use. Using guides, you can quickly set up perfectly-even grid shapes by setting up the number of rows and columns you wish to use. Then, you will use shapes and clipping masks to finish your collage.
Want to learn how to create a custom photo collage in Lightroom? Go here to watch a video tutorial.
How to create a collage in Photoshop
Below is a step-by-step tutorial on creating a custom Photoshop collage.
Step 1: Create a new document
Open Photoshop and go to File > New. Then, choose a document size you’d like to work with. This tutorial will work with all image sizes, so go ahead and pick a size that works for you. Here I created a document with a white background of 6000×4000 pixels in size and 300 PPI.
Step 02: Create a grid using guides
After you create your new document, go to View > New Guide Layout. Then, use the Columns and Rows sections to create your grid, and make sure the Preview box is checked so you can see how it looks. This sets up evenly-spaced guides that make it easy to create the shapes you will use to place your images for your photo grid collage.
Step 03: Set up the Rectangle tool before creating your grid shapes
In the toolbar, go to the Rectangle tool. If you don’t see it, you might need to right-click over the existing shape and set it to the rectangle.
Then, at the top, make sure that the default shape has no stroke, and choose a color for your shape. You can choose any color you like, as a photo will replace it once you’ve created your photo grid collage.
Step 04: TitleAdd the first shape template
First, make sure that you have the Snap option checked in the menu. You can check this by going to View > Snap, as well as View > Snap to > Guides. This will ensure that your shape is set up against the guides you created in the second step.
Then, using the Rectangle tool, draw a shape, make it fit inside one of the guide boxes, and snap it to the guides in the document.
Step 05: Duplicate the shape and fill the other photo grid boxes
Now that you have your first shape created, it’s time to add rectangles to the other boxes. Instead of drawing the shapes over and over, you can duplicate the layer and drag it to the grid box.
The quickest way to do this is to select the Move tool (keyboard shortcut: V), then press the Opt (Mac) or Alt (Win) key and drag the rectangle shape. This will duplicate and move the shape at the same time. Continue duplicating and moving the shapes until the entire grid is filled.
Step 06: Add a border to the shape
If you want to add a border to the outside of your grid photos, you can do that easily with Layer Styles. Select the top layer in the Layers panel, and use the Layer Styles button to add a stroke.
Then, set the Stroke size and color to whatever works for your setup. Here I chose a 30 px white stroke set inside the shape.
Step 07: Copy the Layer Style to the other layers
With the top layer still active, go to Layer > Layer Style > Copy Layer Style. Then, in the Layers panel, press and hold the Shift key. and click the bottom shape layer (this selects all shape layers). Next, go to Layer > Layer Style > Paste Layer Style, and the stroke/border will be applied to all the shape layers.
Step 08: Fill the shapes with photos to finish your Photoshop collage
Now it’s time to fill your shapes with your image to create the photo grid! First, you might want to clean up the preview and hide the grid view by going to View > Clear Guides (don’t worry, you can leave it on if you like, and it won’t affect your printed or exported file).
Now, open a folder on your computer with the photos you want to use in your photo grid. Then, select one of the shape layers and drag/drop your photo to the preview window. Press and hold the Opt (Mac) or Alt (Win) key and hover in-between the shape layer and the image (just below the image you just added), and click when you see the icon change. This will create a clipping mask, so the image you added is only visible within the confines of the shape layer. Now you can resize the image layer (select the layer and go to Edit > Free Transform) to fit better within the shape.
Continue adding your images above the shape layers and clip/transform them until your entire photo grid is filled.

Nicole is a photographer, published author, and educator specializing in Lightroom, Photoshop, and photography. She is best known for her books on food photography but is widely versed in various photographic genres, including landscape, nature, stock, travel, and experimental imagery.


I really appreciate how clearly you explain things!
You’re welcome, Scott, and I’m glad you enjoyed the tutorial!
thank you, very helpful
Very clear. Thanks.
So clear, Nicole. Not something I use but you make it tempting for me to try. Thanks for clear pictures and simple explanations. It is helpful to know the possibilities and realize I don’t have to put all the steps to memory as long as your instructions are near.
I recommend you preview using Adobe Creative Express.
Великолепно, Поразительно, Замечательно!
Great information that I didn’t know. I’ll have to give it a try. Thanks! ????
Hi
I visited your site. Very nice & helpful share your knowledge for photography. Nice shar tutorial step by step. I like.
Let me just say….. this tutorial is AMAZING! Thank you for the step by step.
I took a bunch of photos of the eclipse on April 8, and I used this precis to create a collage. Thanks.