
Learn how to merge panorama photos in three steps using Lightroom. (This tutorial shows the technique using Lightroom Classic, but the process is nearly identical in Lightroom CC). But before creating a merged panorama, you must have the image frames. Below are a few tips on creating panorama images with the camera.
Tips on photographing for a successful panorama merge in Lightroom:
- Photograph images vertically: When creating a horizontal panorama, you’ll get a lot more photography “real estate” by creating each frame vertically.
- Overlap each frame by at least 20%: To ensure you get a good merge, overlap each frame by at least 20% (I usually overlap by much more, resulting in more frames per panoramic scene).
- Use a tripod: It’s best to use a tripod to help ensure that the camera remains level and steady and to make it easier to overlap each frame.
- Level your camera or tripod: If you have a small bubble level on your tripod or camera, use it! Then, do a quick run-through of your camera movement to ensure the camera stays level across the horizon for each frame. You don’t want to end up with a crooked panorama!
- Keep your exposure consistent: Use manual exposure for each frame to be consistent across your panorama.
How to merge panoramas in Lightroom
Here is a step-by-step tutorial on how to merge panoramas in Lightroom Classic and Lightroom Mobile (CC). If you want to watch the video to see this process in-depth, please click here to view it on YouTube.
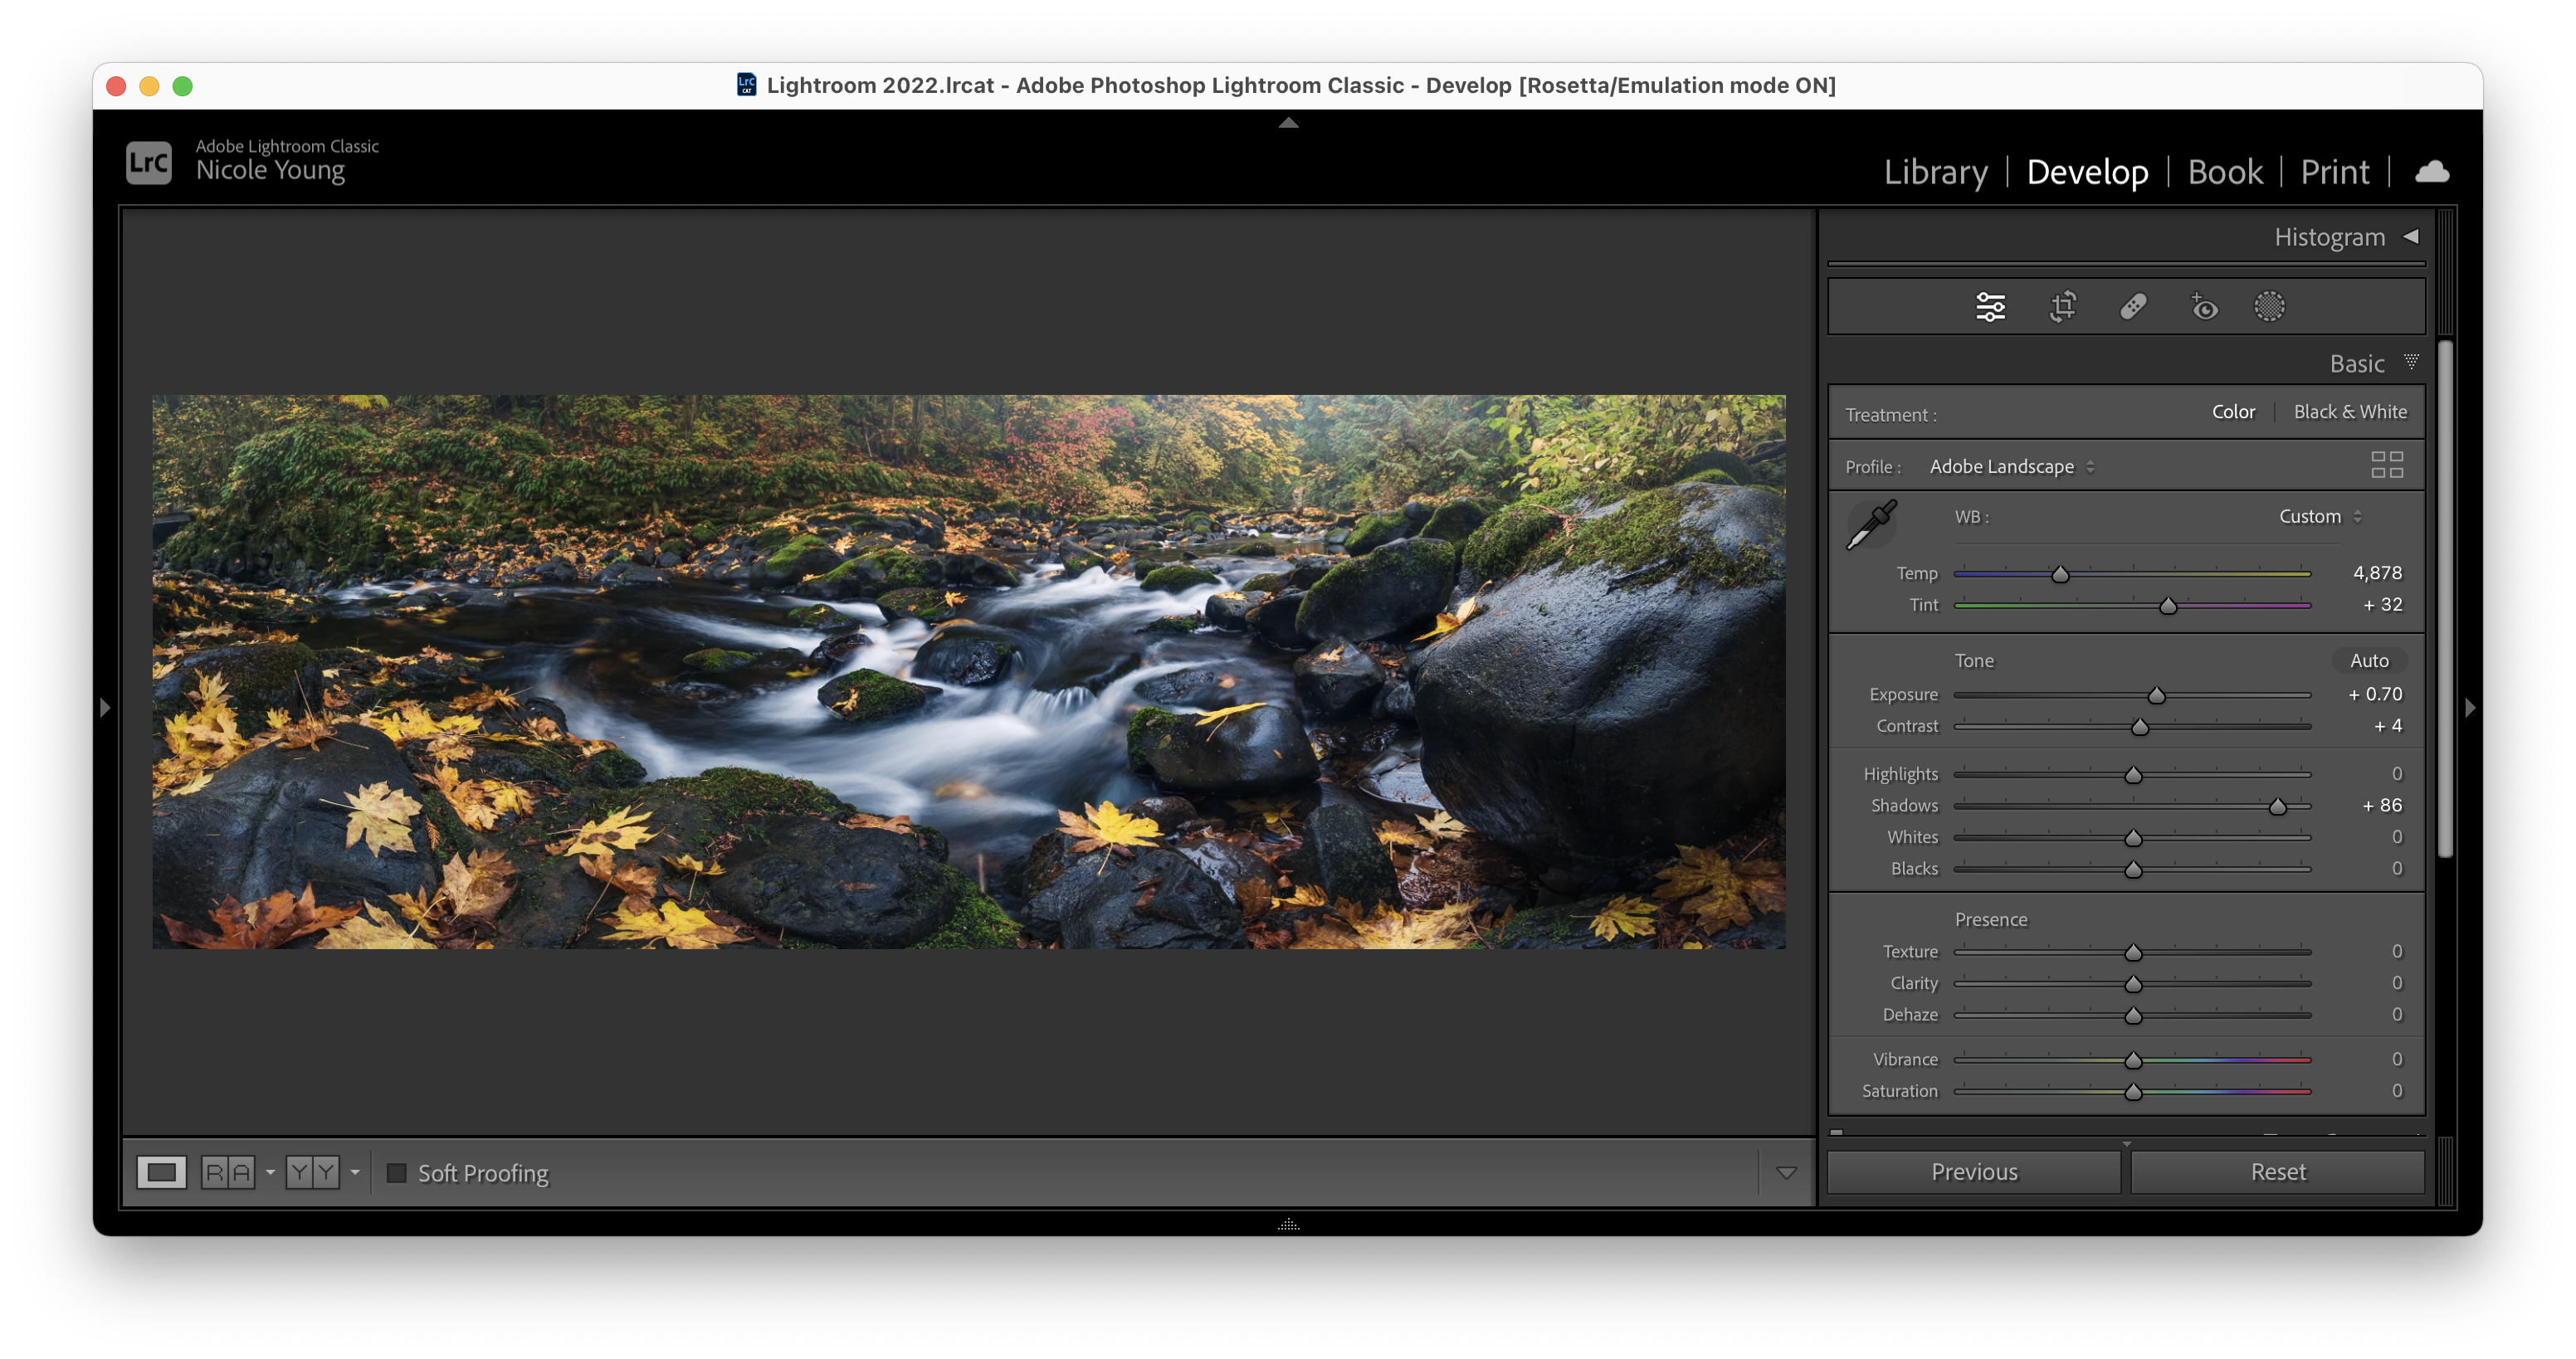
Step 1: Edit the photos with Auto Sync
Select the images you want to merge and open them into the Develop module. All these images should be highlighted if the filmstrip is visible at the bottom. You can also click on one of the images (with all other images still selected) to choose a reference image while making adjustments.
On the right, make sure that the Auto Sync button is toggled. Then, make the edits you would like to your image, and all selected photos will be synced and updated with the same adjustments.
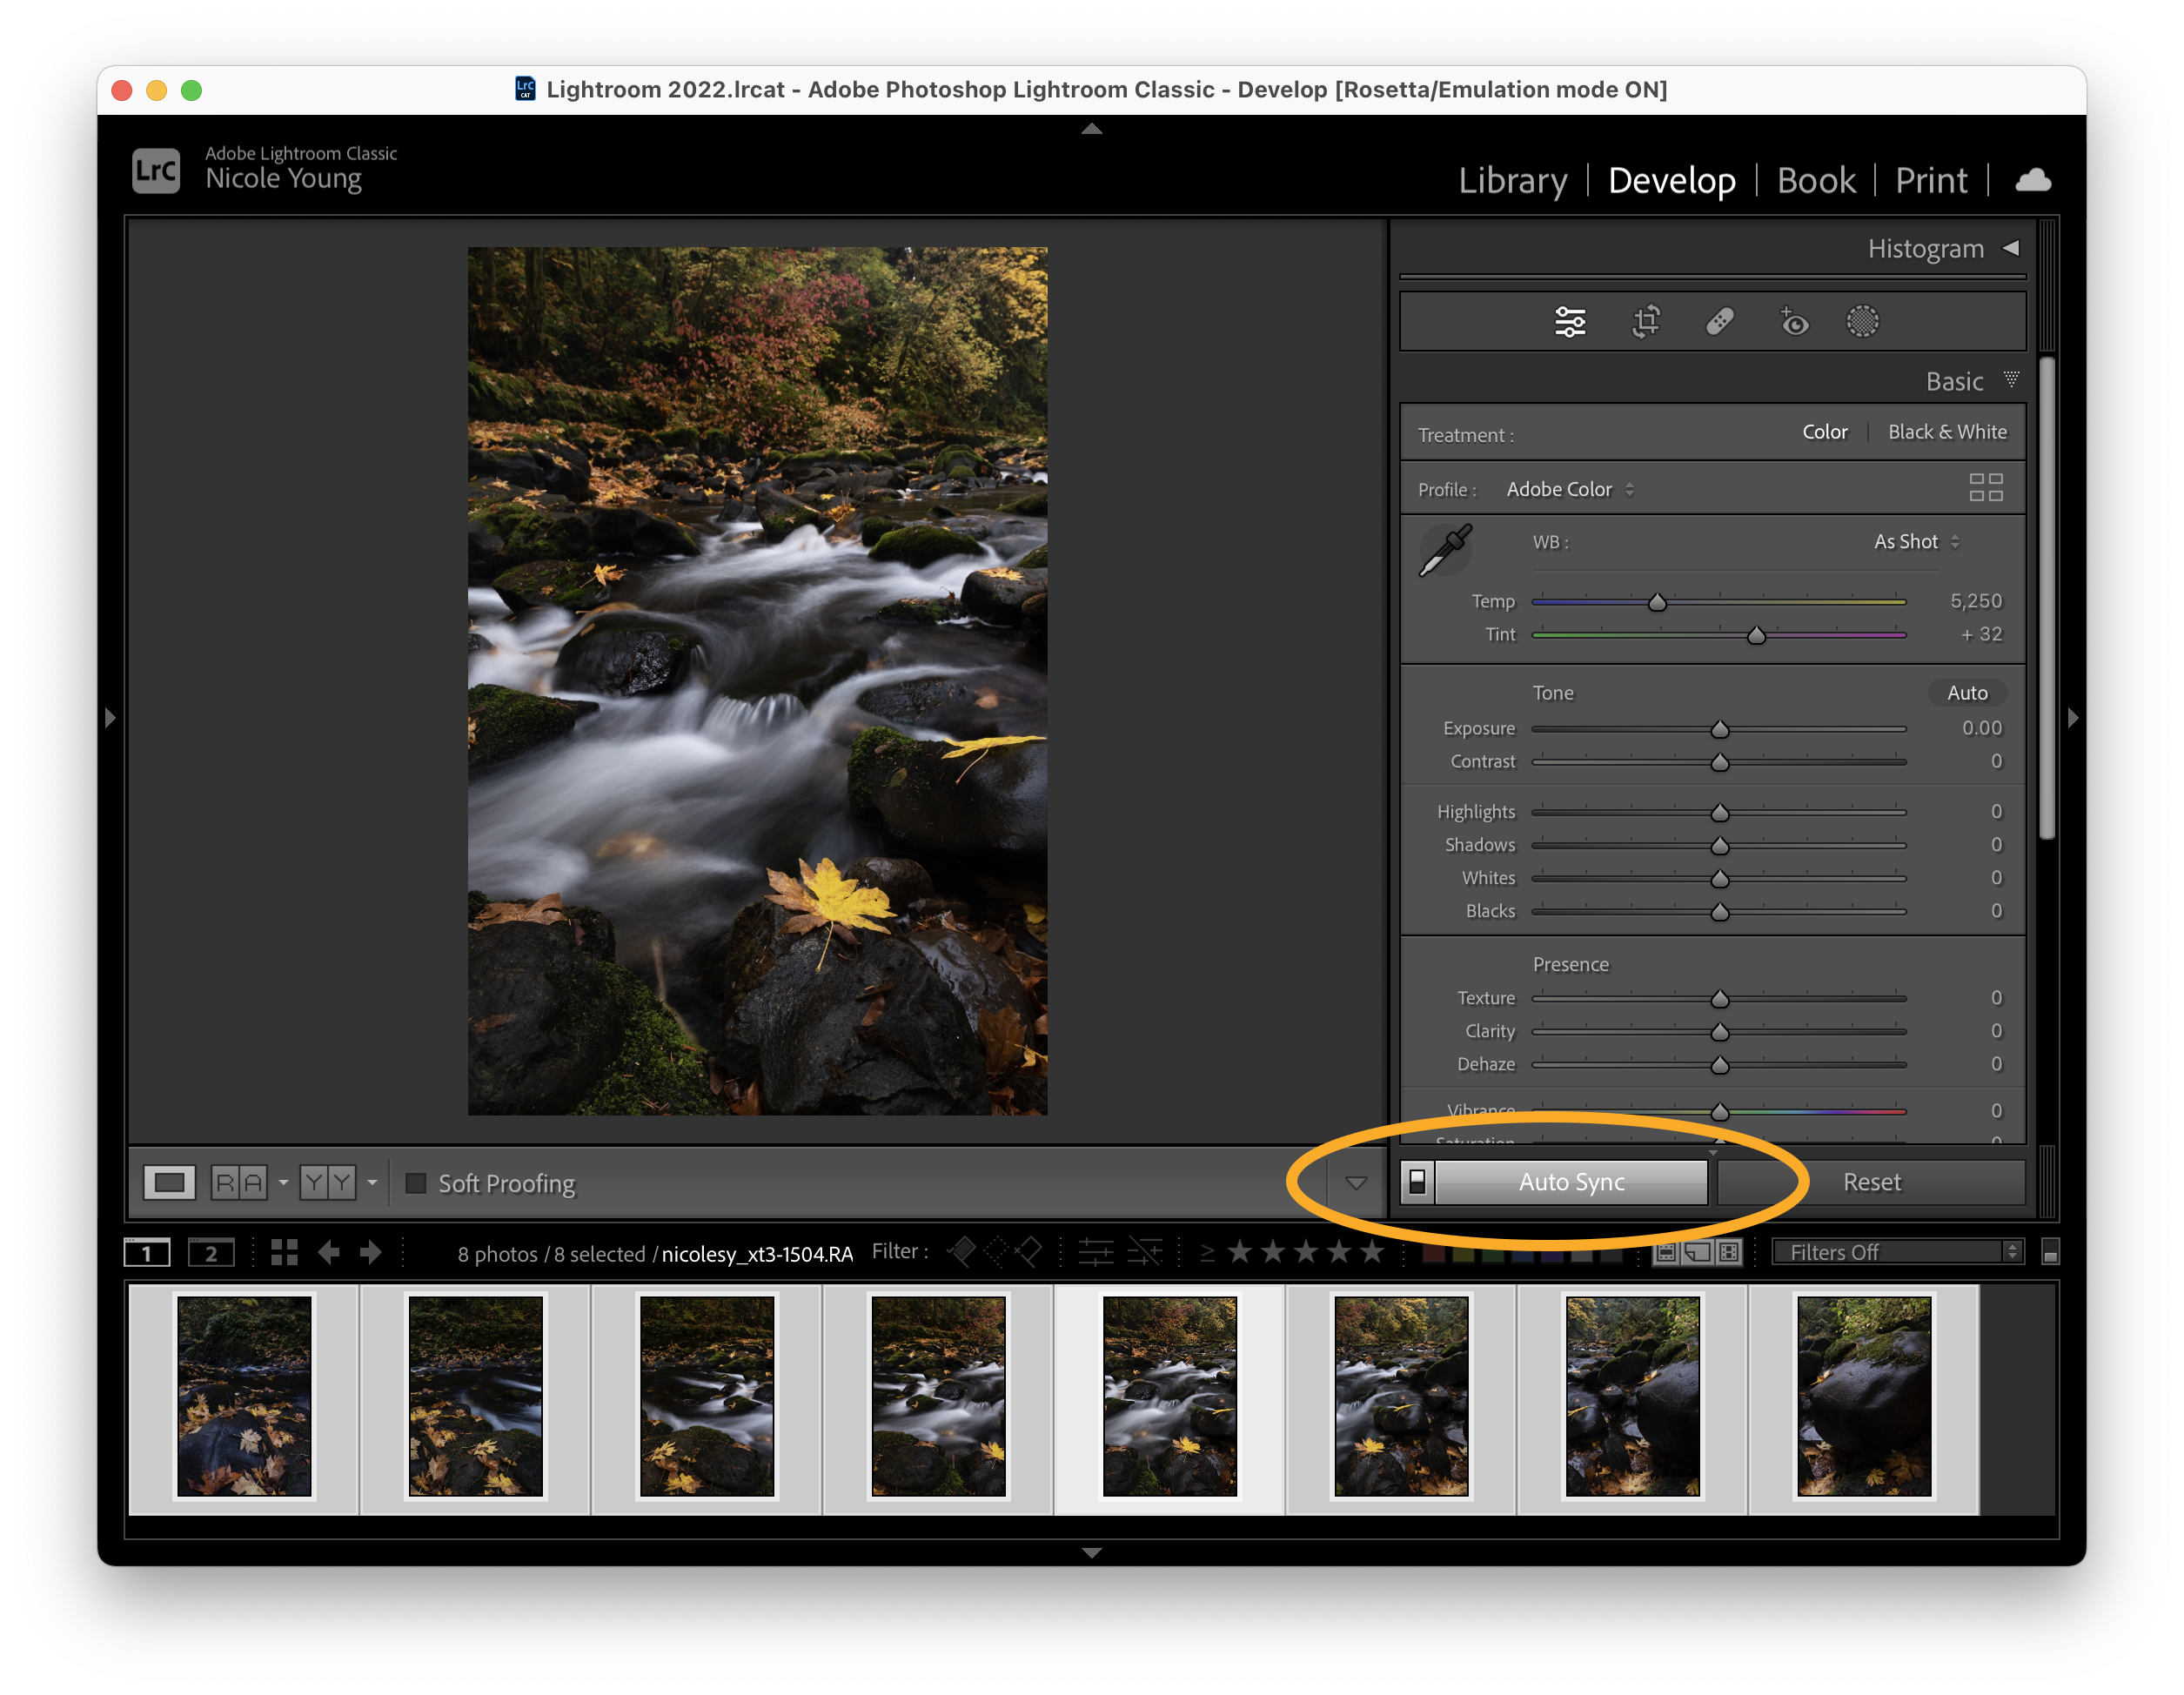
Select the photos and make sure that “Auto Sync” is enabled in the Develop module.
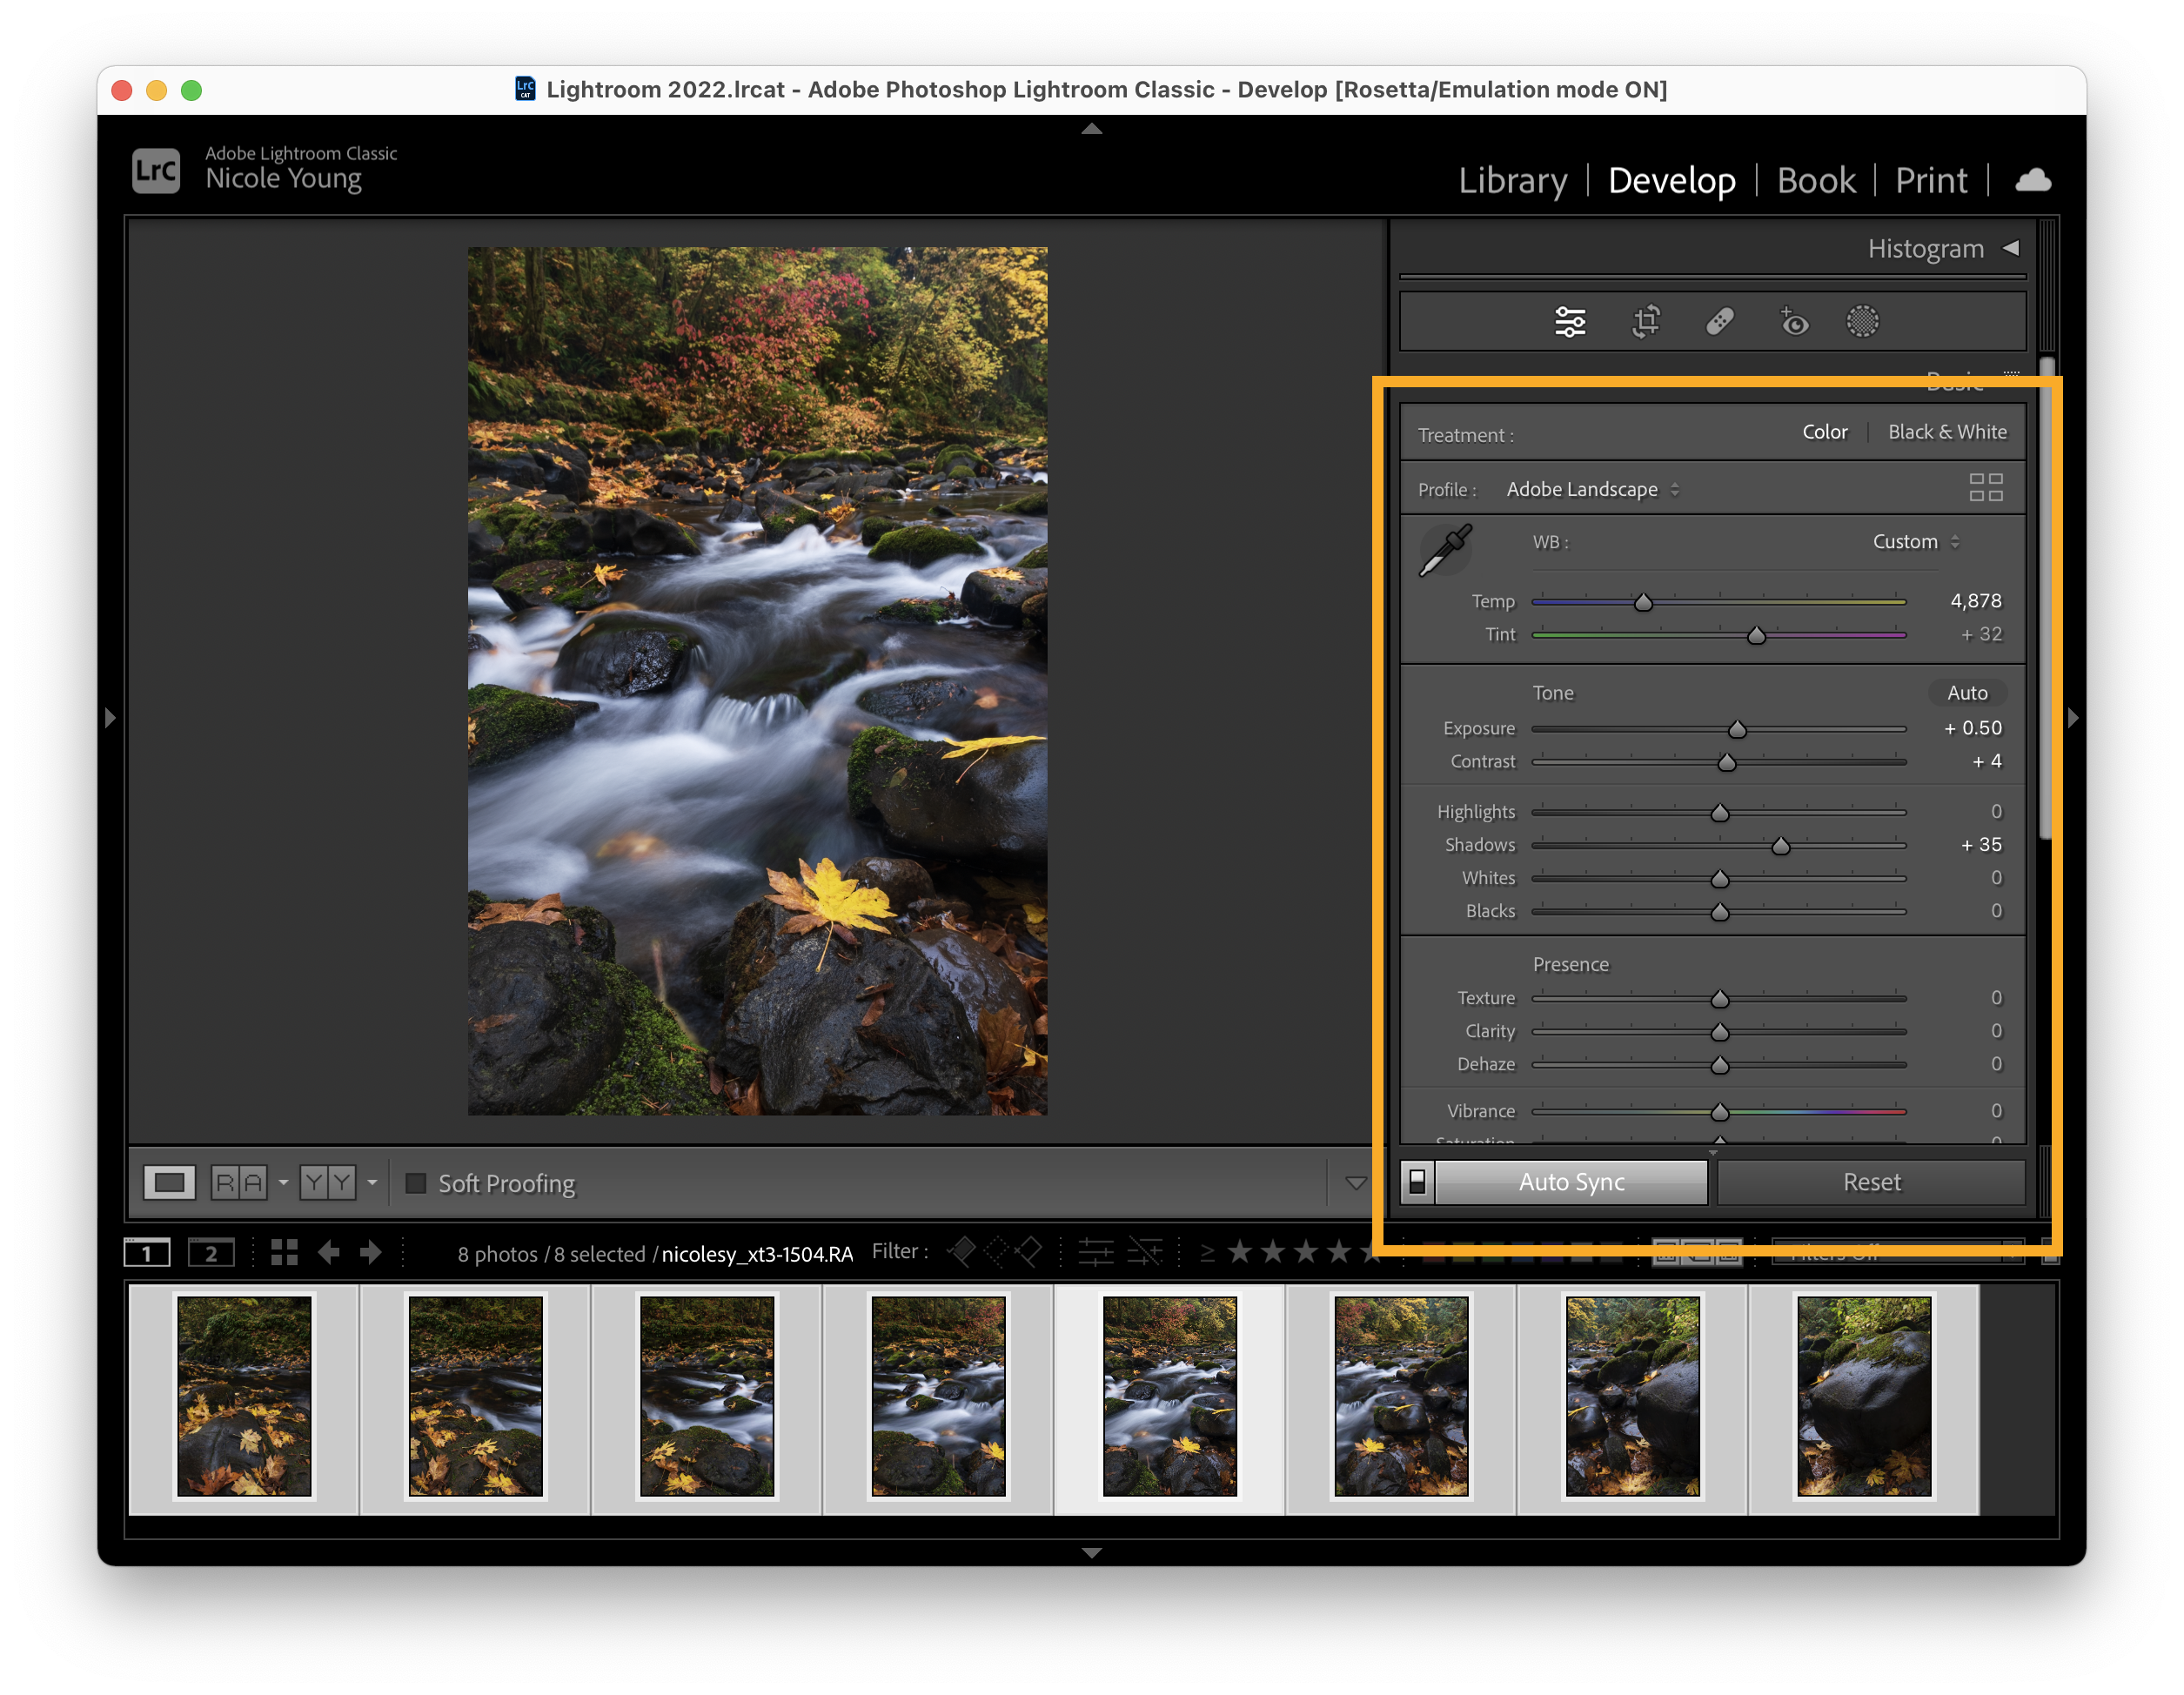
Use the Edit panels and the adjustments will automatically sync with all selected images in the filmstrip.
Step 02: Merge the panorama
Press the G key to go to the grid view in the Library module. Then, with all panorama images still selected, go to Photo > Photo Merge > Panorama.
A new window will pop up where you can make some decisions about your panorama:
- Projection: Decides how the final panorama merge is laid out. Here are the descriptions (from Adobe’s website):
- Spherical: Aligns and transforms the images as if they were mapped to the inside of a sphere. This projection mode is great for really wide or multirow panoramas / HDR panorama.
- Perspective: Projects the panorama / HDR panorama as if it were mapped to a flat surface. Since this mode keeps straight lines straight, it is great for architectural photography. Really wide panoramas may not work well with this mode due to excessive distortion near the edges of the resulting panorama.
- Cylindrical: Projects the panorama / HDR panorama as if it were mapped to the inside of a cylinder. This projection mode works really well for wide panoramas, but it also keeps vertical lines straight.
- Boundary warp: Helps to remove warp from the finished panorama.
- Fill edges: Fills in the white space using content-aware fill.
- Auto crop: Automatically crops the excess white space out of the photo. This crop can be re-adjusted after merging the images using the Crop tool.
- Auto settings: Applies auto settings in the Develop module. You can re-adjust these settings after the images are merged.
- Create stack: Stacks the photos and panorama merge for easy organization.
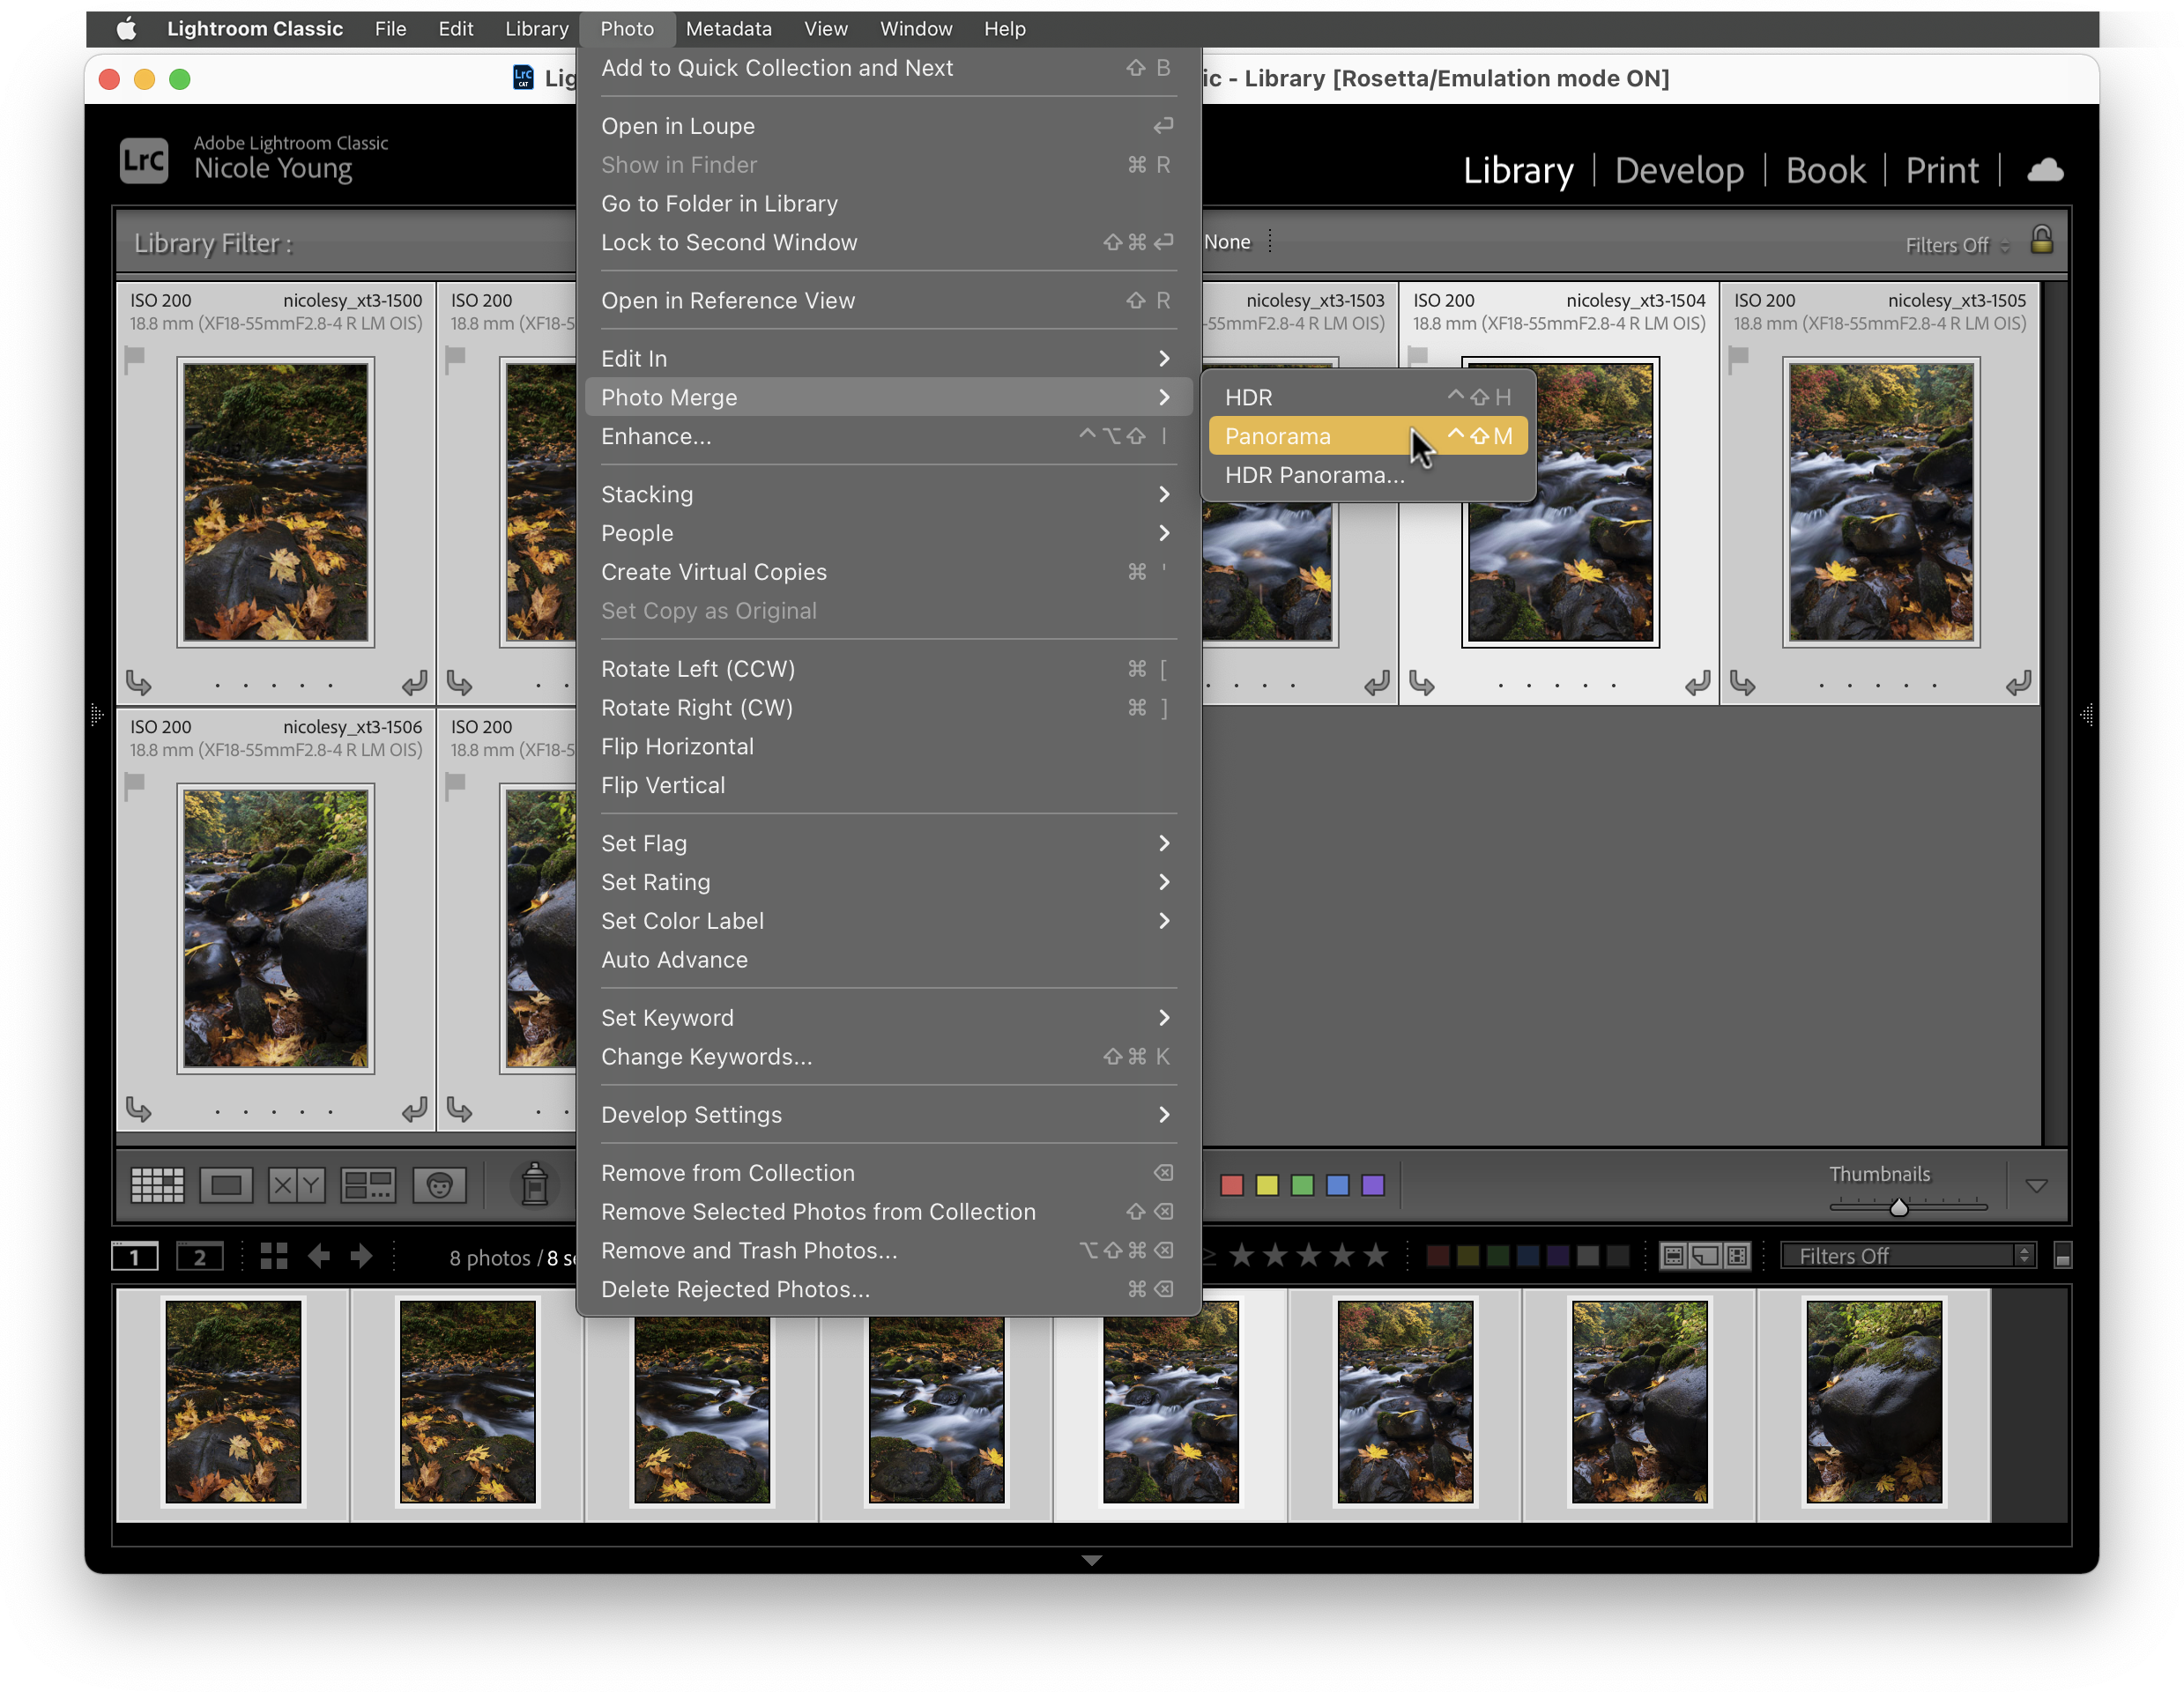
Select the photos in the Library module and use the menu to merge the panorama.
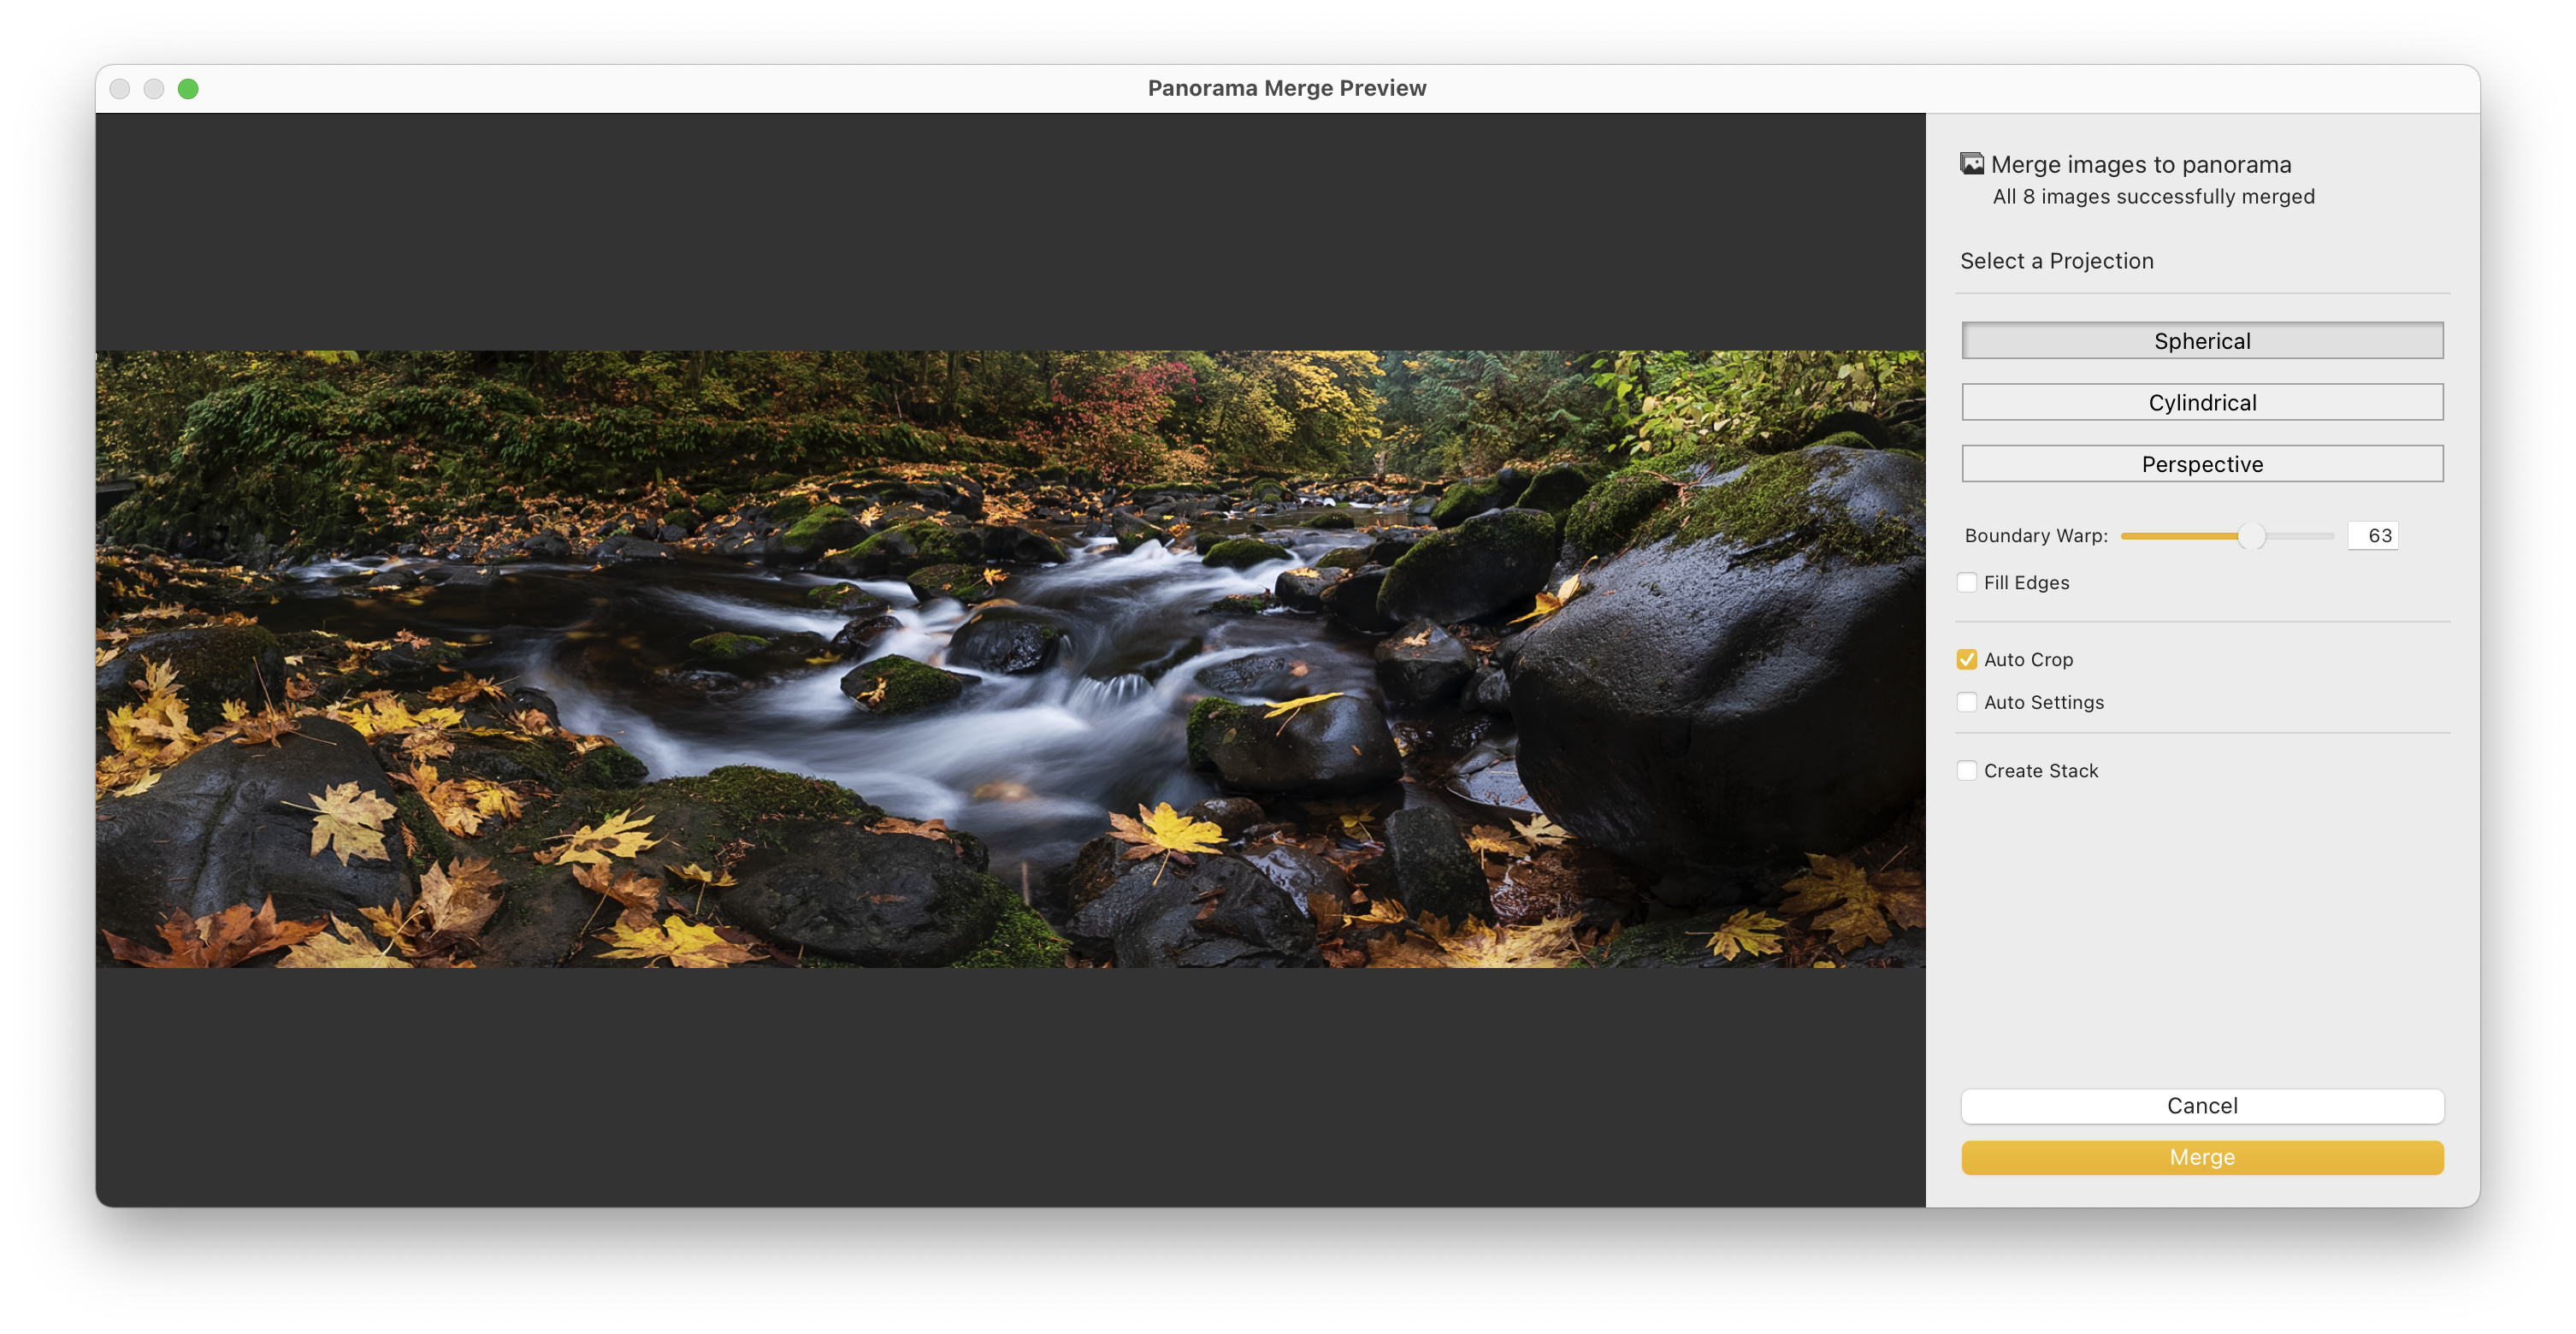
Use the window to choose your panorama settings.
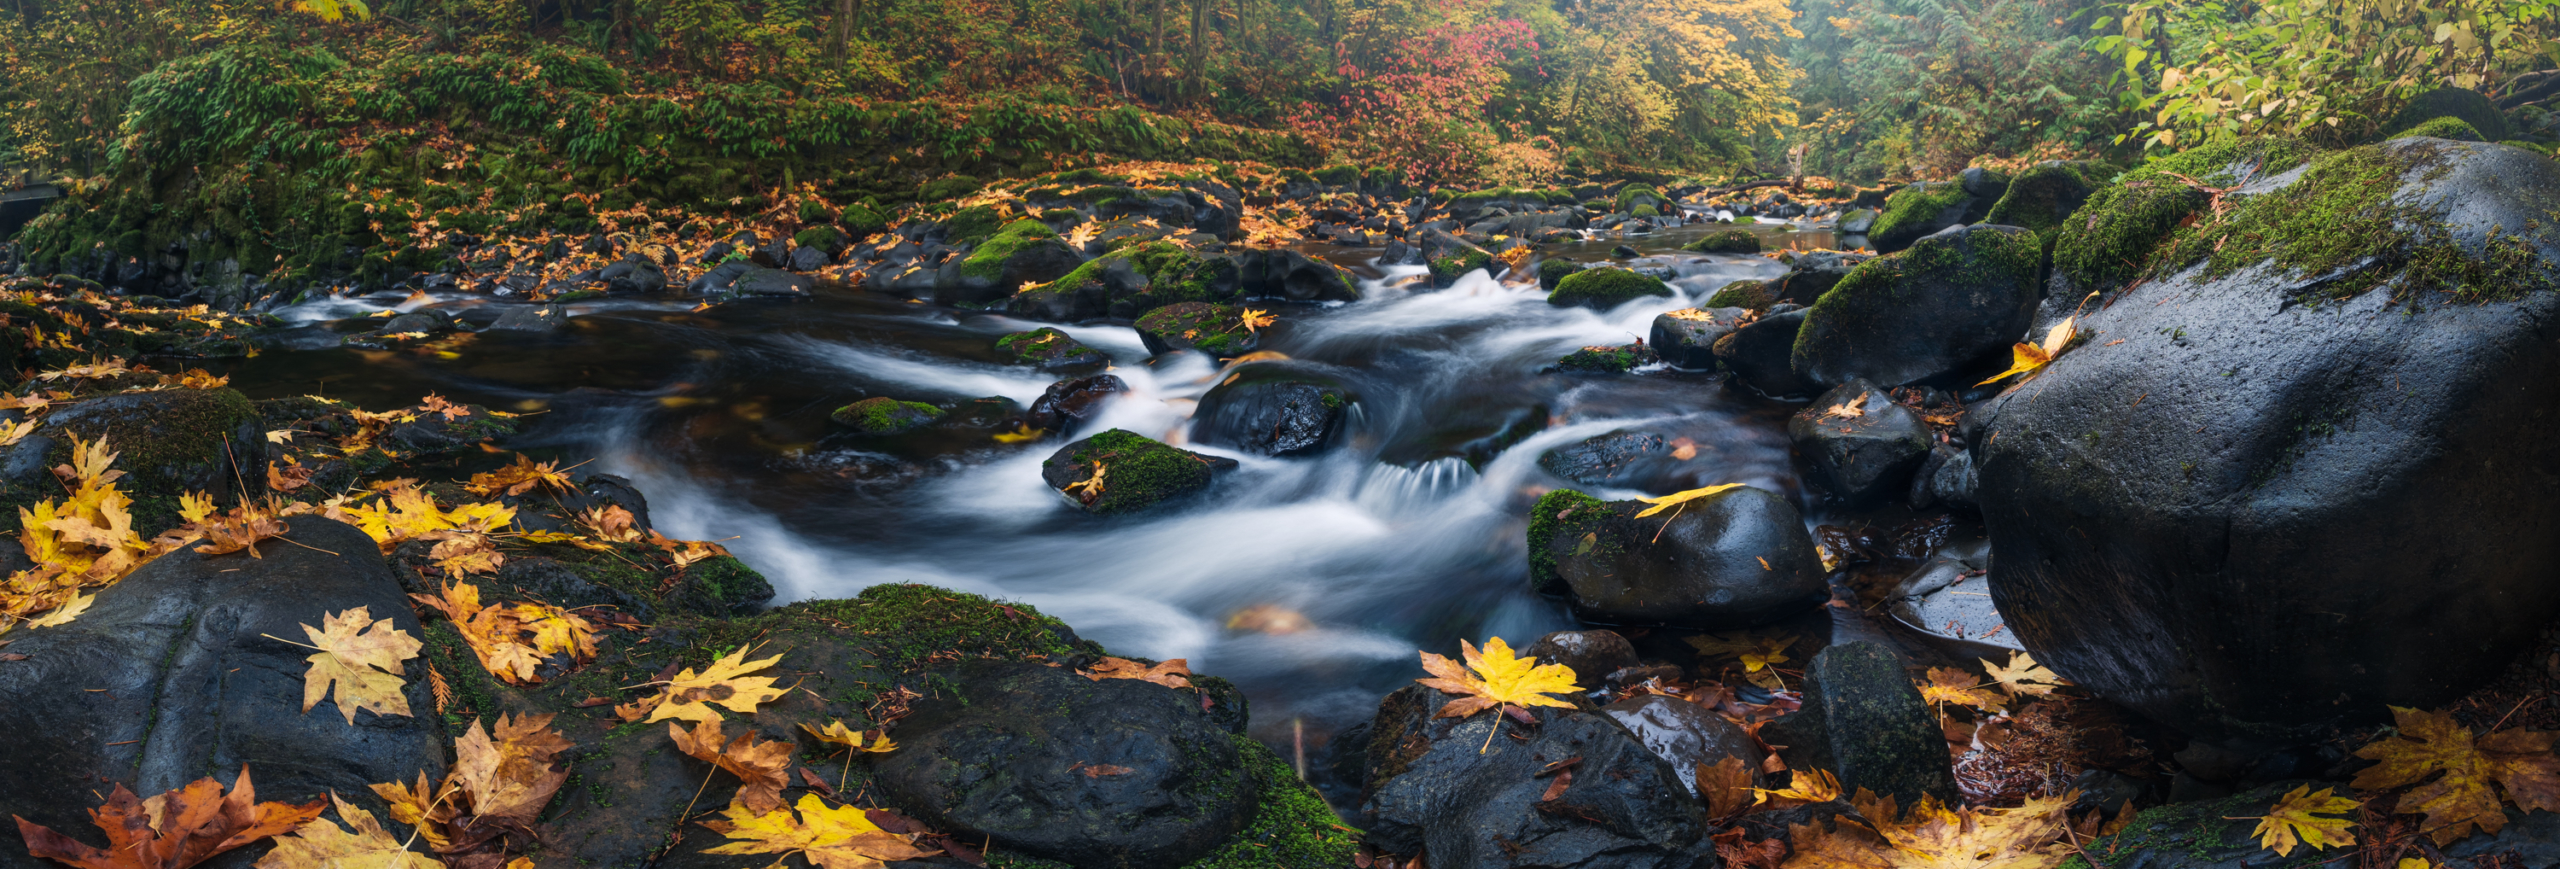
Step 03: Make the final adjustments to your panorama merge
Now, select the merged panorama and open the Develop module to edit and stylize your photo however you like. For this image, I used masking to add fog as well as other global color and tonal adjustments.
Watch the video tutorial
Learn how to create this effect by watching the video tutorial below.

Learn how to merge panorama photos in three steps using Lightroom. (This tutorial shows the technique using Lightroom Classic, but the process is nearly identical in Lightroom CC). But before creating a merged panorama, you must have the image frames. Below are a few tips on creating panorama images with the camera.
Tips on photographing for a successful panorama merge in Lightroom:
- Photograph images vertically: When creating a horizontal panorama, you’ll get a lot more photography “real estate” by creating each frame vertically.
- Overlap each frame by at least 20%: To ensure you get a good merge, overlap each frame by at least 20% (I usually overlap by much more, resulting in more frames per panoramic scene).
- Use a tripod: It’s best to use a tripod to help ensure that the camera remains level and steady and to make it easier to overlap each frame.
- Level your camera or tripod: If you have a small bubble level on your tripod or camera, use it! Then, do a quick run-through of your camera movement to ensure the camera stays level across the horizon for each frame. You don’t want to end up with a crooked panorama!
- Keep your exposure consistent: Use manual exposure for each frame to be consistent across your panorama.
How to merge panoramas in Lightroom
Here is a step-by-step tutorial on how to merge panoramas in Lightroom Classic and Lightroom Mobile (CC). If you want to watch the video to see this process in-depth, please click here to view it on YouTube.
Step 1: Edit the photos with Auto Sync
Select the images you want to merge and open them into the Develop module. All these images should be highlighted if the filmstrip is visible at the bottom. You can also click on one of the images (with all other images still selected) to choose a reference image while making adjustments.
On the right, make sure that the Auto Sync button is toggled. Then, make the edits you would like to your image, and all selected photos will be synced and updated with the same adjustments.
Select the photos and make sure that “Auto Sync” is enabled in the Develop module.
Use the Edit panels and the adjustments will automatically sync with all selected images in the filmstrip.
Step 02: Merge the panorama
Press the G key to go to the grid view in the Library module. Then, with all panorama images still selected, go to Photo > Photo Merge > Panorama.
A new window will pop up where you can make some decisions about your panorama:
- Projection: Decides how the final panorama merge is laid out. Here are the descriptions (from Adobe’s website):
- Spherical: Aligns and transforms the images as if they were mapped to the inside of a sphere. This projection mode is great for really wide or multirow panoramas / HDR panorama.
- Perspective: Projects the panorama / HDR panorama as if it were mapped to a flat surface. Since this mode keeps straight lines straight, it is great for architectural photography. Really wide panoramas may not work well with this mode due to excessive distortion near the edges of the resulting panorama.
- Cylindrical: Projects the panorama / HDR panorama as if it were mapped to the inside of a cylinder. This projection mode works really well for wide panoramas, but it also keeps vertical lines straight.
- Boundary warp: Helps to remove warp from the finished panorama.
- Fill edges: Fills in the white space using content-aware fill.
- Auto crop: Automatically crops the excess white space out of the photo. This crop can be re-adjusted after merging the images using the Crop tool.
- Auto settings: Applies auto settings in the Develop module. You can re-adjust these settings after the images are merged.
- Create stack: Stacks the photos and panorama merge for easy organization.
Select the photos in the Library module and use the menu to merge the panorama.
Use the window to choose your panorama settings.
Step 03: Make the final adjustments to your panorama merge
Now, select the merged panorama and open the Develop module to edit and stylize your photo however you like. For this image, I used masking to add fog as well as other global color and tonal adjustments.
Watch the video tutorial
Learn how to create this effect by watching the video tutorial below.

Nicole is a photographer, published author, and educator specializing in Lightroom, Photoshop, and photography. She is best known for her books on food photography but is widely versed in various photographic genres, including landscape, nature, stock, travel, and experimental imagery.


Sehr gut und ausführlich wie immer. Mir gefällt vor allem, dass die Kommandos schriftlich eingeblendet werden, da ich kaum englisch verstehe.