As a food photographer who works out of my home (creating food photography almost exclusively for my stock portfolio) I prop and style all of my dishes. Over time I’ve found this to be challenging, but also very rewarding and I’ve accumulated not only a lot of dishes, but I’ve also discovered and created several different tools and techniques I use when working with food. And, as is my nature, I thought I’d share these resources with you!
So to learn more about the items I use as well as where you can get them (like fake ice, for example) be sure to keep on reading. Enjoy!
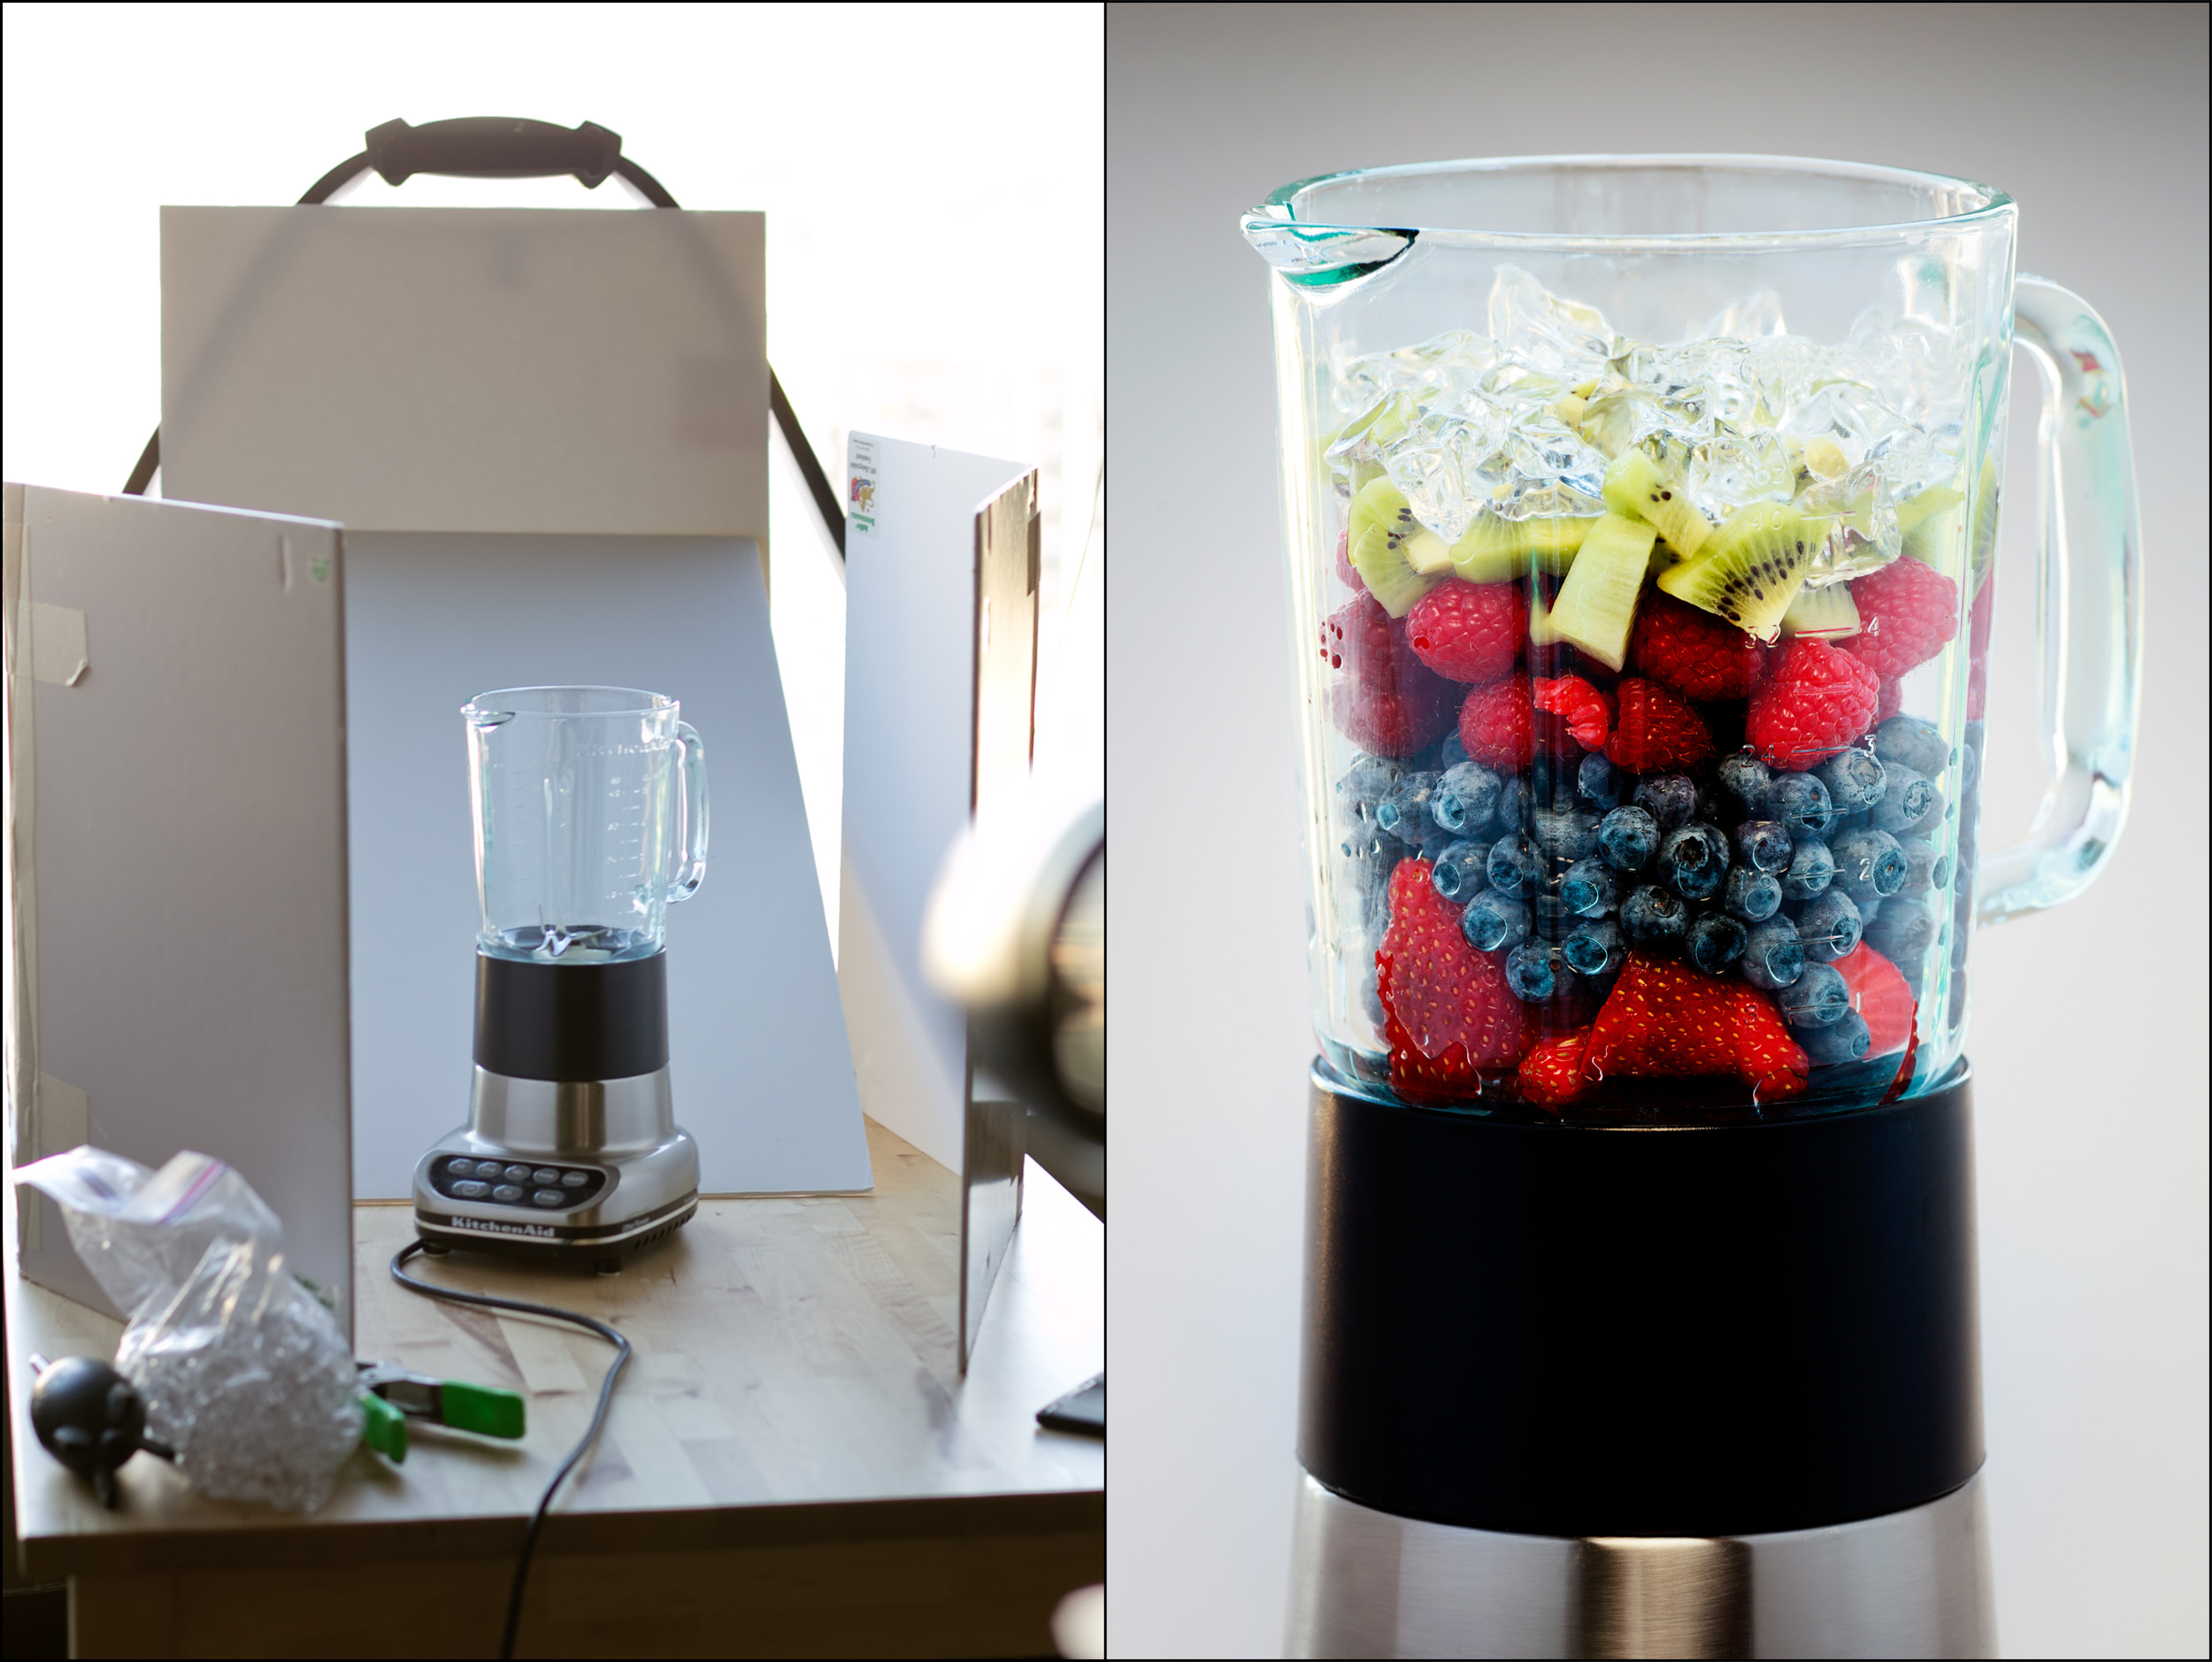
Fake Ice
If you ever photograph drinks, or ever plan to, then you should really invest in one or two different types of fake ice. The professional grade stuff, like custom-made splashes, can be extremely pricey, and most often is usually rented (not purchased). However, for at-home food photographers there are much less expensive options out there. I get mine over on Amazon and you can find them for under $20/bag.
Foam Board
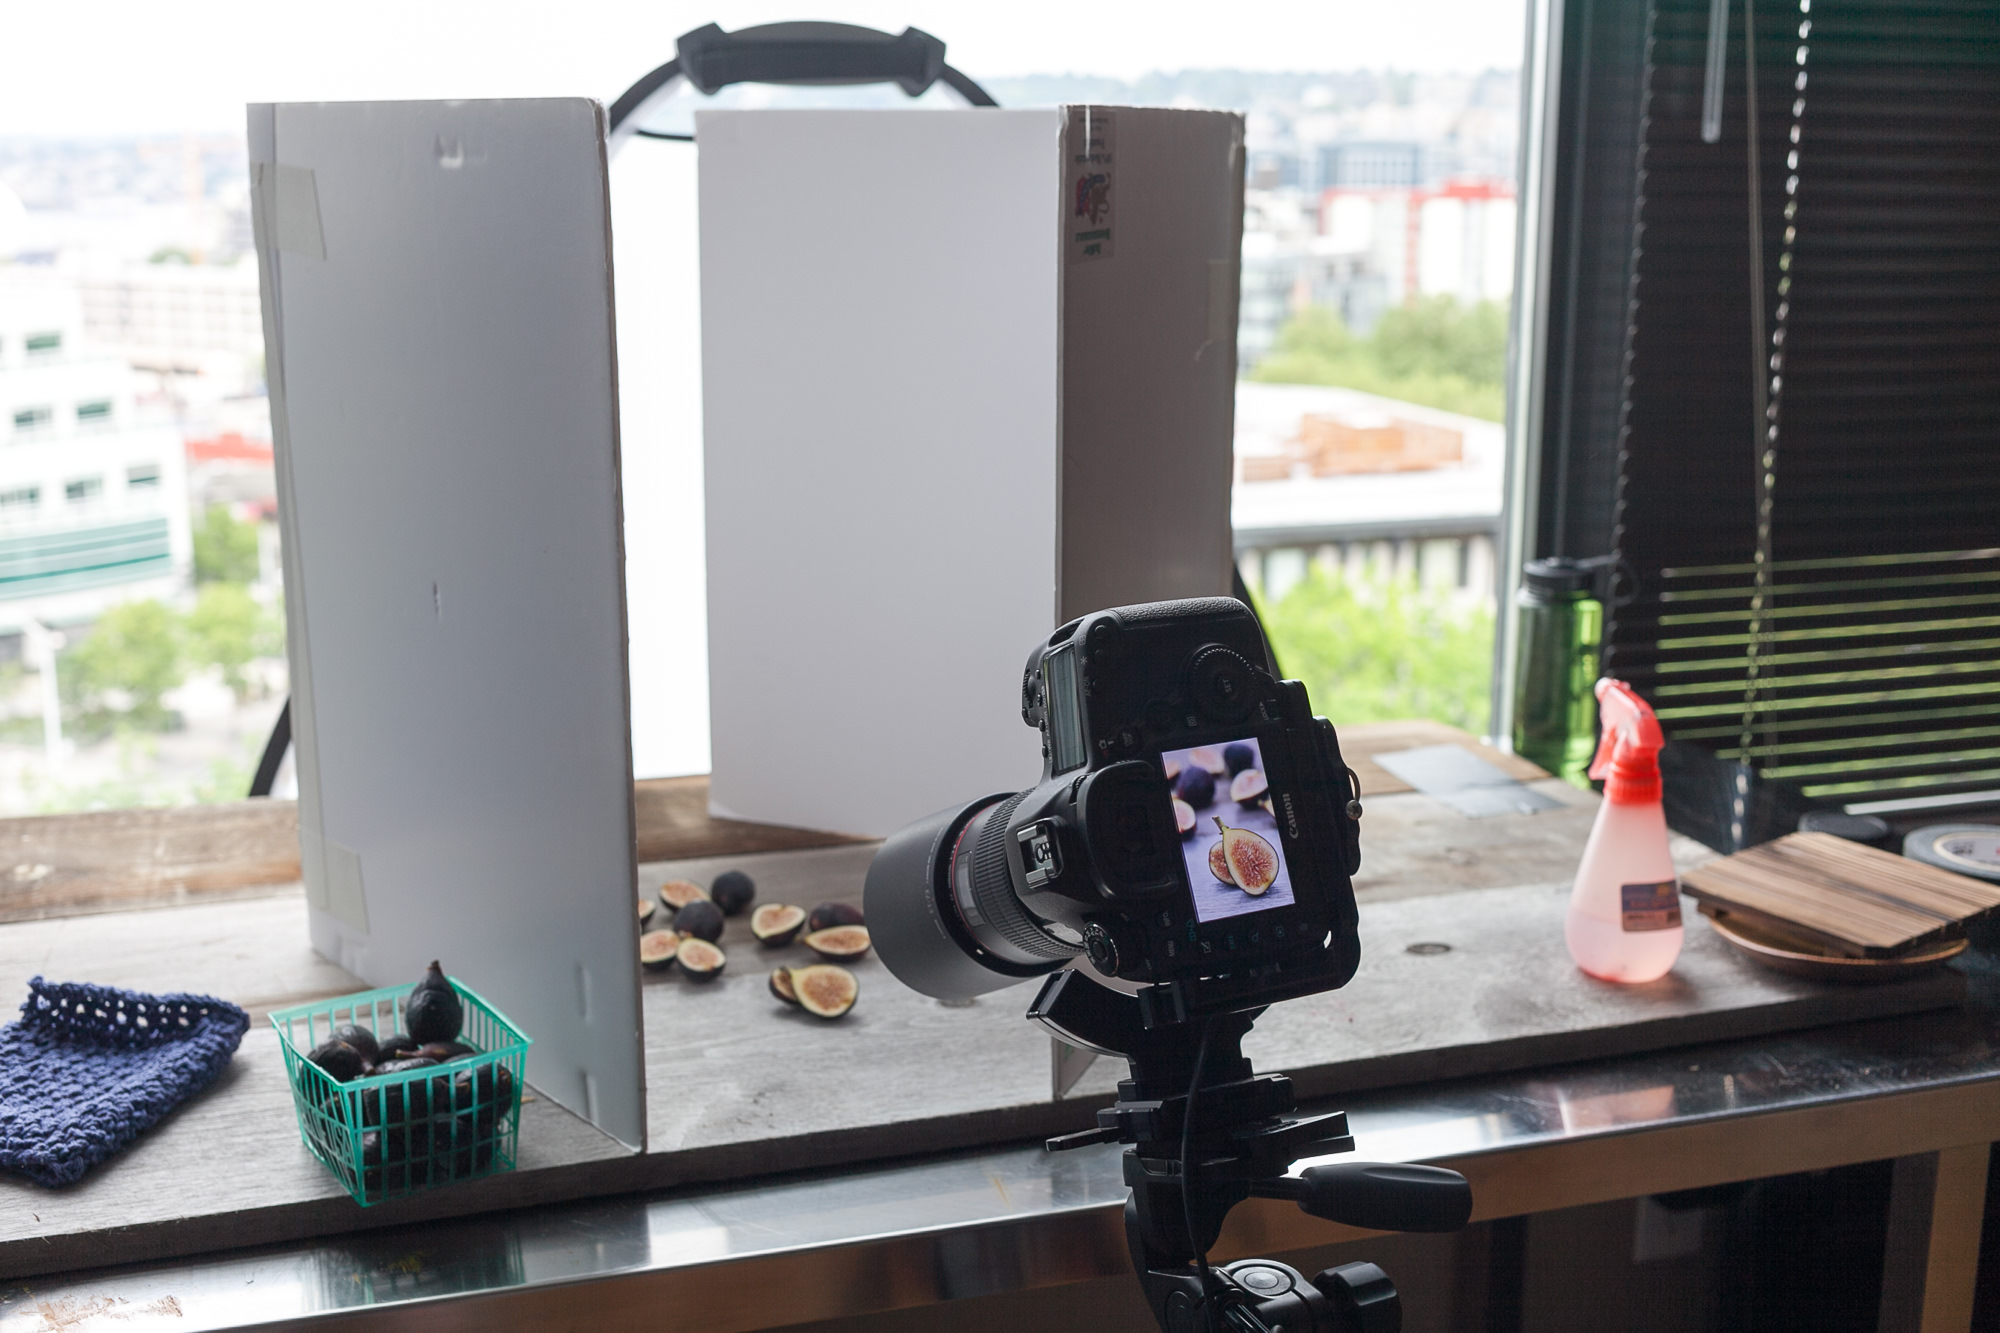
Of all the tools I use, these are by far the least expensive and most useful. I use them for reflection, diffusion, blocking light, and even tabletops (I wrap cloth around them and secure it to keep the wrinkles out).
I use the 20-inch x 30-inch size, and to make them stand on their own cut them in half, and then tape them back together (I use gaffers tape, but you could probably use duct tape, too). This way they will fold like books and stay propped open to add fill light, just like I did in this photo to the left.
• You can buy foam board at almost any craft store (or department store where they sell craft items).
Tacky Wax
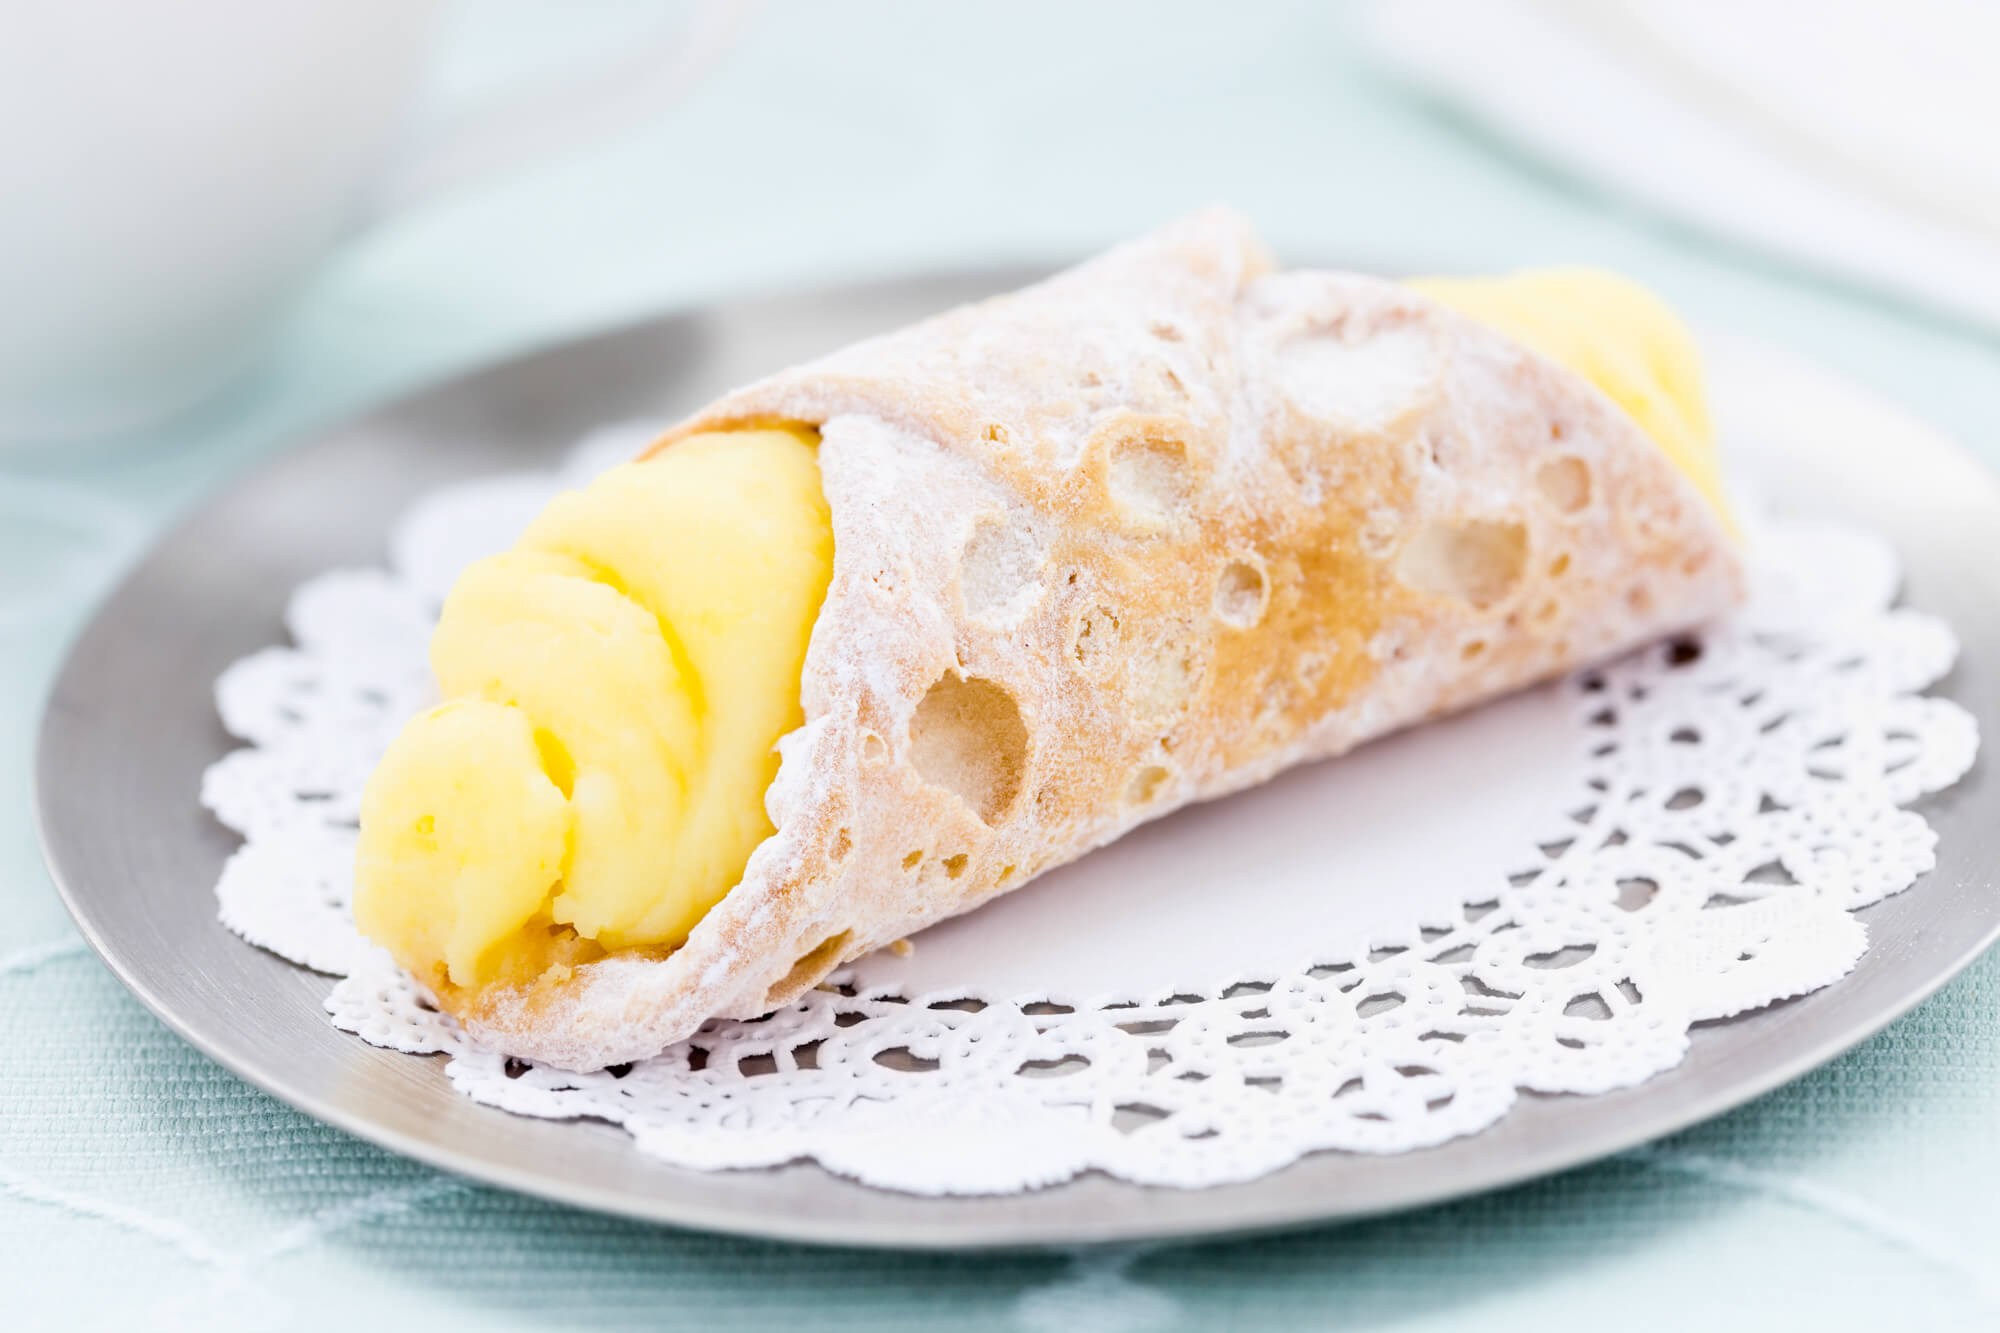
Sometimes you have something positioned “just so” and you need it to stay in place.This will usually be a small item, or a napkin or doily you need to stick to the table, just like I did with the photo of this cannoli. When you run across a situation like this, the absolute best item you can use is Tacky Wax (or something similar). It’s pretty sticky stuff, but it’s clear-ish (like hair wax) and helps keep trouble items in-place.
• Buy Tacky Wax on Amazon.com; you can also get it at craft stores, and even some camera stores carry it.

Crackle Paint
I love this stuff! It gives your table-top surfaces that “weathered” look, and you can really get creative with different color combinations. I tend to use this on wood surfaces, but I’ve seen other photographers use foam board with just as much success. My favorite brand is Valspar. I’ve tried the Martha Stewart stuff but it didn’t work nearly as well (and is actually kinda worthless, IMO). I’ve also seen posts where people get the same look using Elmer’s Glue, so you might want to look into that, too.
• I get my crackle paint at Lowes (here’s a link); there are other brands, and you can also use Elmer’s Glue for the same look (here’s the link for that).

Water Bottles
These are good for filling with water (or whatever your spritzer-liquid-of-choice may be). I use them to add water to fresh herbs, fruit, and vegetables, or even for flowers for still-life images or add-ons to your food set. (I will also often carry a tiny water bottle with water in my camera bag for macro shots when I’m doing landscapes). You can get these almost anywhere, such as a department store (Target, etc.), Amazon, craft stores, etc.
- Food styling tip: Just Add Water
- Get Evian canned water spray on Amazon

Dulling Spray
When you have dishes or flatware that shines, it can add odd or unwanted hot-spots in your photos. It also tends to show the reflection of whatever is in your room or setup. The quick fix for this is to get a can of dulling spray and give it a smooth and even surface to reflect off of. It only takes a few minutes for the paint to set, and is a really great idea for props and silverware that you use specifically for your food photography.
Vinyl Backdrops
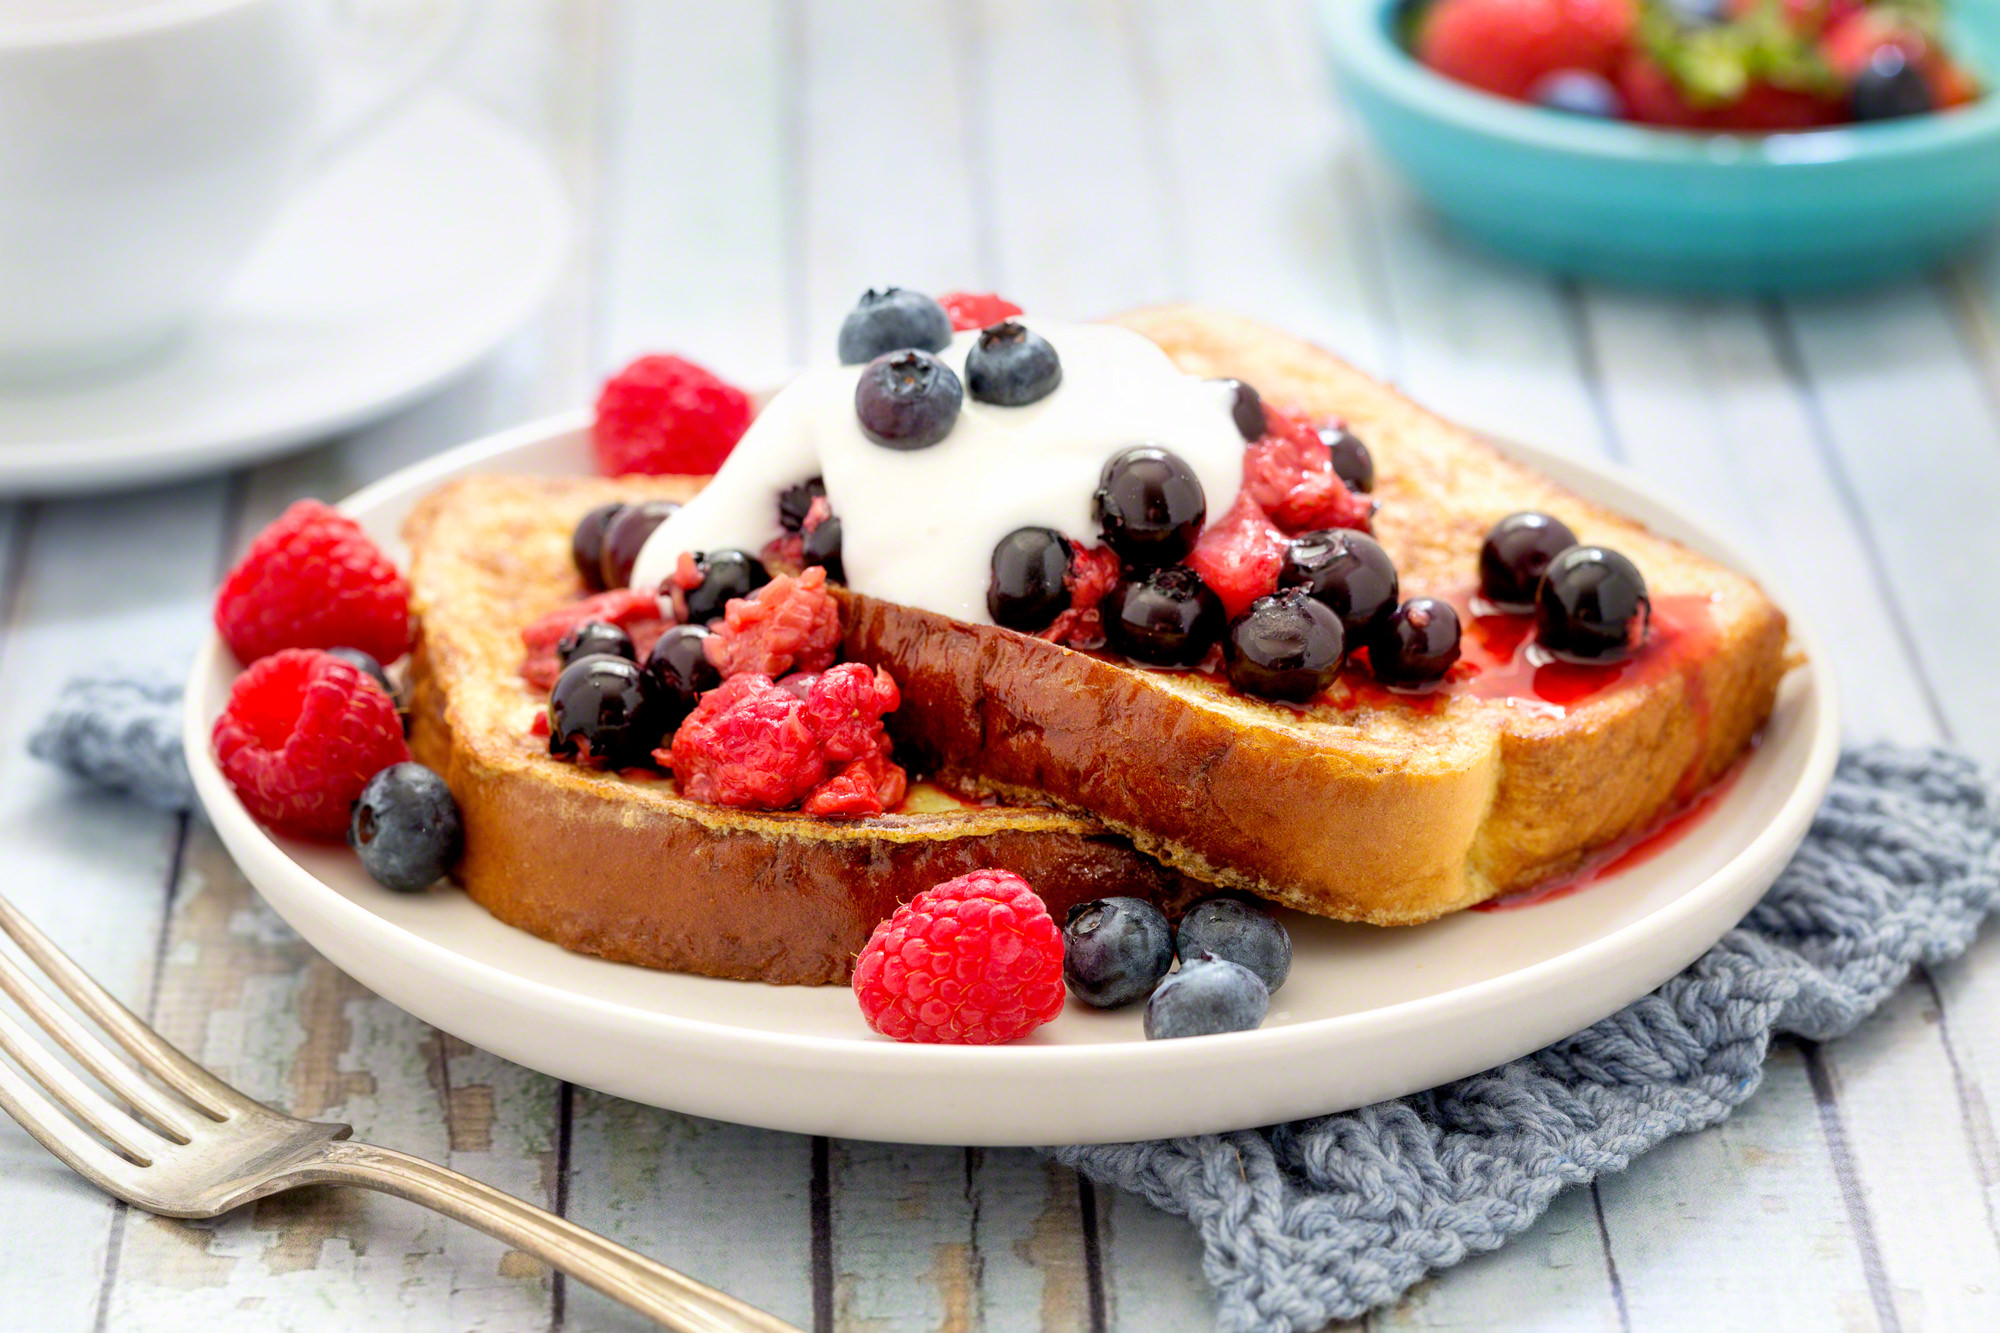
I recently discovered that I can use vinyl backdrops with table-top backgrounds printed on them to use with my food photographs! I’ve purchased a few, some were hit and miss in terms of quality, but overall they are pretty good (and so much easier to store than dozens of wooden boards). Here’s a photo I took with one. They clean up pretty easily, too … and I kind of wonder how difficult it would be to make my own :)
- Ink & Elm: http://www.inkandelm.com/

Styrofoam and Small Bowls
When you need a to add little bulk to your food, the easiest way is to place something underneath. For slippery stuff, like pasta, styrofoam is a good fit. However, this will usually be for food you are not planning on eating after you photograph it, as you’ll end up with little bits of styrofoam stuck to the food. Another option is to use small bows, placed upside-down in the dish. This helps bulk up the food without messing with it (in other words, you can have your cake and eat it, too). :)
Cardboard and toothpicks
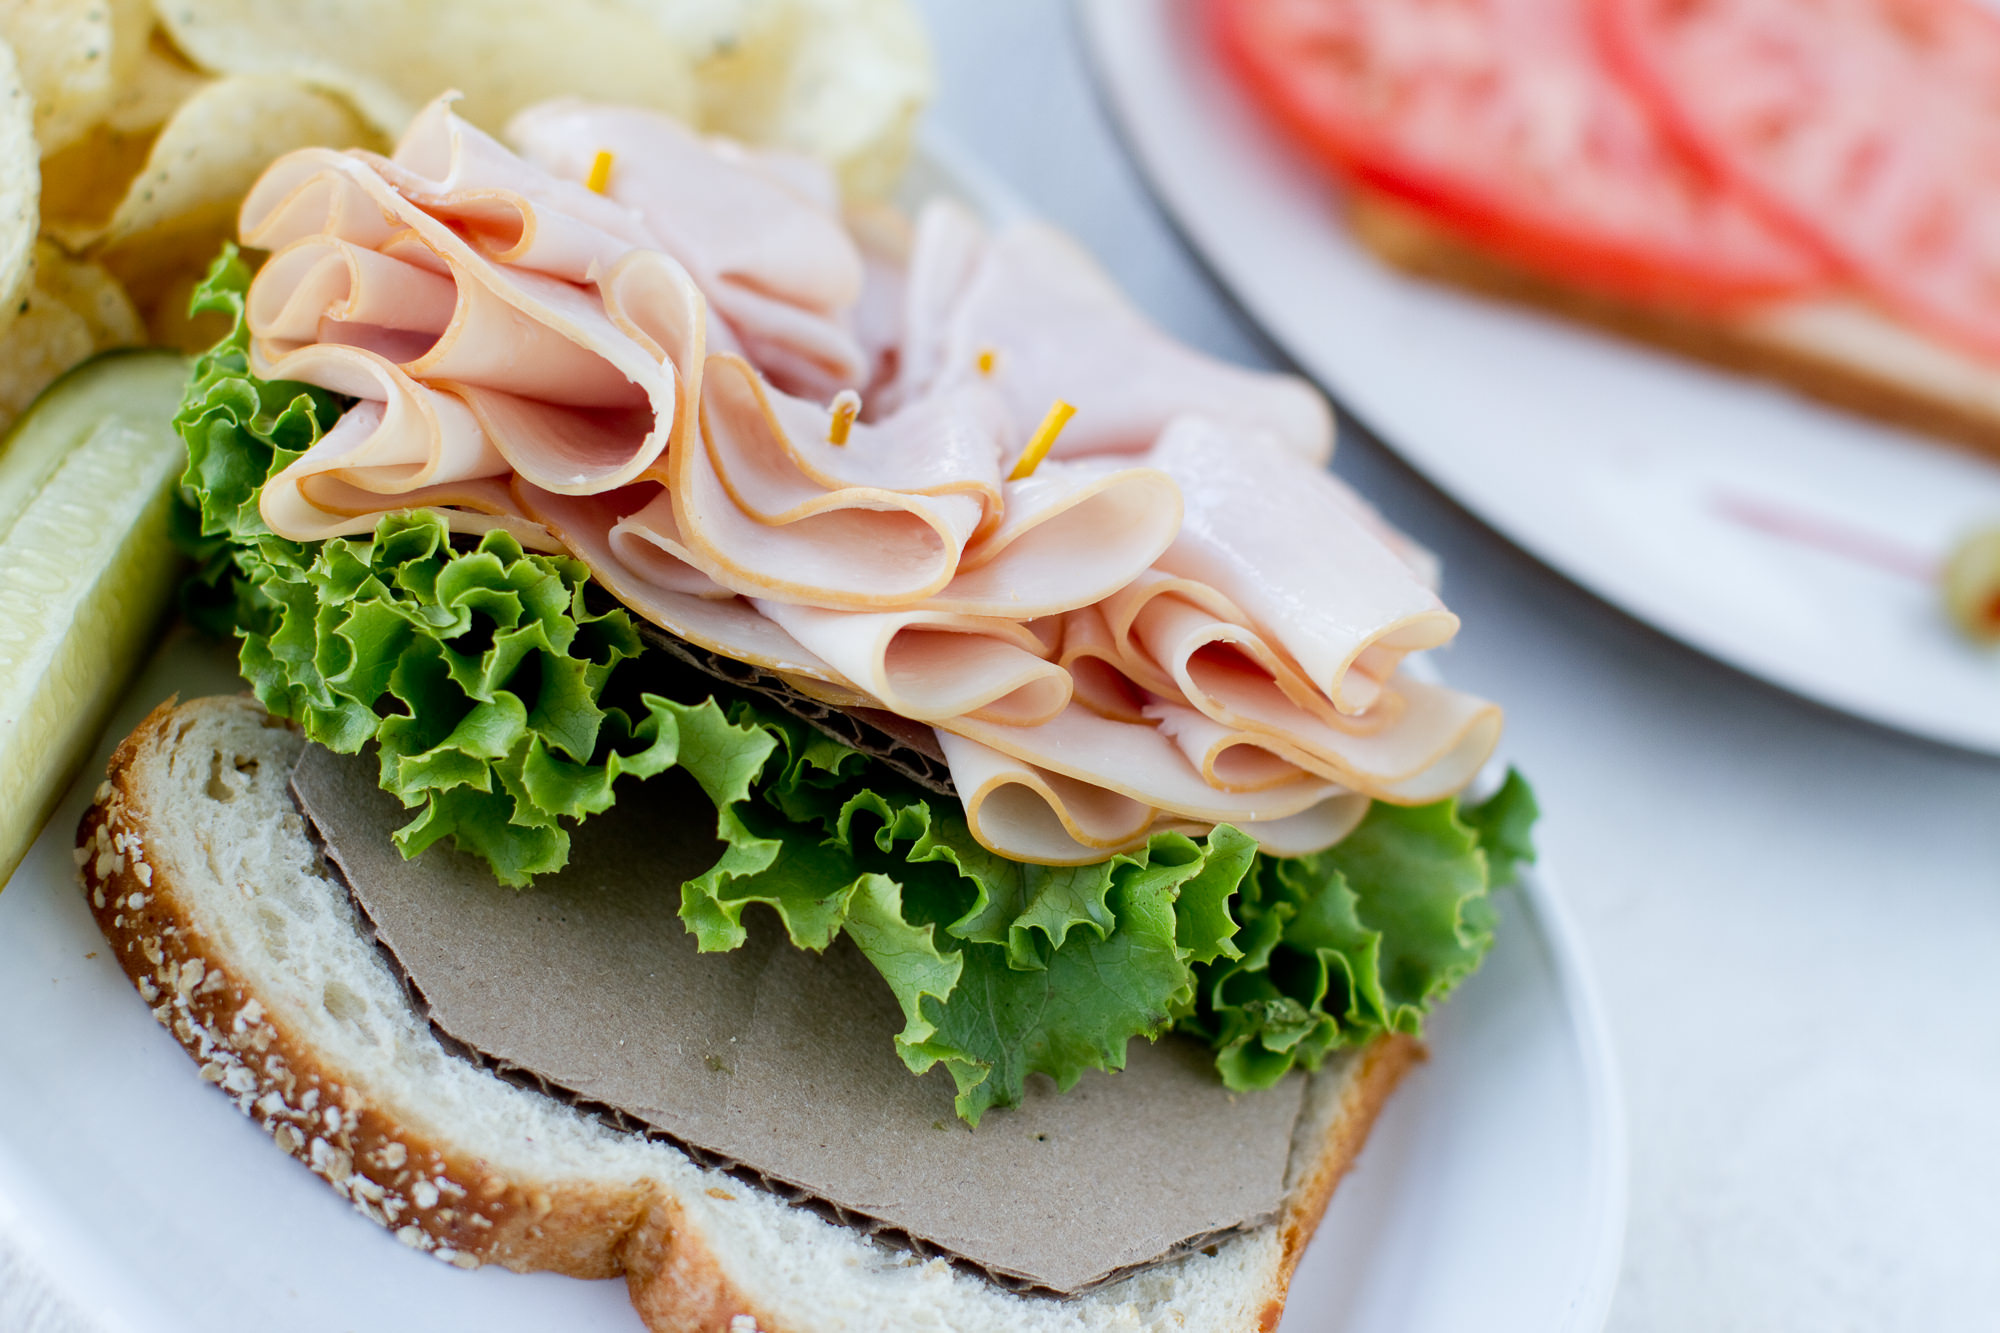
When you want food to stay put, and you don’t mind adding a few things inside of the food to make it work, then consider using cardboard and/or toothpicks. For food that you want to add a bit of bulk to, particularly things like sandwiches or stacked foods, then this is a good trick to keep in mind. And, as long as your cardboard is clean, you can still eat the food after you’ve disassembled everything. :)

Creme Brûlée Torch & Charcoal Starter
Adding a little extra char, or even grill marks to food on-set can be done easily with the right tools. A creme brûlée torch will allow you to selectively “char” your food, and a charcoal starter can add thick grill marks. Careful with these, though, especially the charcoal starter! That thing gets super-heated … I would highly suggest using it in the kitchen, as opposed to directly on-set. :)

Hand Steamer
A hand steamer is a useful tool to have for a few different reasons. First, it’s an easy way to get those pesky wrinkles out of linen. Secondly, it can make a fun toy to play with if you want to do creative shoots, like in the example to the left. I added the steam with the hand-steamer and then used Photoshop to mask out the unwanted areas.
- Here’s a link to the original article with a step-by-step tutorial: Adding Steam
- This is the steamer I use: Steam Buddy Handheld Steamer
Lastolite Tri-grips
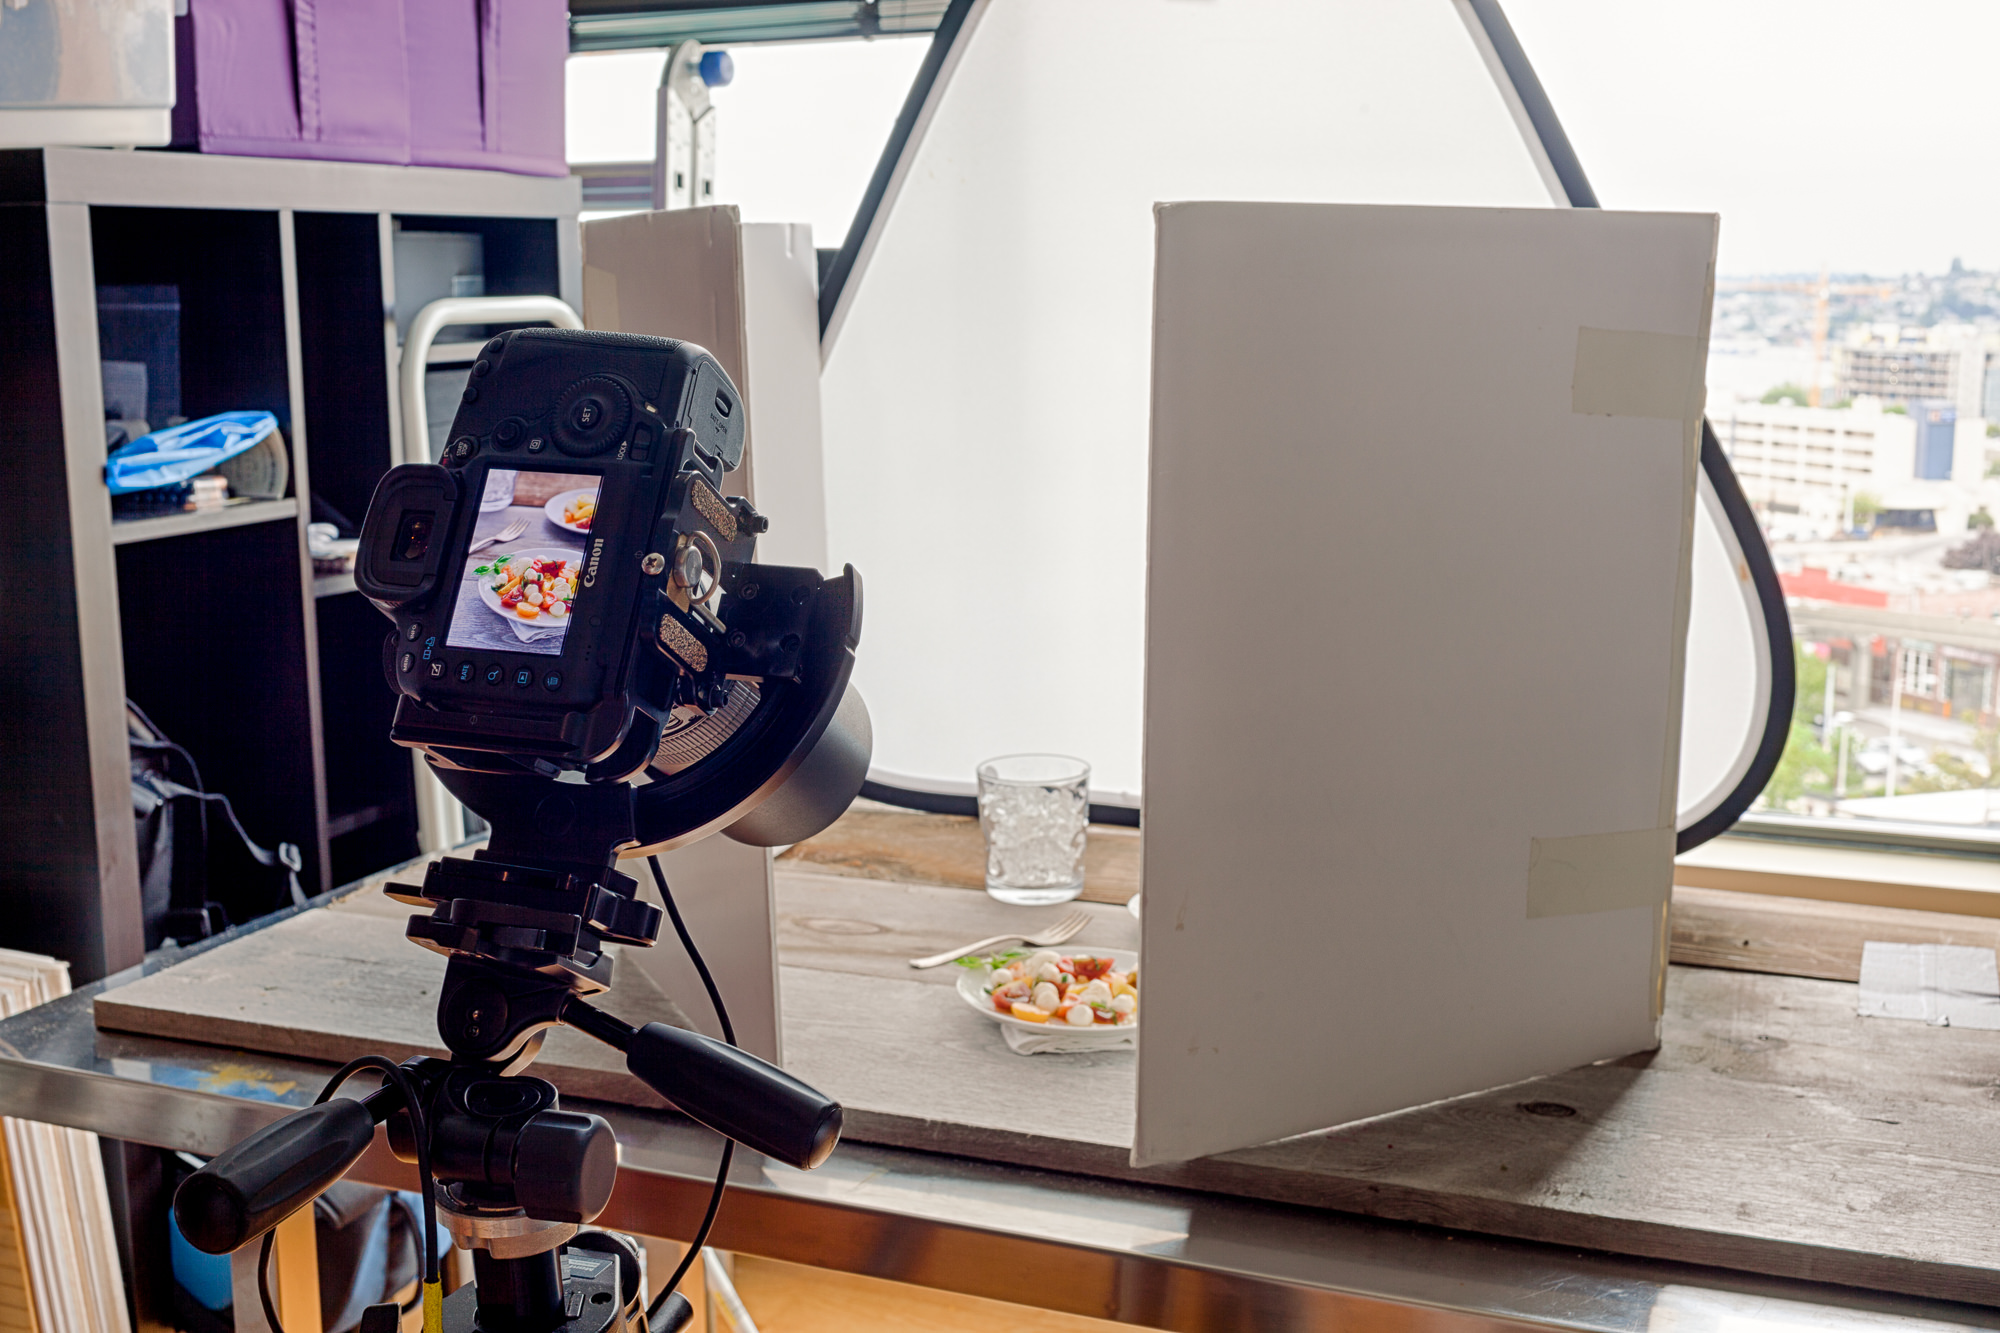
One thing I use in nearly every single shoot is a diffuser behind my setup. This cuts the light down and softens it, and it also will kill harsh light (if you have the sun coming in through the window. I prefer the Lastolite TriGrip brand because they prop up easily right on the table and lean agains the window (or my foam board), unlike circle diffusers which tend to roll around a lot. :) I currently have a 1-stop diffuser, but will be adding a 2-stop to my collection, soon.
Note: The difference between the 1-stop and 2-stop is the amount of light that they will block; the 1-stop cuts out 1-stop of light, and the 2-stop cuts out two stops of light (or, double the amount of light the 2-stop). If you have a LOT of harsh light coming in through your windows, or you do a lot of photography with strobes or flashes, you may want to consider the 2-stop; if you have a soft and diffused light coming in through your windows then the 1-stop will probably suit you just fine.
- TriGrip Diffusers on Amazon: 30-inch 2-stop Diffuser
Books, Websites and Classes
There are a lot of other places to find education and resources about food photography. I’ve listed a few below:
- Food Styling for Photographers (book)
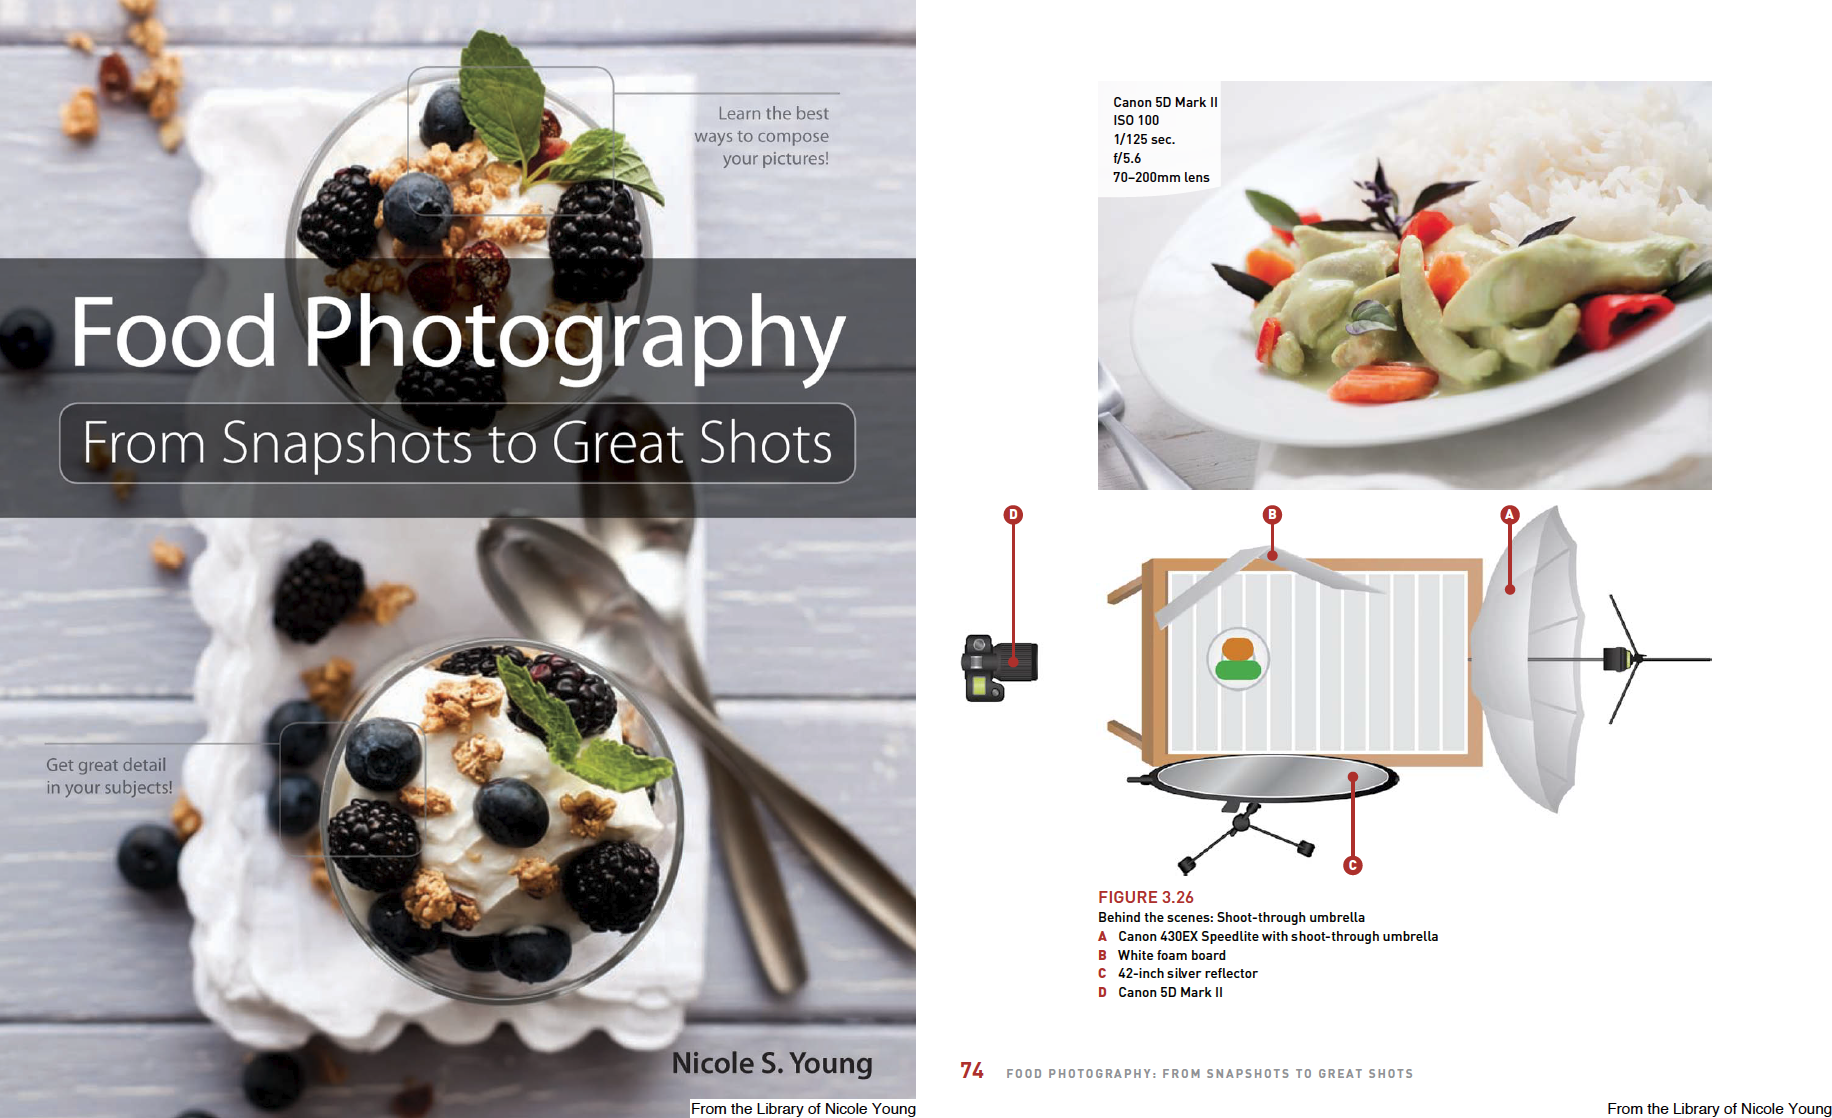
- Food Photography: From Snapshots to Great Shots (my book)
- Food Photography: From Snapshots to Great Shots (Second Edition) (my book)
- Penny DeLosSantos on CreativeLive (video class)
As a food photographer who works out of my home (creating food photography almost exclusively for my stock portfolio) I prop and style all of my dishes. Over time I’ve found this to be challenging, but also very rewarding and I’ve accumulated not only a lot of dishes, but I’ve also discovered and created several different tools and techniques I use when working with food. And, as is my nature, I thought I’d share these resources with you!
So to learn more about the items I use as well as where you can get them (like fake ice, for example) be sure to keep on reading. Enjoy!

Fake Ice
If you ever photograph drinks, or ever plan to, then you should really invest in one or two different types of fake ice. The professional grade stuff, like custom-made splashes, can be extremely pricey, and most often is usually rented (not purchased). However, for at-home food photographers there are much less expensive options out there. I get mine over on Amazon and you can find them for under $20/bag.

Foam Board
Of all the tools I use, these are by far the least expensive and most useful. I use them for reflection, diffusion, blocking light, and even tabletops (I wrap cloth around them and secure it to keep the wrinkles out).
I use the 20-inch x 30-inch size, and to make them stand on their own cut them in half, and then tape them back together (I use gaffers tape, but you could probably use duct tape, too). This way they will fold like books and stay propped open to add fill light, just like I did in this photo to the left.
• You can buy foam board at almost any craft store (or department store where they sell craft items).

Tacky Wax
Sometimes you have something positioned “just so” and you need it to stay in place.This will usually be a small item, or a napkin or doily you need to stick to the table, just like I did with the photo of this cannoli. When you run across a situation like this, the absolute best item you can use is Tacky Wax (or something similar). It’s pretty sticky stuff, but it’s clear-ish (like hair wax) and helps keep trouble items in-place.
• Buy Tacky Wax on Amazon.com; you can also get it at craft stores, and even some camera stores carry it.

Crackle Paint
I love this stuff! It gives your table-top surfaces that “weathered” look, and you can really get creative with different color combinations. I tend to use this on wood surfaces, but I’ve seen other photographers use foam board with just as much success. My favorite brand is Valspar. I’ve tried the Martha Stewart stuff but it didn’t work nearly as well (and is actually kinda worthless, IMO). I’ve also seen posts where people get the same look using Elmer’s Glue, so you might want to look into that, too.
• I get my crackle paint at Lowes (here’s a link); there are other brands, and you can also use Elmer’s Glue for the same look (here’s the link for that).

Water Bottles
These are good for filling with water (or whatever your spritzer-liquid-of-choice may be). I use them to add water to fresh herbs, fruit, and vegetables, or even for flowers for still-life images or add-ons to your food set. (I will also often carry a tiny water bottle with water in my camera bag for macro shots when I’m doing landscapes). You can get these almost anywhere, such as a department store (Target, etc.), Amazon, craft stores, etc.
- Food styling tip: Just Add Water
- Get Evian canned water spray on Amazon

Dulling Spray
When you have dishes or flatware that shines, it can add odd or unwanted hot-spots in your photos. It also tends to show the reflection of whatever is in your room or setup. The quick fix for this is to get a can of dulling spray and give it a smooth and even surface to reflect off of. It only takes a few minutes for the paint to set, and is a really great idea for props and silverware that you use specifically for your food photography.

Vinyl Backdrops
I recently discovered that I can use vinyl backdrops with table-top backgrounds printed on them to use with my food photographs! I’ve purchased a few, some were hit and miss in terms of quality, but overall they are pretty good (and so much easier to store than dozens of wooden boards). Here’s a photo I took with one. They clean up pretty easily, too … and I kind of wonder how difficult it would be to make my own :)
- Ink & Elm: http://www.inkandelm.com/

Styrofoam and Small Bowls
When you need a to add little bulk to your food, the easiest way is to place something underneath. For slippery stuff, like pasta, styrofoam is a good fit. However, this will usually be for food you are not planning on eating after you photograph it, as you’ll end up with little bits of styrofoam stuck to the food. Another option is to use small bows, placed upside-down in the dish. This helps bulk up the food without messing with it (in other words, you can have your cake and eat it, too). :)

Cardboard and toothpicks
When you want food to stay put, and you don’t mind adding a few things inside of the food to make it work, then consider using cardboard and/or toothpicks. For food that you want to add a bit of bulk to, particularly things like sandwiches or stacked foods, then this is a good trick to keep in mind. And, as long as your cardboard is clean, you can still eat the food after you’ve disassembled everything. :)

Creme Brûlée Torch & Charcoal Starter
Adding a little extra char, or even grill marks to food on-set can be done easily with the right tools. A creme brûlée torch will allow you to selectively “char” your food, and a charcoal starter can add thick grill marks. Careful with these, though, especially the charcoal starter! That thing gets super-heated … I would highly suggest using it in the kitchen, as opposed to directly on-set. :)

Hand Steamer
A hand steamer is a useful tool to have for a few different reasons. First, it’s an easy way to get those pesky wrinkles out of linen. Secondly, it can make a fun toy to play with if you want to do creative shoots, like in the example to the left. I added the steam with the hand-steamer and then used Photoshop to mask out the unwanted areas.
- Here’s a link to the original article with a step-by-step tutorial: Adding Steam
- This is the steamer I use: Steam Buddy Handheld Steamer

Lastolite Tri-grips
One thing I use in nearly every single shoot is a diffuser behind my setup. This cuts the light down and softens it, and it also will kill harsh light (if you have the sun coming in through the window. I prefer the Lastolite TriGrip brand because they prop up easily right on the table and lean agains the window (or my foam board), unlike circle diffusers which tend to roll around a lot. :) I currently have a 1-stop diffuser, but will be adding a 2-stop to my collection, soon.
Note: The difference between the 1-stop and 2-stop is the amount of light that they will block; the 1-stop cuts out 1-stop of light, and the 2-stop cuts out two stops of light (or, double the amount of light the 2-stop). If you have a LOT of harsh light coming in through your windows, or you do a lot of photography with strobes or flashes, you may want to consider the 2-stop; if you have a soft and diffused light coming in through your windows then the 1-stop will probably suit you just fine.
- TriGrip Diffusers on Amazon: 30-inch 2-stop Diffuser

Books, Websites and Classes
There are a lot of other places to find education and resources about food photography. I’ve listed a few below:
- Food Styling for Photographers (book)
- Food Photography: From Snapshots to Great Shots (my book)
- Food Photography: From Snapshots to Great Shots (Second Edition) (my book)
- Penny DeLosSantos on CreativeLive (video class)

Nicole is a photographer, published author, and educator specializing in Lightroom, Photoshop, and photography. She is best known for her books on food photography but is widely versed in various photographic genres, including landscape, nature, stock, travel, and experimental imagery.

Great post Nicole! Lots of great tips! I’m in the middle of your book now and very much enjoying it. Now the getting sorted out and taking the food photos part!
Wow, I had no idea so much was involved in food photography and no wonder the food always looks so good :-) Thanks for passing these tips on.
What a great post, thank you for these tips, very useful !
Thank for the tips. Some really useful ones. My creme brulée torch will get an outing very soon.
Best,
Conor
Just wanted to say thanks for the great information that you provide. I first found you on G+ and am glad I did.
Vinyl backdrops!! I must check these out. Thank you for sharing.
Great post! Thank you Nicole! Just wanted to share that on July 19 CreativeLive will have another food photographer (Andrew Scrivani) and its 3 days long! It’s totally free to watch and should be great!
Excellent tips! I have never heard of dulling spray!
The faux tabletops via vinyl is an interesting idea! My primary question about doing that, however, is whether you’ve encountered any rejections from stock libraries for those… the vinyl texture is visible in highlight areas, most notably in the cracks between boards: it should be black/shadowy, rather than seeing vinyl cross-hatching. Is that ever a problem?
Most of the time I have the vinyl part of the background in the out-of-focus portion of the frame, but I do see what you mean about the vinyl. I’m looking into seeing if there is a way to have a table-top printed without the texture, which I think would solve the problem. I may also try spraying dulling-spray in the front part of the vinyl to dull it, too (or just coat the entire thing with some sort of matte finish).
Wow, very useful post! Thank you for the great tips. I especially like the idea of using the Valspar Crackle Paint for backdrops…. I’m always looking for ways to increase my backdrop collection!
Hair spray can also be used for a dulling spray.
These are awesome resources–thank you!
Great tips! I’ve shared the link with my Creative Cooking Crew.
GREAT post! Thanks so much for sharing all this info. Definitely bookmarking this page. :-)
Nicole, this was really really useful, thanks!
Great list of resources and tools. Thanks for sharing it. I have a few more things that I might need on my Amazon Wish List now….. :)
Great tips, thanks for sharing. I need to go shopping now.
Thank you for these great tips! What is the tripod and head system you are using here?
It’s a Custom Bracket (http://www.custombrackets.com/digital-pro-sv.html) on a Benro 3-Way panhead (http://www.benrousa.com/products_details_HD-18.html).
Thanks for the awesome post, Nicole! Such helpful info. I’ve been looking everywhere for the perfect vinyl floordrop, and I love the ones at ink&elm that you linked to. Can I ask which size you typically buy?
Hi Jessica, I’m happy you like the post! I think I have the 3′ by 3′ square vinyls. I work in a pretty tight space with my food images so I don’t usually need to cover the whole table. Here’s a BTS of it, the vinyl is not in the “after” image but you can see it draped over the table on the left: http://nicolesy.me/17cKAtt
Wow, so helpful. I’ve recently started my own food blog to combine my passion of cooking (and eating) and photography and your tips are great. The foam boards will certainly help me with my lighting issues I think
Superb stuff
Thank you, that was really useful. Are there any foods that are easier vs more difficult to work with?
Great tips! The upside down bowl is genious! I have a stack of wooden tabletop props on my porch….i need to check out those vinyl tabletops! Thank you for all the information!
This is great! Thank you so much for sharing Nicole!
Wow…this is the best food prop and styling article I’ve seen (and I’ve been searching for a good one ilk a needle in a haystack). Awesome tips–I can’t tell you how appreciative I am!
Kelley
I think I just found my dream job! Thanks so much for the great resources and tips.
I am so glad I found this site.
these are fantastic tips! wow!
Great photos! FYI the Ink and Elm backdrops are not a quality product, they are really inferior and poorly made compared to the ones from LemonDropStop. I’m not affiliated with them in any way, I just wanted to let you know! The LemonDropStop Backdrops are much less expensive too and they have professional customer service, unlike Ink and Elm. I don’t want anyone else to make the same mistake by spending a lot of money on such a poor product that doesn’t have any depth or photography well. Photographers must stick together!
I recently had a major problem with Ink and Elm too! And their rebuttal to a complaint is to twist the truth and make up lies to make the customer look like a crazy person! Very interesting to see another customer with a terrible experience too.
Love you mam! Absolute life hack! Love it!
Your amazing thank you for all your help xoxo
This is so helpful….. I have just embarked on my photography journey and really love food styling and photography. Thanks so much for some great tips and ideas.
The absolute BEST place for flat vinyl backgrounds is Swanky Prints – check them out at either http://www.swankybackdrops.com/shop/ or http://www.swankyprints.net/ or on Etsy. Good quality and lots of choices.
Hi! Do you know where to get a scratched metal surface as a table surface? I’m struggling to find them in home improvement stores. Thanks!
Thank-you for sharing your knowledge. I can wait to start using some of your tips on my new blog. The links will really help too.
Thank you for sharing… Tips that I looking for
Great tips! Thank you. Will help in my magazine work!
Great tips! I’m getting started with food photography. I didn’t know how to bulk up food, so I resolved the matter by shooting food in really small dishes. Thank you so much!
Thanks so much for sharing these tips. I found them really helpful! Can I choose to use the foam board without pinning a white sheet of cloth to it? Will it affect the quality of the light reflection?
I use my foam boards without any cloth attached to them. I do use diffusion panels to soften the light, but they are not always necessary (depending on the light you have available and the look you are after).
Awesome! I heard somewhere that food photographers sometimes microwave wet cotton balls to get the ‘steam’ effect behind food , but these tools would be much easier!
Nice read. I just bought the Vinyl Backdrops from Ink & Elm as you mentioned. It arrived but I am a bit disappointed. I bought 3×4 feet size. The resolution is not very high. That said when you place food on top of it. It looks not real. because the food looks sharp but the surface look blur.
Yes, it’s hit and miss. I assume that some of the file resolutions are too small to be printed at certain sizes, which is unfortunate. I’ve moved on from using these as tabletops and may only use them as backdrops in the future (blurred out and not visible in detail). I can see how they might work well with other things, such as baby portraits, however.
What are your some favorite background? I find every type of material come with compromise. Tablecloth do look nice. but if there is winkle, it won’t look good in the photo. so need iron before using it. kind a pain for location shoot. wooden surface is also nice. but very heavy and quite expensive to own.
Wow what a wonderful tips Nicole, thank you for that! Great to find you’re website through pinterest. I also make a lot of backgrounds by myself but never thought of this crackle paint.
I am so new to food photography and can’t wait to try out some of these tips and tricks! Thanks for sharing them :)
Wow! First of all, thanks so much for sharing your knowledge! It’s fascinating the amount of things you can use, some of them are actually very simple. I also liked that you seem to use natural light only, am I wrong? Since you show the tri-grip between your set and the window. I used to shoot with natural light only but hard sunny days where very tricky to even with foam boards ans such. That, and the fact that sometimes I shoot for hours so there’s no chance to have even light the whole shooting. That’s why I started relying on my softboxes. I might give natural light more chances, it’s a flattering light. I use wood for surfaces to put the plates on, and they’re so heavy and big that they almost don’t fit in my car. I do appreciate the thickness of the pieces of wood I have because I tend to shoot from low angles and regular tables don’t work, so I use them as tables. I wonder if I can get those vinyl backdrops, tough, they look great. The crackled paint looks amazing as well. So sad that a lot of the things you listed here are not available in my country. Anyway, thanks again, I really enjoyed this article!
Thanks so much for your comment! I use a lot of natural light but also will use my strobes sometimes, too. They offer greater control for certain things, and small strobes (flashes) can allow you to work with fast-moving food items (falling sprinkles/toppings, steam, etc.). But I always have light coming in through my kitchen so sometimes it’s easier to not deal with setting up the lights for a quick shoot :)