
If you want to add a digital photo mat to your photos, then you’ve come to the right place to learn how! Below are instructions on how to create your own mat using layers and layer styles.
I also have a free Nicolesy Photo Mat action set that you can download if you would like to automate this process. Click here or scroll down to access this download.
Step 1: Open and prep your file
First, open an image into Photoshop. This can be any image file type with as many layers as you would like.
Then, prep the image in the layers document to add your digital mat:
- If you are working off of the background layer, click the lock icon to unlock this layer.
- If your image has several layers, click the top layer to activate it and create a merged copy using the keyboard shortcut Cmd + Opt + Shift + E (Mac) or Ctrl + Alt + Shift + E (Windows).
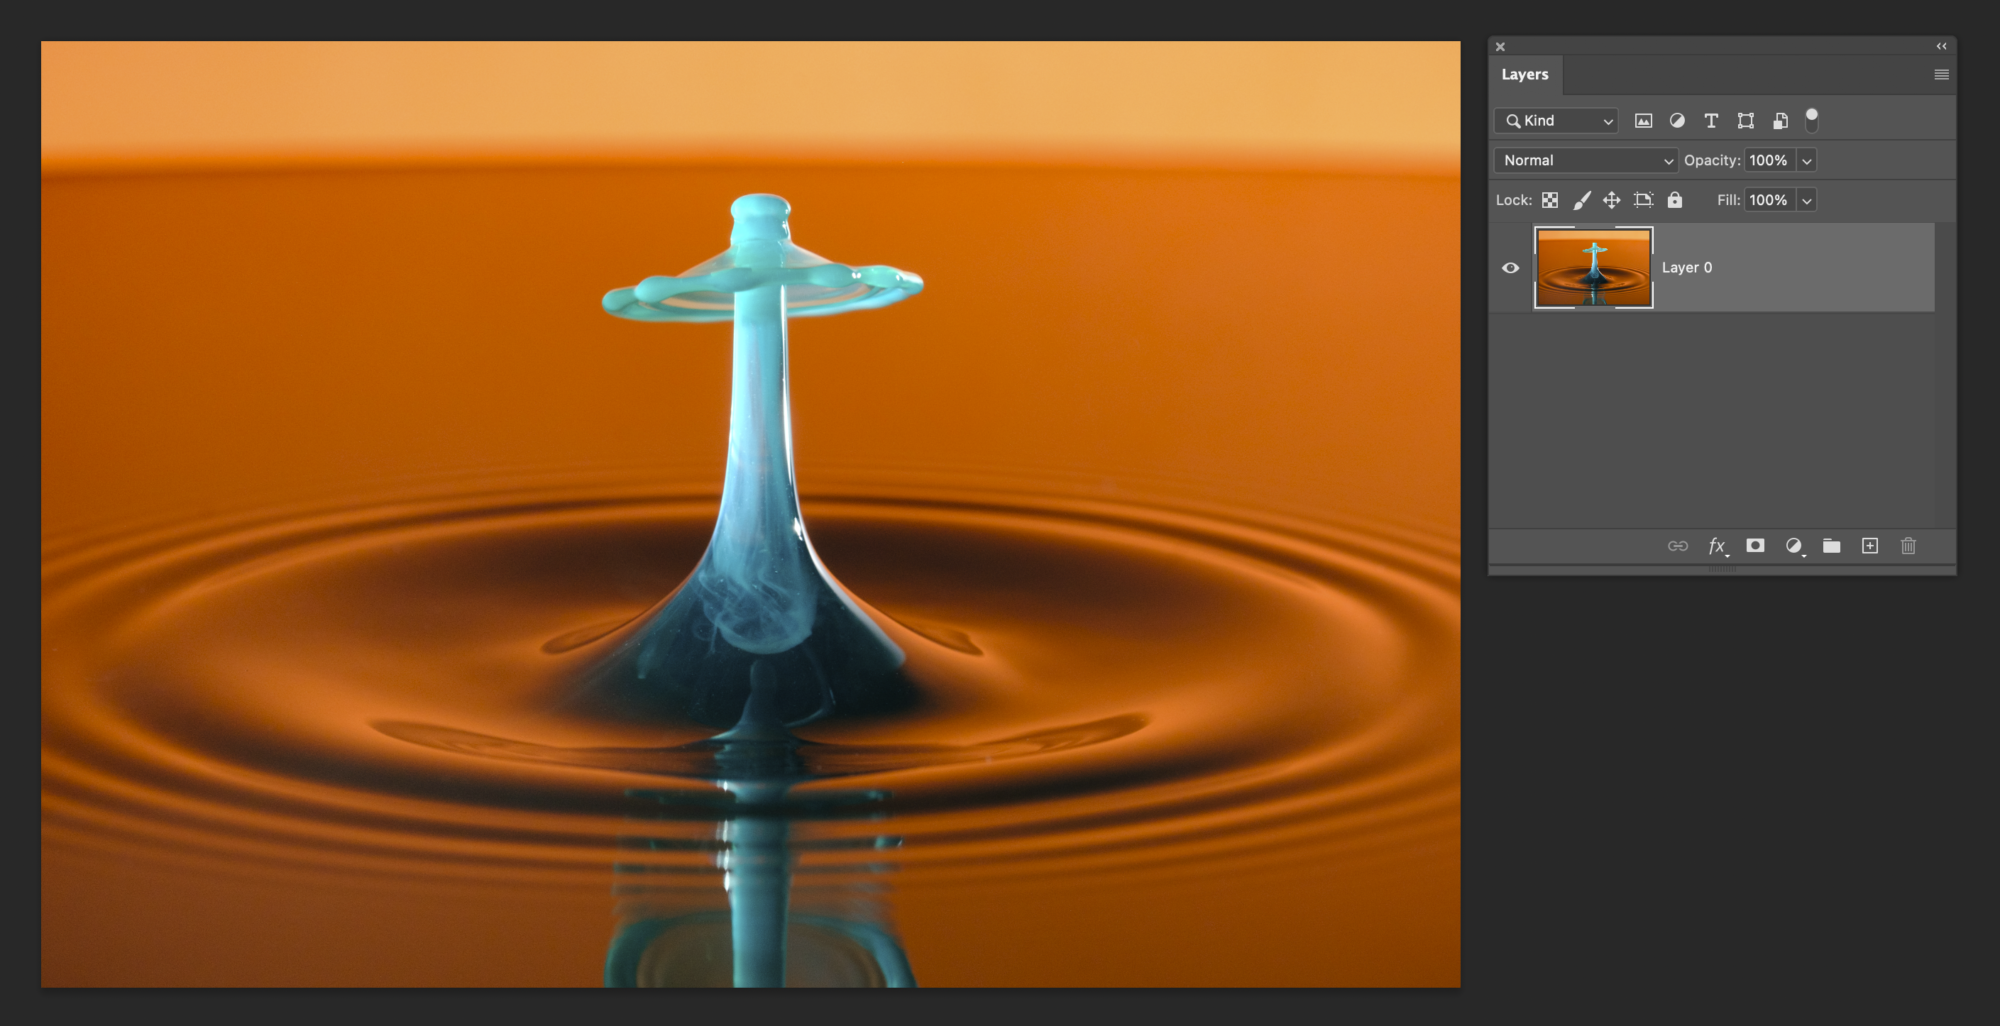
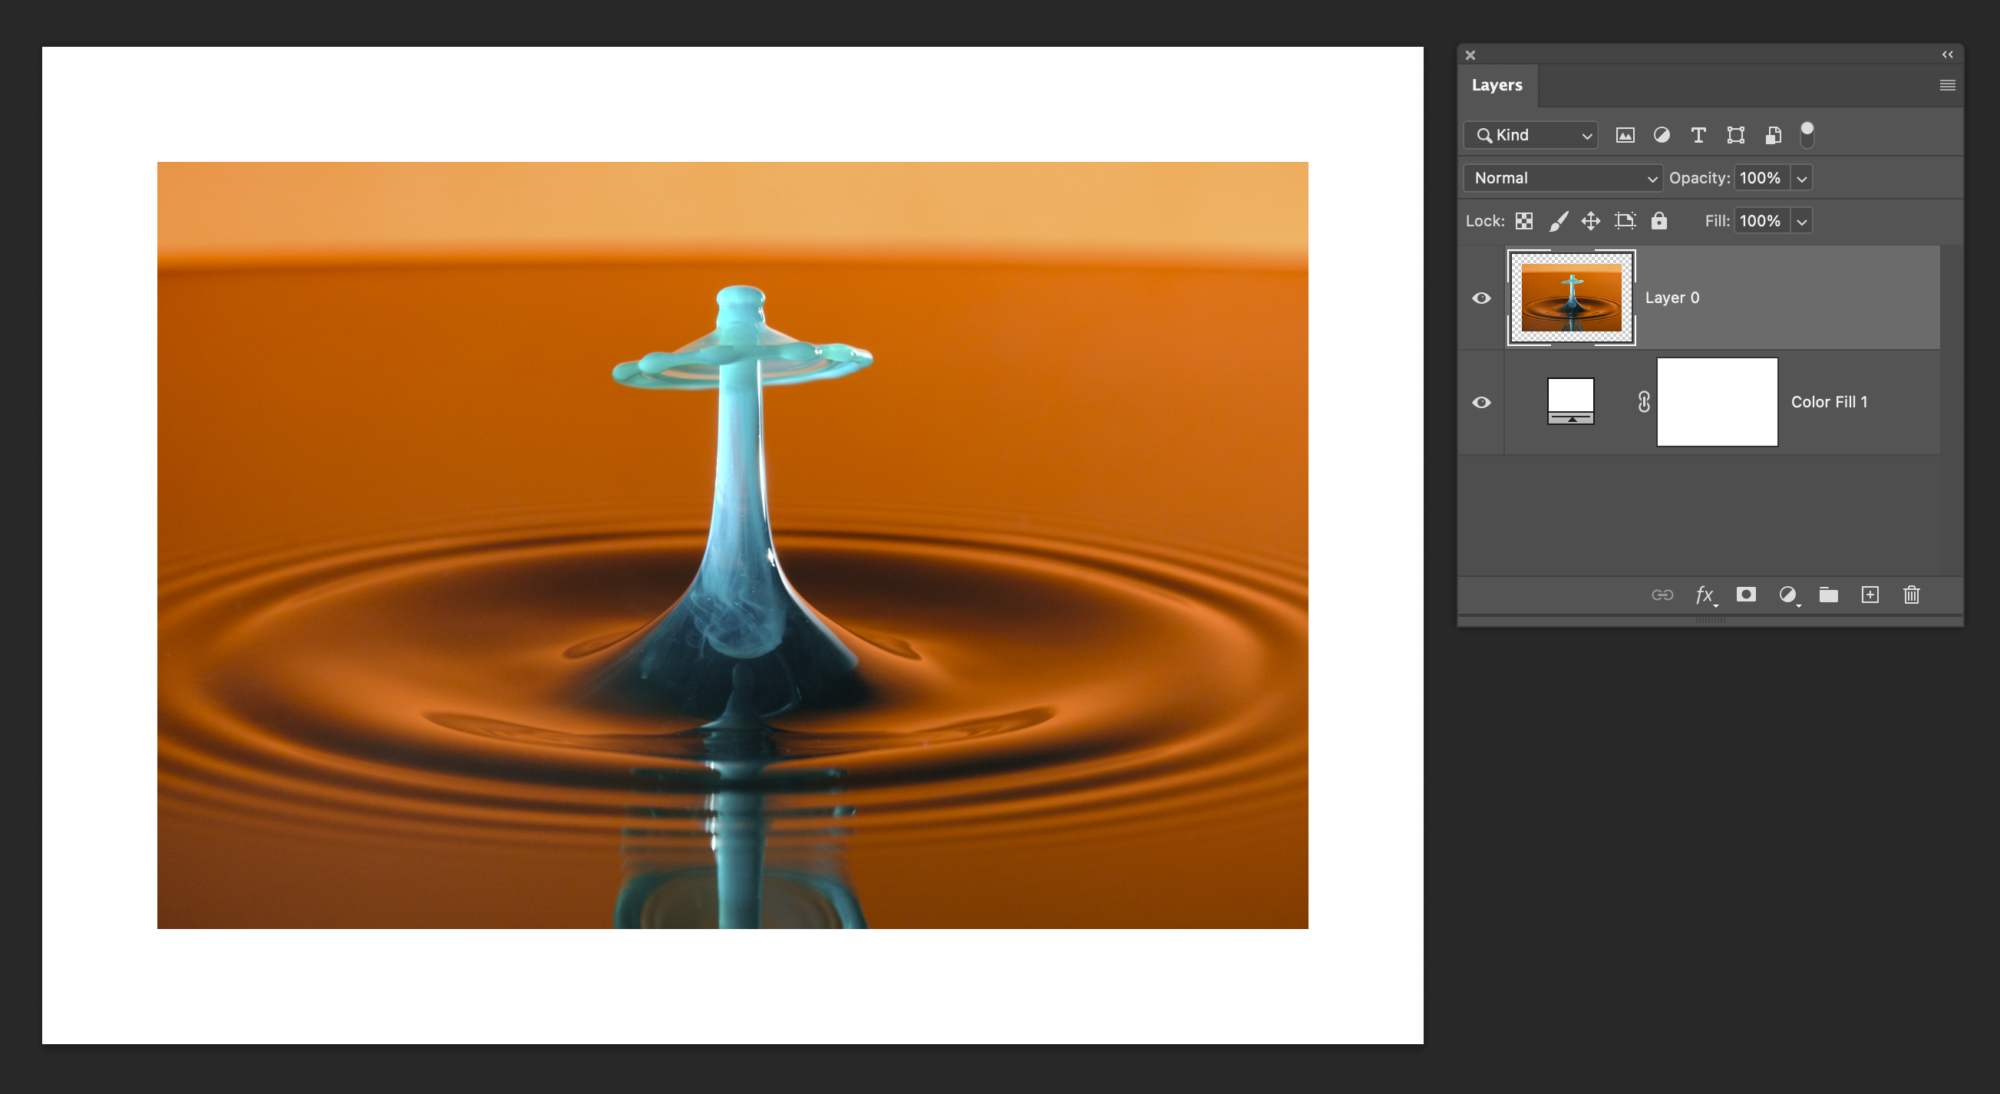
You should now have one single layer at the top of your layers panel that shows your completed photograph. This can be a single image in the layer (an unlocked image layer), or a merged layer that combines all of the layers you originally had in your document.
Step 2: Add a white Color Fill layer
In the Layer panel, click the Adjustments drop down and select “Solid Color”. Set the color to white (or whichever color mat you prefer) and click OK.
Alternately, you can use the menu to add a color fill layer by going to Layer > New Fill Layer > Solid Color.
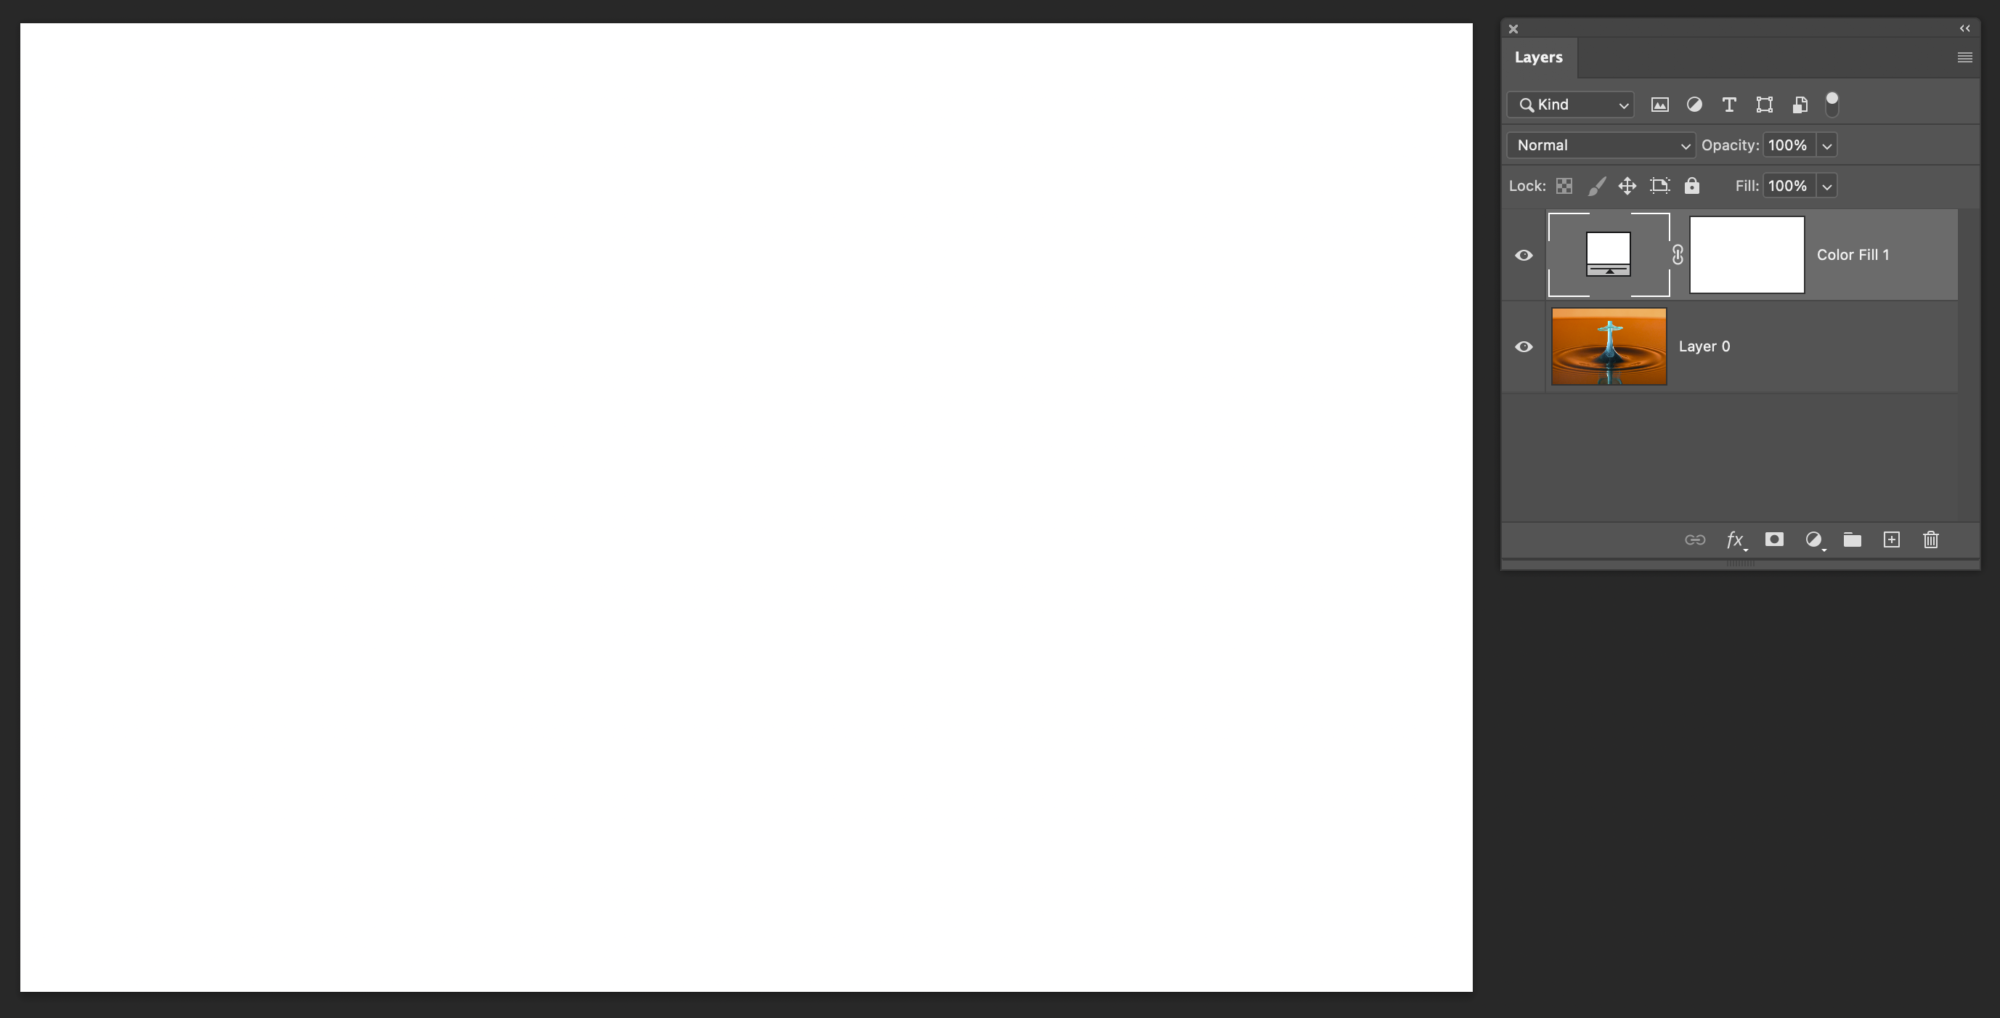
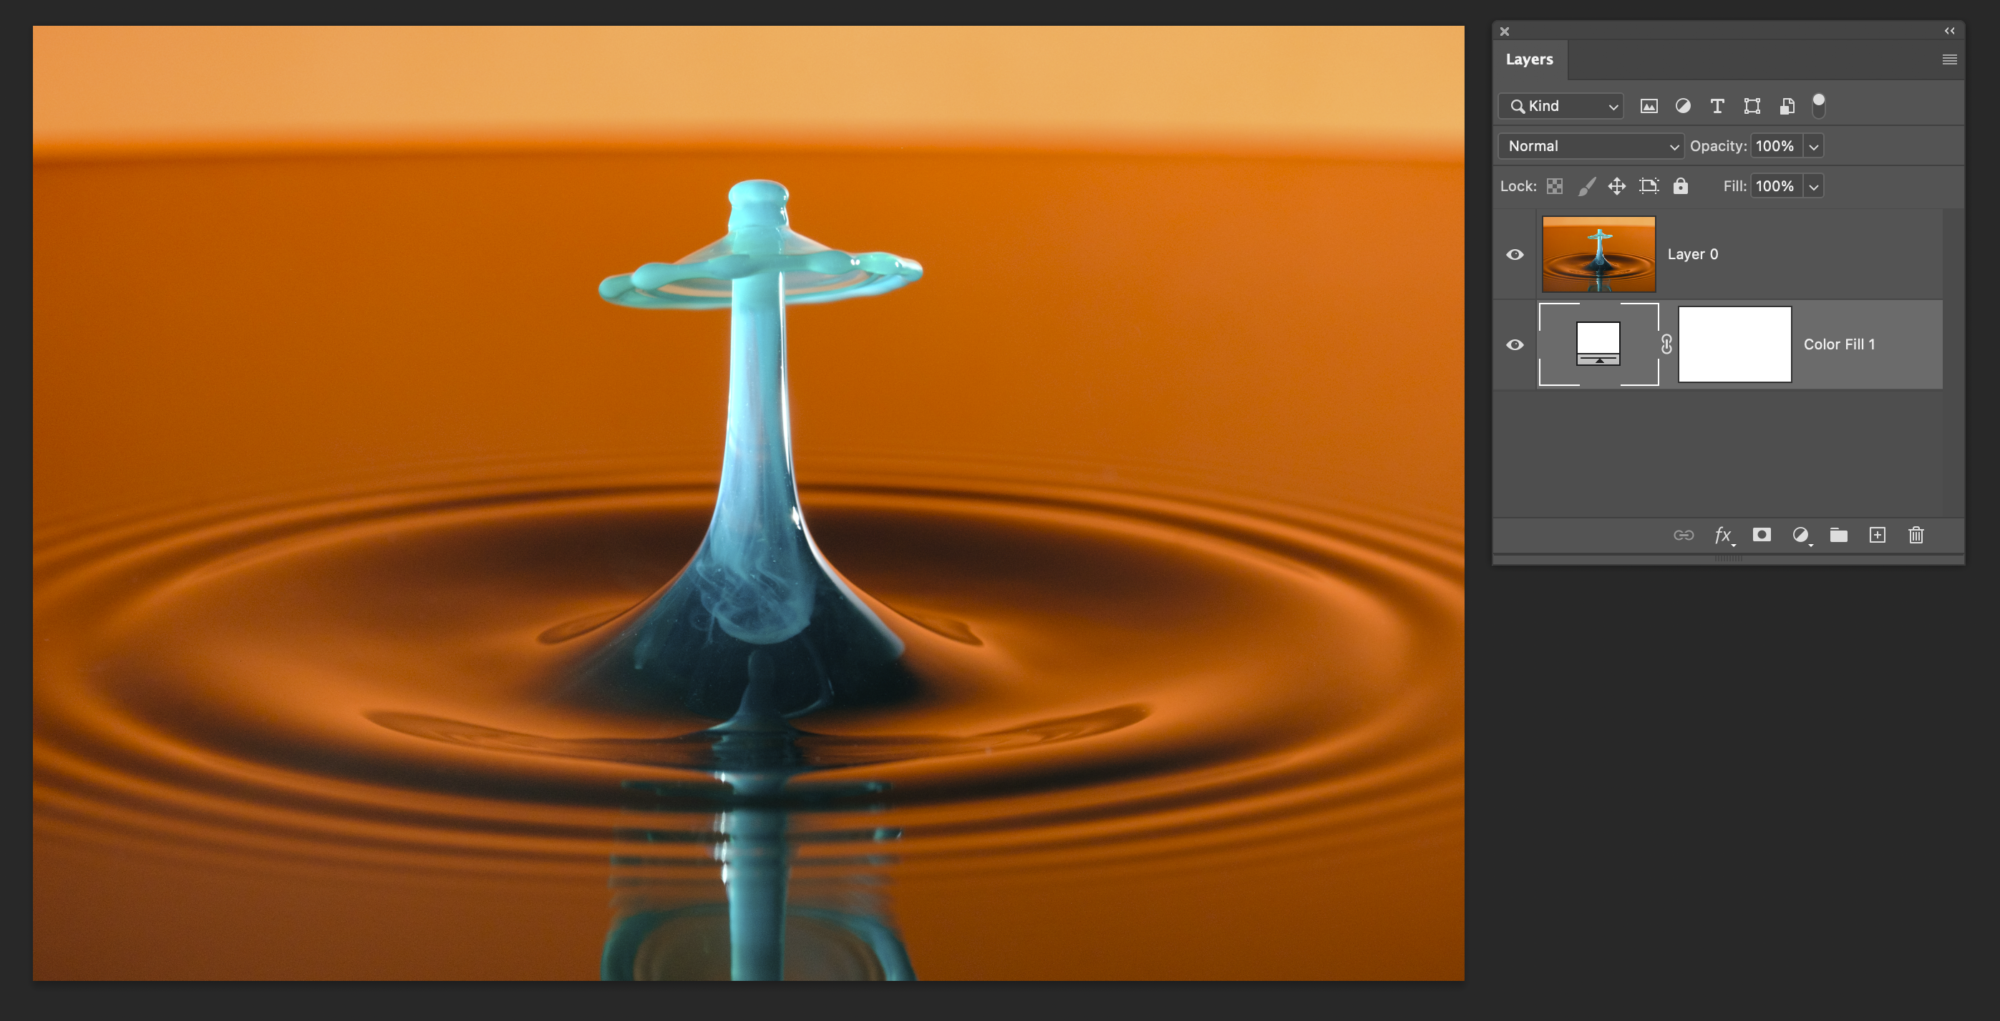
Then, drag this new Color Fill layer so it is below the top-most image layer (either the merged layer, or, if you only have one layer in your document, move the Color Fill layer to the very bottom).
Tip: If you’re not sure what color you want to use right now, that’s okay! Because you are using a Color Fill layer, the color can be changed at any time. Simply double-click the color swatch in the layer to open the color picker window.
Step 3: Resize the canvas
Now it’s time to resize the canvas to create the mat effect.
- First, go to Image > Canvas Size.
- Next, check the Relative box and make sure that the Anchor is in the middle (it should be there by default).
- Then, change the measurement units are both set to Percent.
The amount you enter into the Height and Width boxes will boil down to personal preference, but I have some recommended settings below (depending on your image’s orientation):
HORIZONTAL
Width = 20%, Height = 30%

VERTICAL
Width = 30%, Height = 20%

SQUARE
Width = 20%, Height = 20%

PANORAMA
Width = 15%, Height = 50%

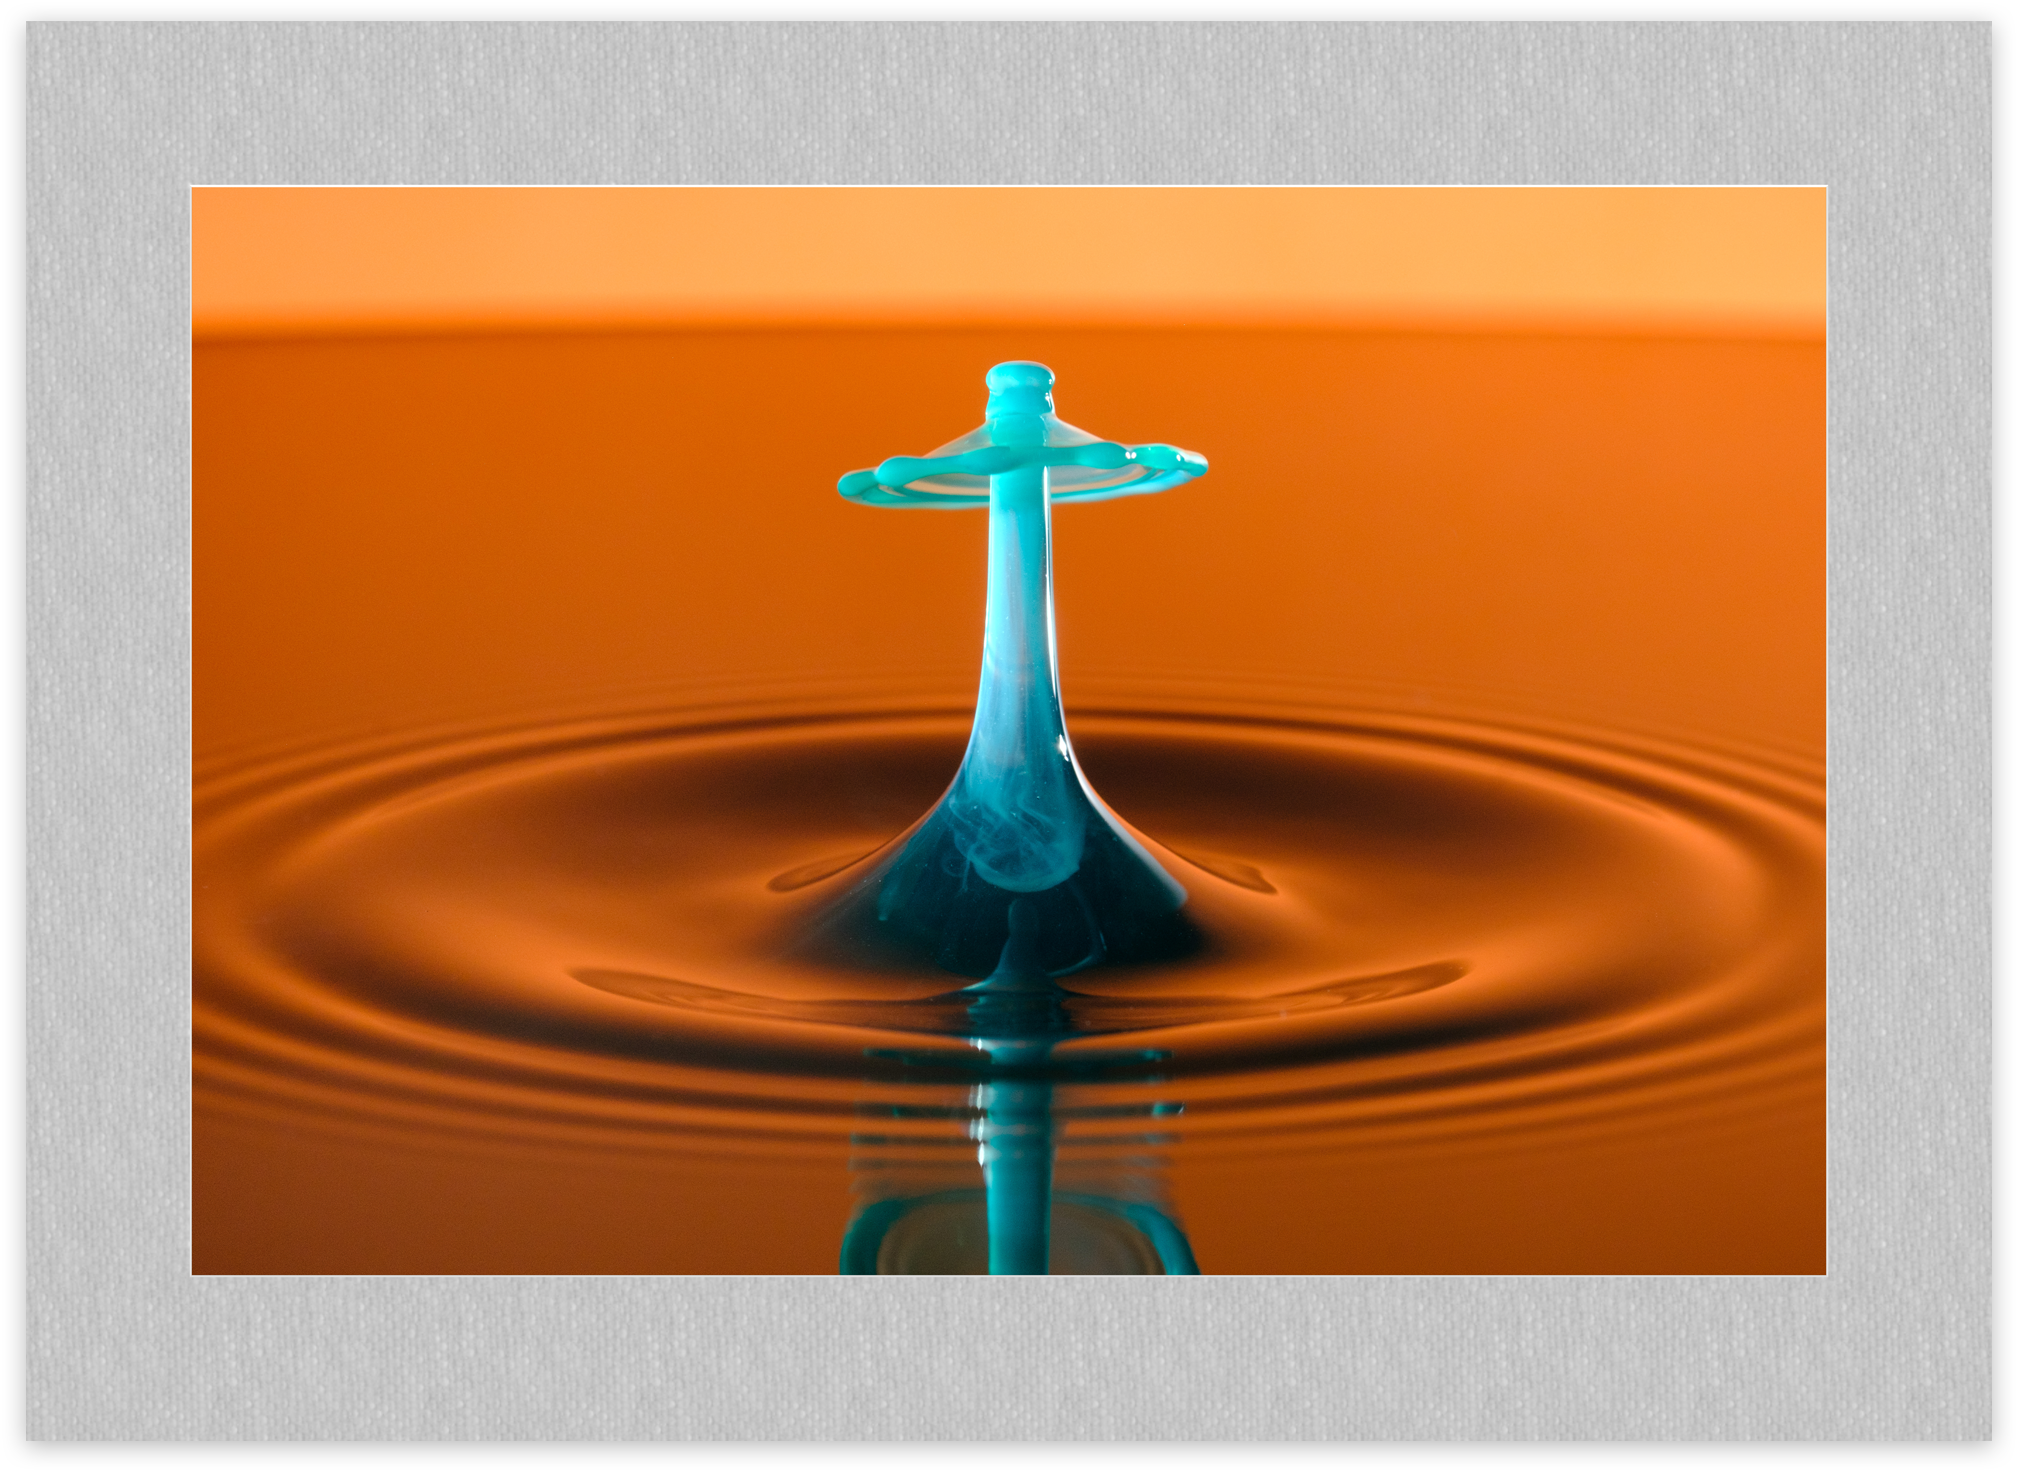
This is what the document looks like after the Canvas Size has been changed. You can stop here if you want a more modern look with flat photo edges, or continue below to add a cut beveled edge to the inside of the photo mat.
Step 4: Access the Layer Styles window
Next, you’ll add a Layer Style to the image to give it the look of having a cut inner portion of the mat.
- First, click the top image layer to activate it.
- Then, access the Layers Styles window and click Bevel & Emboss. You can get to this either by double-clicking the blank space next to the layer’s name or by going to Layer > Layer Style > Bevel & Emboss.

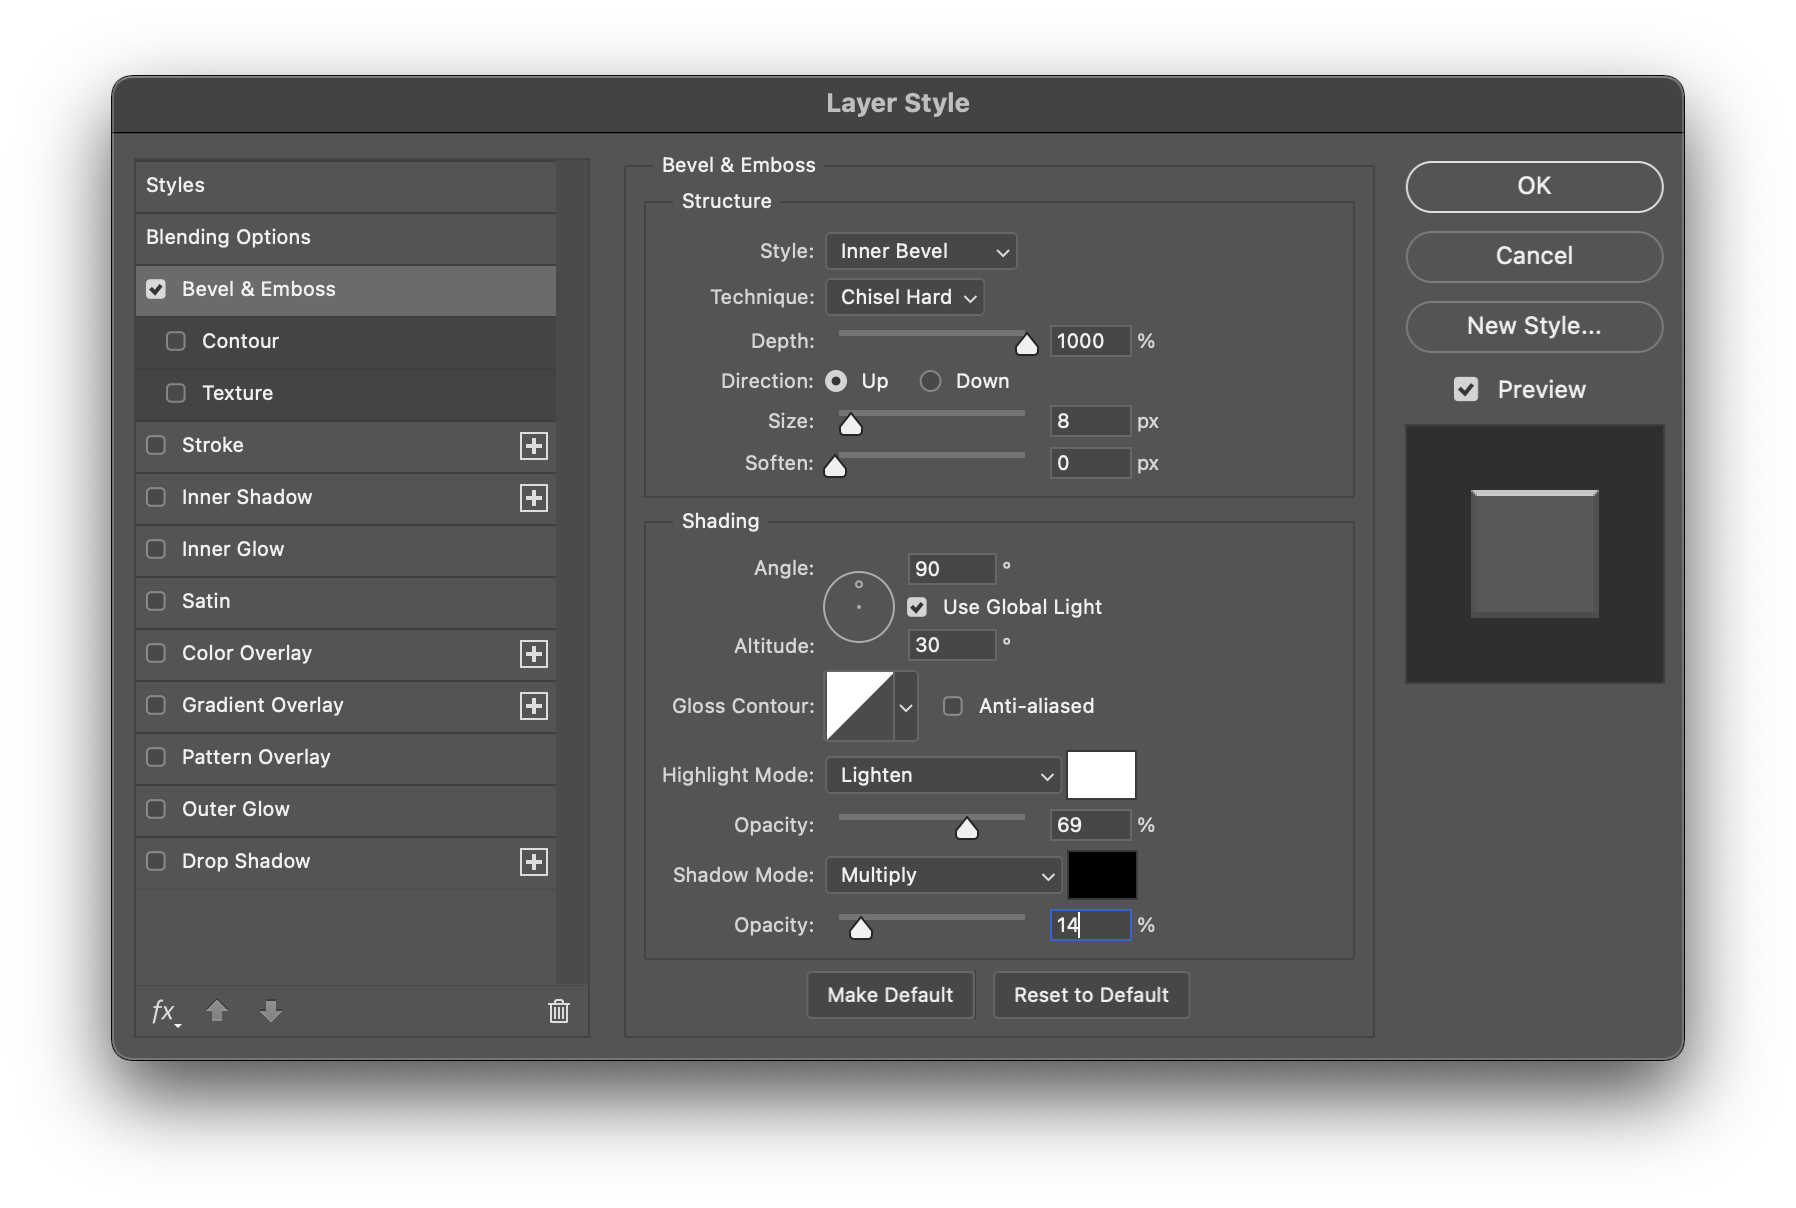
Step 5: Bevel the inside edges of the mat
With the Bevel & Emboss style selected, apply the following settings:
Structure:
- Style: Inner Bevel
- Technique: Chisel Hard
- Depth: 1000%
- Direction: Up
- Size: 8px
- Soften: 0px
Shading:
- Angle: 90º
- Altitude: 30º
- Highlight mode: Lighten
- Opacity: 69%
- Shadow Mode: Multiply
- Opacity: 14%
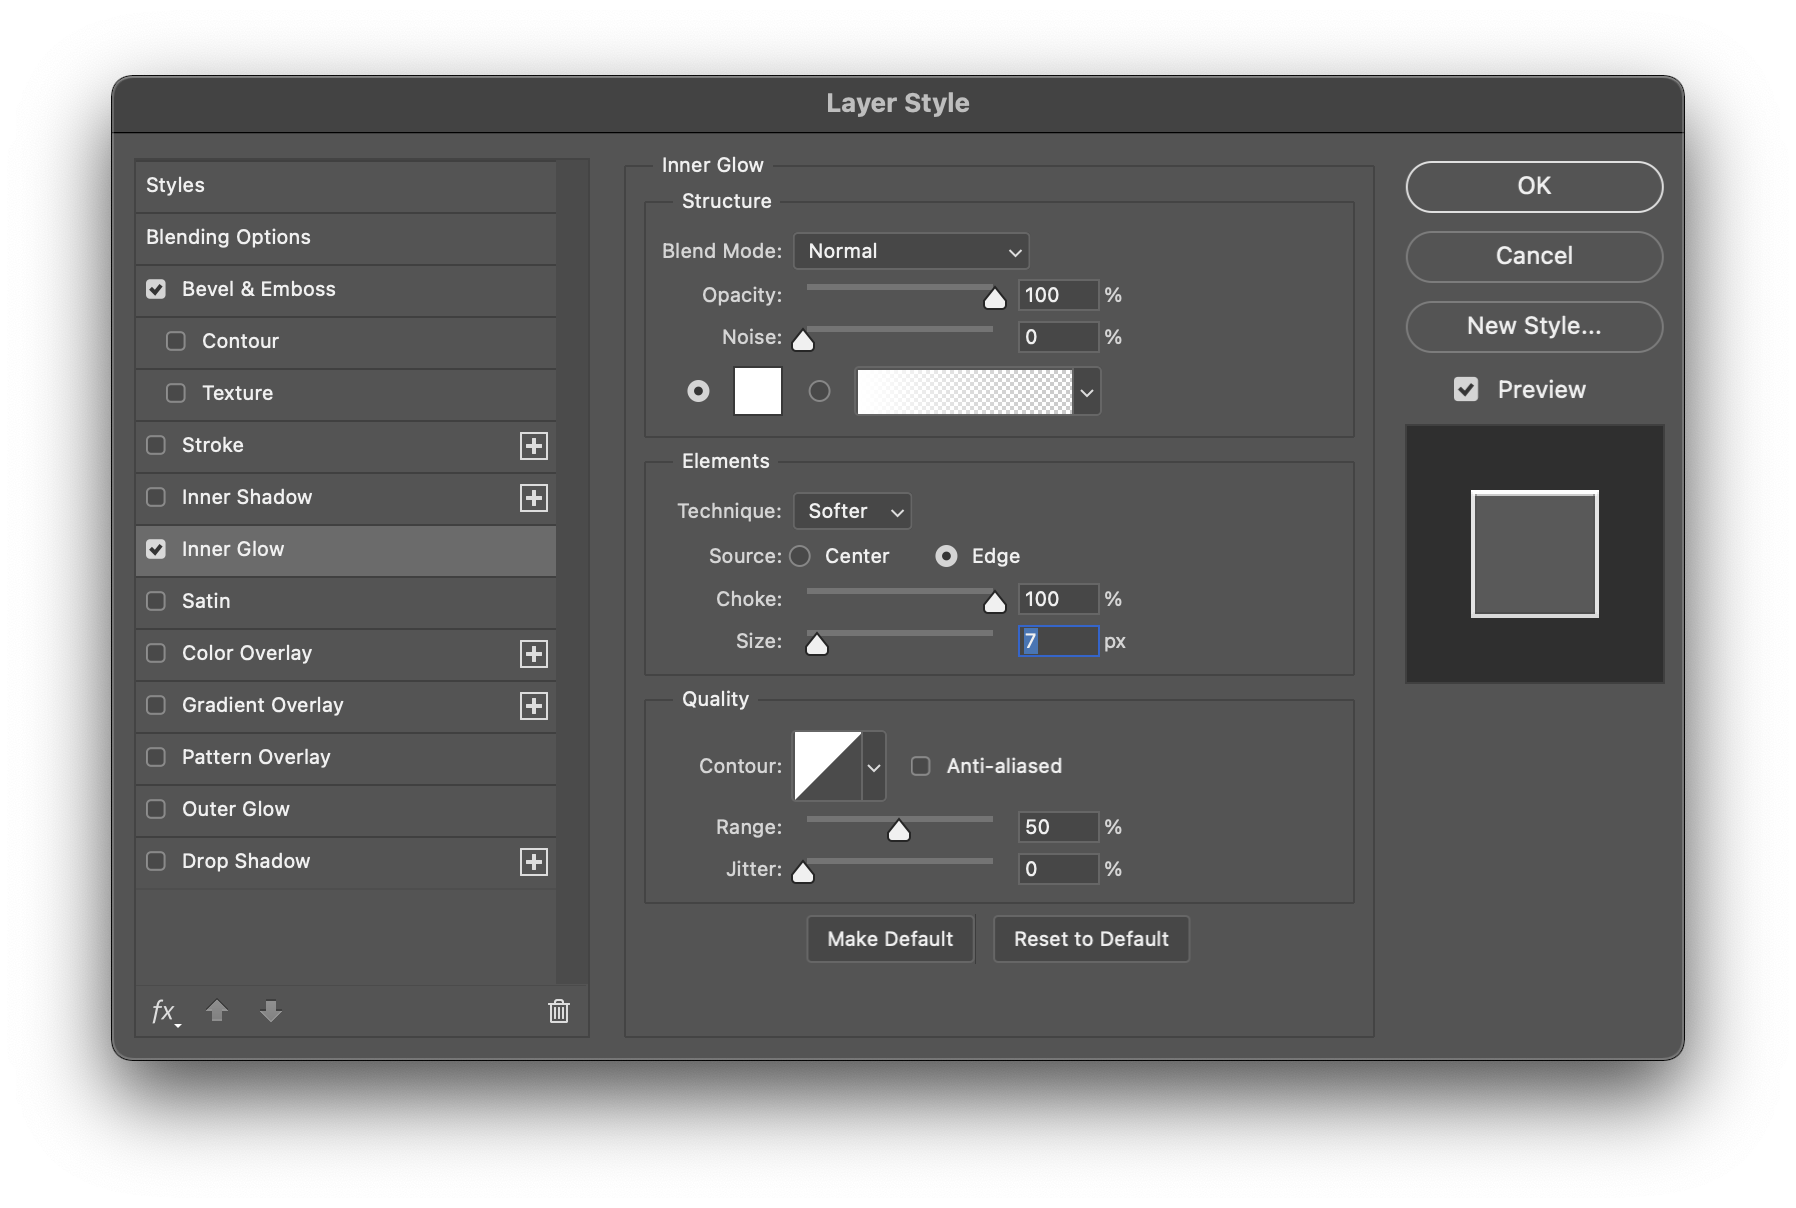
Step 6: Add an inner glow to your digital photo mat
While still inside the Layer Styles window, click Inner Glow to apply that style and apply the following settings:
Structure:
- Blend Mode: Normal
- Opacity: 100%
- Noise: 0%
- Set the swatch to a SOLID WHITE (not the gradient option)
Elements:
- Technique: Softer
- Source: Edge
- Choke: 100%
- Size: 7 px
This shows a close-up of the corner of the inside part of the mat with the beveled edge effect added:

Final digital photo mat image
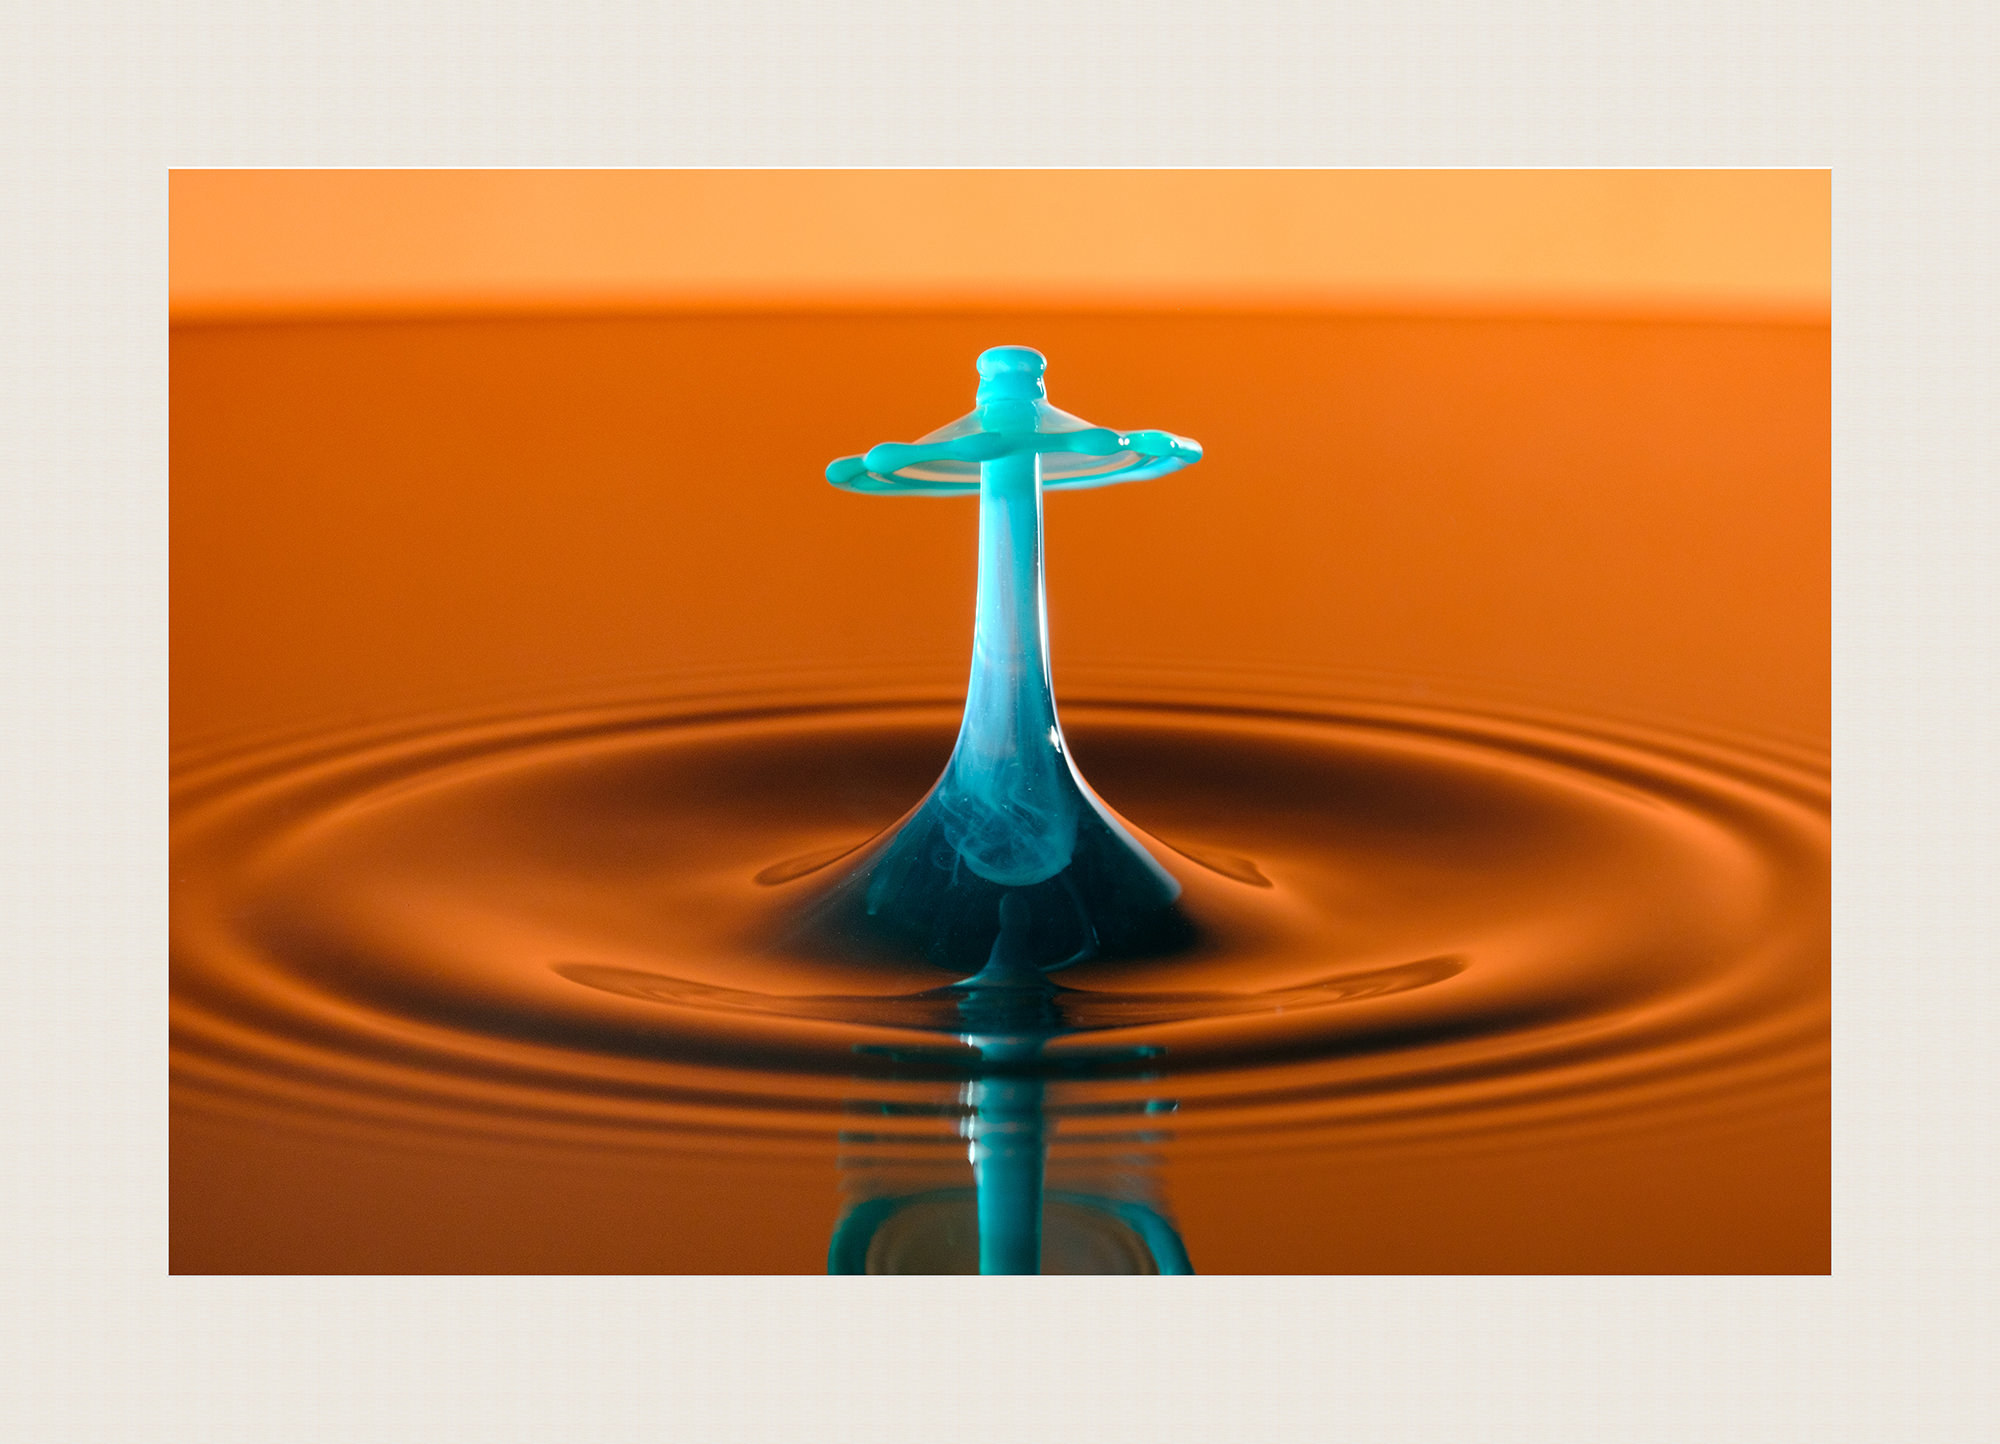
Your photo now has a white photo mat with a cut bevel inside of it. Feel free to alter the color of the mat using the Color Fill layer (double-click the thumbnail to make the change).
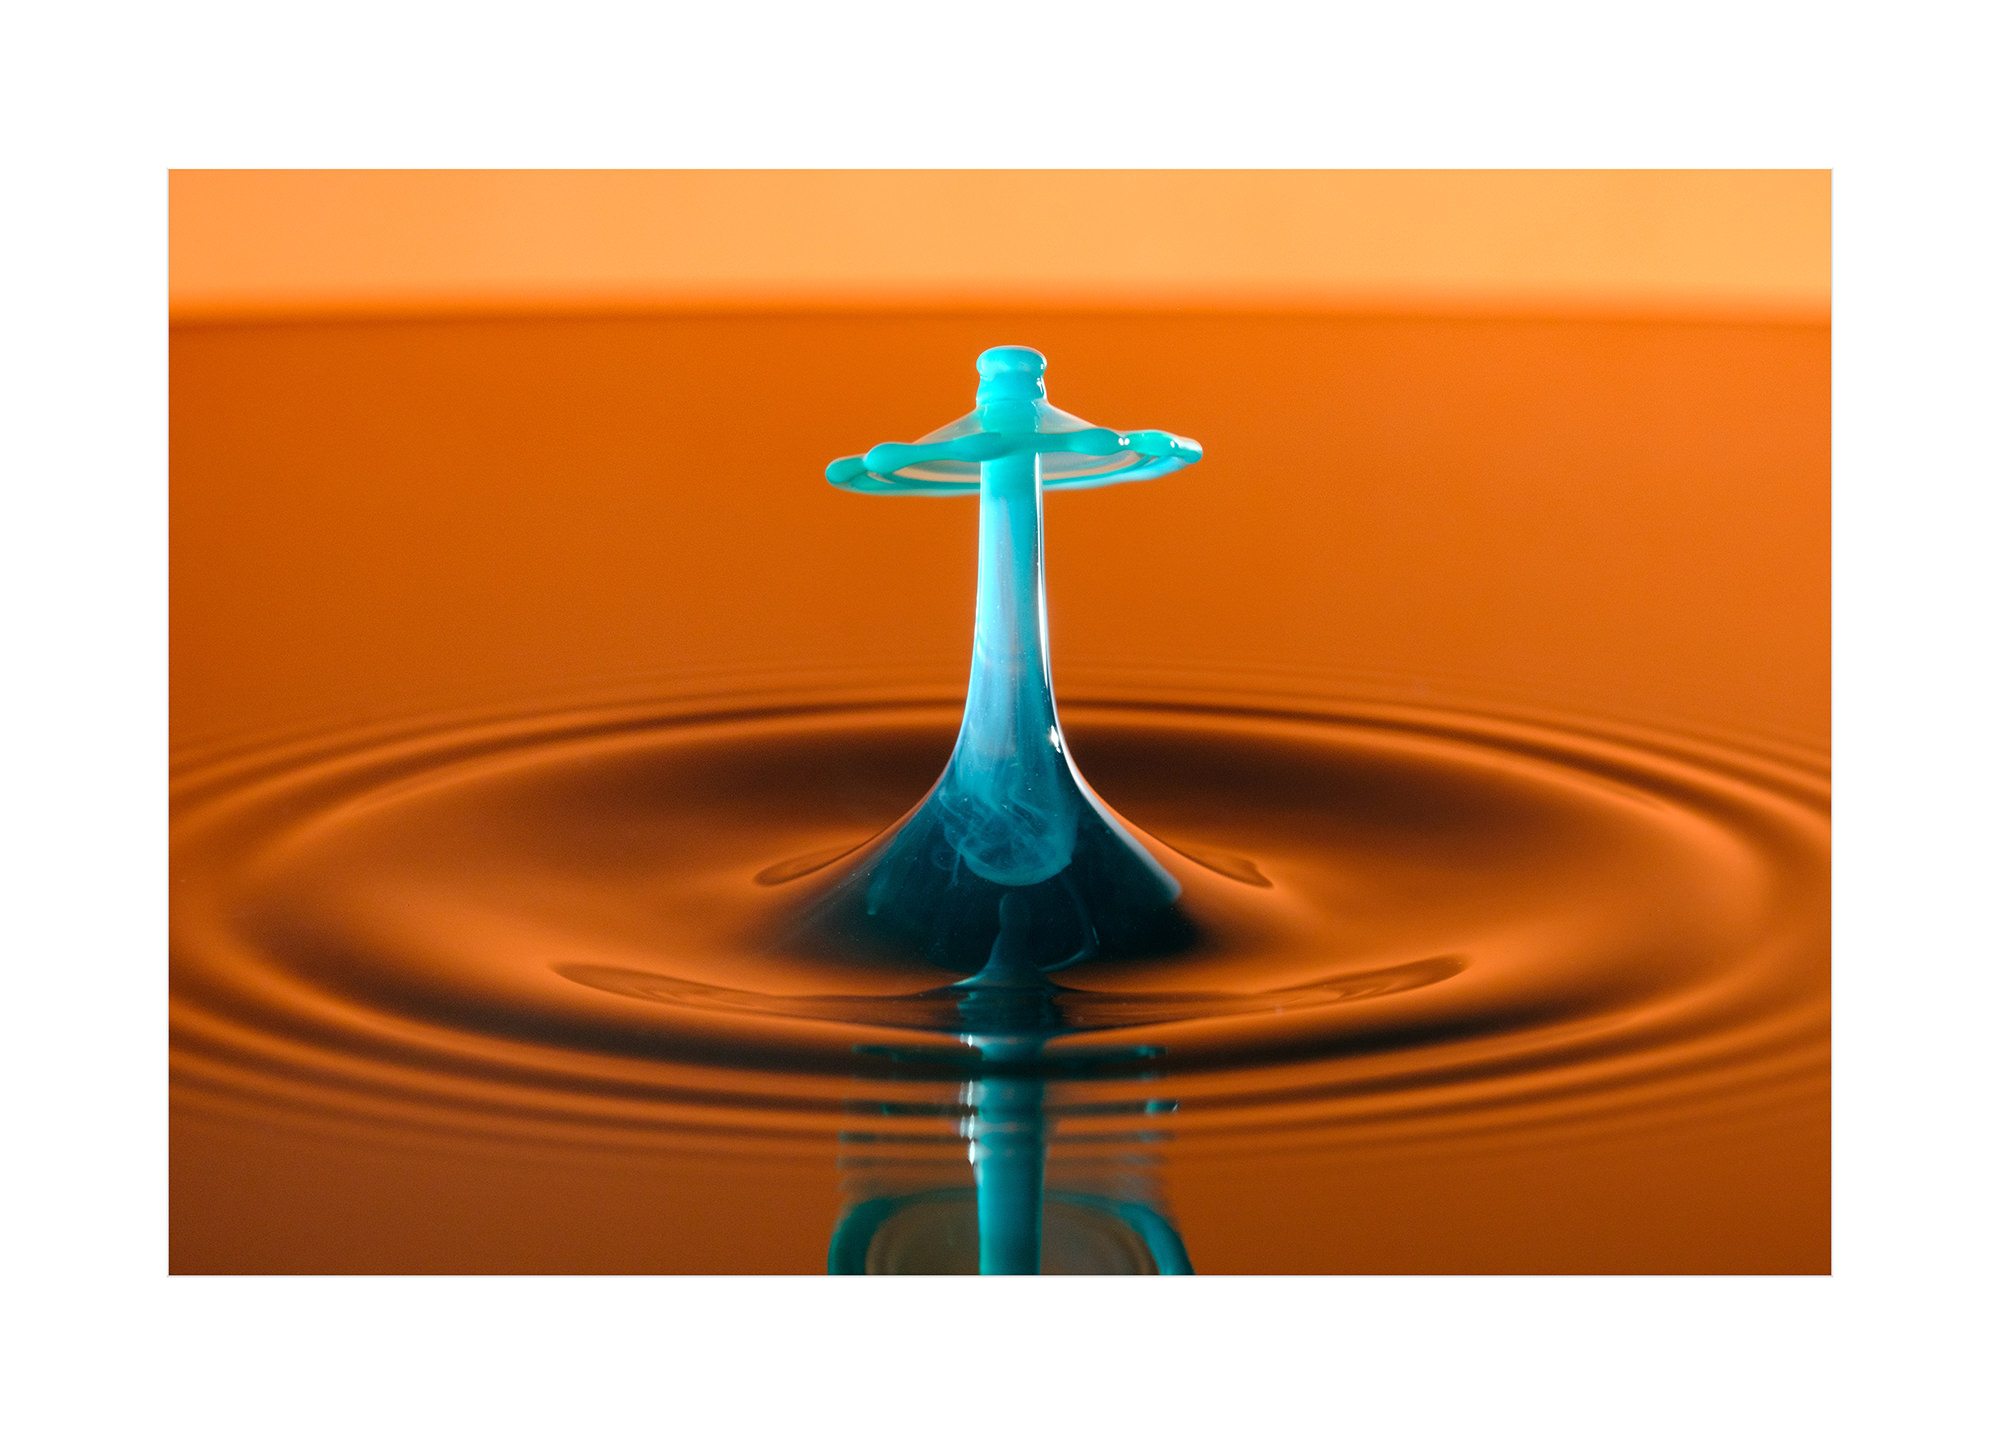
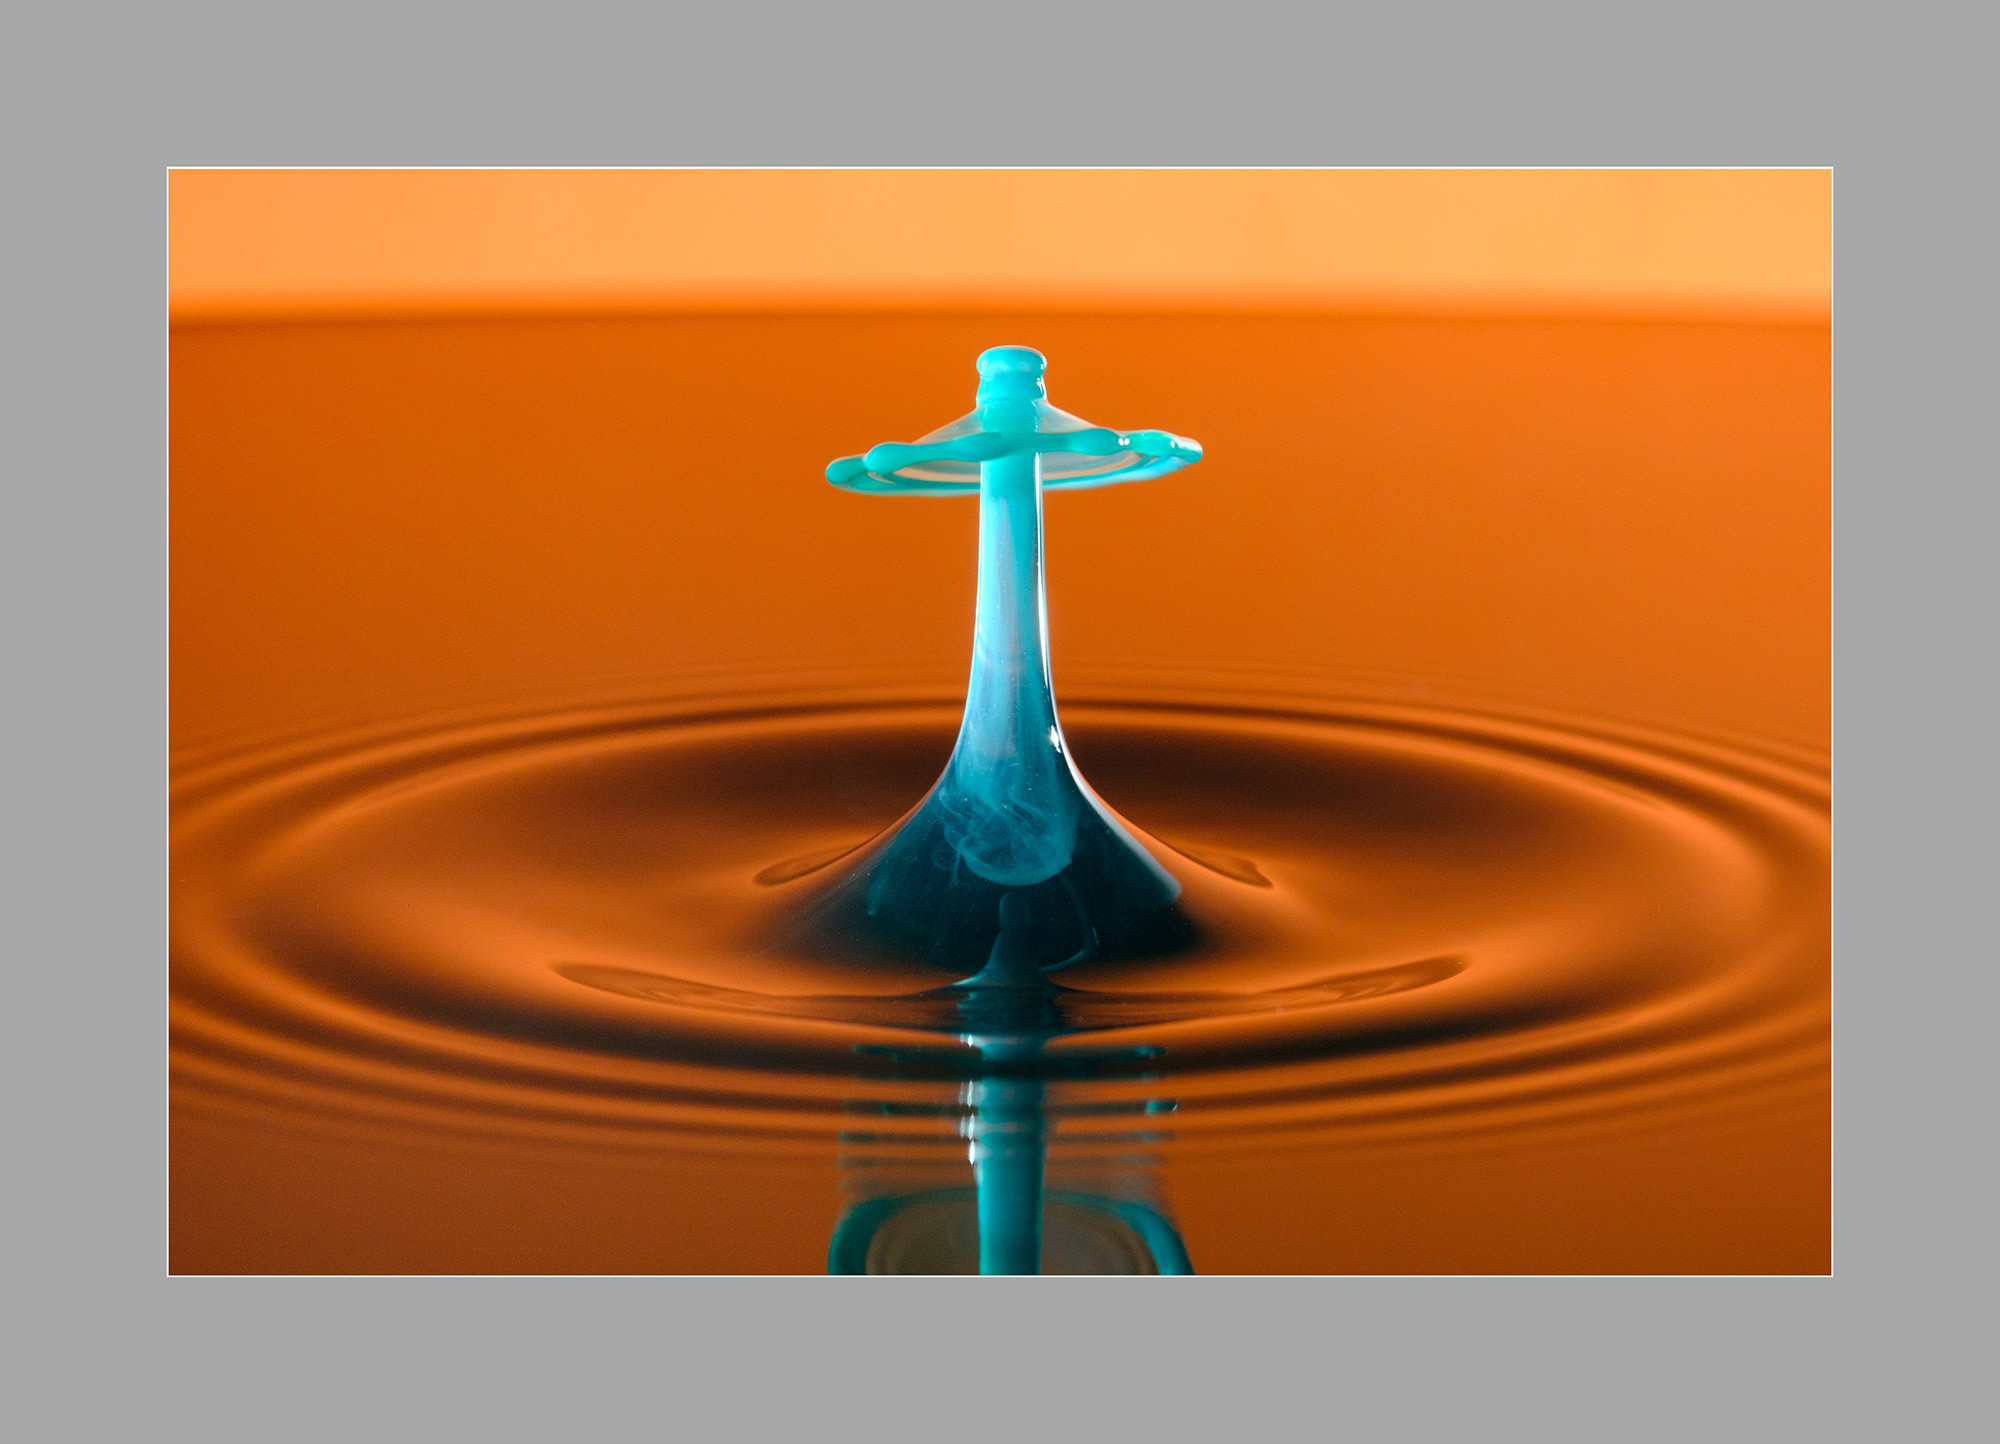
Alternately, instead of a Color Fill layer, you can use a Pattern Fill layer to add a paper texture effect. This is shown with the Legacy Patterns > Color Paper > Linen Weave pattern to give the digital photo mat a textured and more realistic look:
Fill out the form below to receive a FREE digital photo mat action set for Photoshop CC.
This set includes both single and double-mat actions optimized for horizontal, vertical, square, and panorama photographs.
Mat colors and double border width can easily be altered in the Layers panel after running the action to create a customized look.


If you want to add a digital photo mat to your photos, then you’ve come to the right place to learn how! Below are instructions on how to create your own mat using layers and layer styles.
I also have a free Nicolesy Photo Mat action set that you can download if you would like to automate this process. Click here or scroll down to access this download.
Step 1: Open and prep your file
First, open an image into Photoshop. This can be any image file type with as many layers as you would like.
Then, prep the image in the layers document to add your digital mat:
- If you are working off of the background layer, click the lock icon to unlock this layer.
- If your image has several layers, click the top layer to activate it and create a merged copy using the keyboard shortcut Cmd + Opt + Shift + E (Mac) or Ctrl + Alt + Shift + E (Windows).
You should now have one single layer at the top of your layers panel that shows your completed photograph. This can be a single image in the layer (an unlocked image layer), or a merged layer that combines all of the layers you originally had in your document.
Step 2: Add a white Color Fill layer
In the Layer panel, click the Adjustments drop down and select “Solid Color”. Set the color to white (or whichever color mat you prefer) and click OK.
Alternately, you can use the menu to add a color fill layer by going to Layer > New Fill Layer > Solid Color.
Then, drag this new Color Fill layer so it is below the top-most image layer (either the merged layer, or, if you only have one layer in your document, move the Color Fill layer to the very bottom).
Tip: If you’re not sure what color you want to use right now, that’s okay! Because you are using a Color Fill layer, the color can be changed at any time. Simply double-click the color swatch in the layer to open the color picker window.
Step 3: Resize the canvas
Now it’s time to resize the canvas to create the mat effect.
- First, go to Image > Canvas Size.
- Next, check the Relative box and make sure that the Anchor is in the middle (it should be there by default).
- Then, change the measurement units are both set to Percent.
The amount you enter into the Height and Width boxes will boil down to personal preference, but I have some recommended settings below (depending on your image’s orientation):
HORIZONTAL
Width = 20%, Height = 30%
VERTICAL
Width = 30%, Height = 20%
SQUARE
Width = 20%, Height = 20%
PANORAMA
Width = 15%, Height = 50%
This is what the document looks like after the Canvas Size has been changed. You can stop here if you want a more modern look with flat photo edges, or continue below to add a cut beveled edge to the inside of the photo mat.
Step 4: Access the Layer Styles window
Next, you’ll add a Layer Style to the image to give it the look of having a cut inner portion of the mat.
- First, click the top image layer to activate it.
- Then, access the Layers Styles window and click Bevel & Emboss. You can get to this either by double-clicking the blank space next to the layer’s name or by going to Layer > Layer Style > Bevel & Emboss.
Step 5: Bevel the inside edges of the mat
With the Bevel & Emboss style selected, apply the following settings:
Structure:
- Style: Inner Bevel
- Technique: Chisel Hard
- Depth: 1000%
- Direction: Up
- Size: 8px
- Soften: 0px
Shading:
- Angle: 90º
- Altitude: 30º
- Highlight mode: Lighten
- Opacity: 69%
- Shadow Mode: Multiply
- Opacity: 14%
Step 6: Add an inner glow to your digital photo mat
While still inside the Layer Styles window, click Inner Glow to apply that style and apply the following settings:
Structure:
- Blend Mode: Normal
- Opacity: 100%
- Noise: 0%
- Set the swatch to a SOLID WHITE (not the gradient option)
Elements:
- Technique: Softer
- Source: Edge
- Choke: 100%
- Size: 7 px
This shows a close-up of the corner of the inside part of the mat with the beveled edge effect added:
Final digital photo mat image
Your photo now has a white photo mat with a cut bevel inside of it. Feel free to alter the color of the mat using the Color Fill layer (double-click the thumbnail to make the change).
Alternately, instead of a Color Fill layer, you can use a Pattern Fill layer to add a paper texture effect. This is shown with the Legacy Patterns > Color Paper > Linen Weave pattern to give the digital photo mat a textured and more realistic look:
Fill out the form below to receive a FREE digital photo mat action set for Photoshop CC.
This set includes both single and double-mat actions optimized for horizontal, vertical, square, and panorama photographs.
Mat colors and double border width can easily be altered in the Layers panel after running the action to create a customized look.

Nicole is a photographer, published author, and educator specializing in Lightroom, Photoshop, and photography. She is best known for her books on food photography but is widely versed in various photographic genres, including landscape, nature, stock, travel, and experimental imagery.


The mat collection action set is really cool! thank you so much!
Shawnie is right. Your mat collection action rocks!!
Thanks for sharing.
Great action but how do you change to a pattern? I have tried a couple different ways and have no idea, either, as to where the legacy patterns are. What am I missing?
To change a “Color Fill” to a “Pattern”, after applying the action, do the following:
To get the Legacy Patterns into your pattern list, do the following: