

If you want to have a little fun with your images, why not add some blur? There are a lot of different types of blur you can add, and below I’ve listed some of the methods I enjoy using to add a creative addition to my photographs.
Increase the size of the aperture
The most obvious way to add blur to a photograph is to photograph with a wide aperture. The extent of the blur you add to a photo will depend on a few different factors.
First, the lens you use will physically allow you to open the aperture only to a certain width. Lenses that go to f/2.8 and wider will typically let you to blur any element that is not your in-focus subject quite well.
But aperture alone is not the only factor that determines how the amount of blur added the rest of a photo. Focal length, along with your distance to the subject (and the subject’s distance to the background/foreground), can also play a very big role. Simply put, the longer your focal length, and the farther away you are from the subject (and the subject is from its background), the more blurry the background (or foreground) will become in your photo. Couple this with a wide aperture and you have a very out-of-focus background. (Click here to learn more about this technique, also referred to as lens compression.)
-
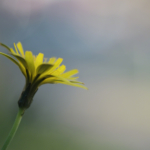
- I used a wide aperture (f/2.4) to blur everything except the flower in this photo.
-

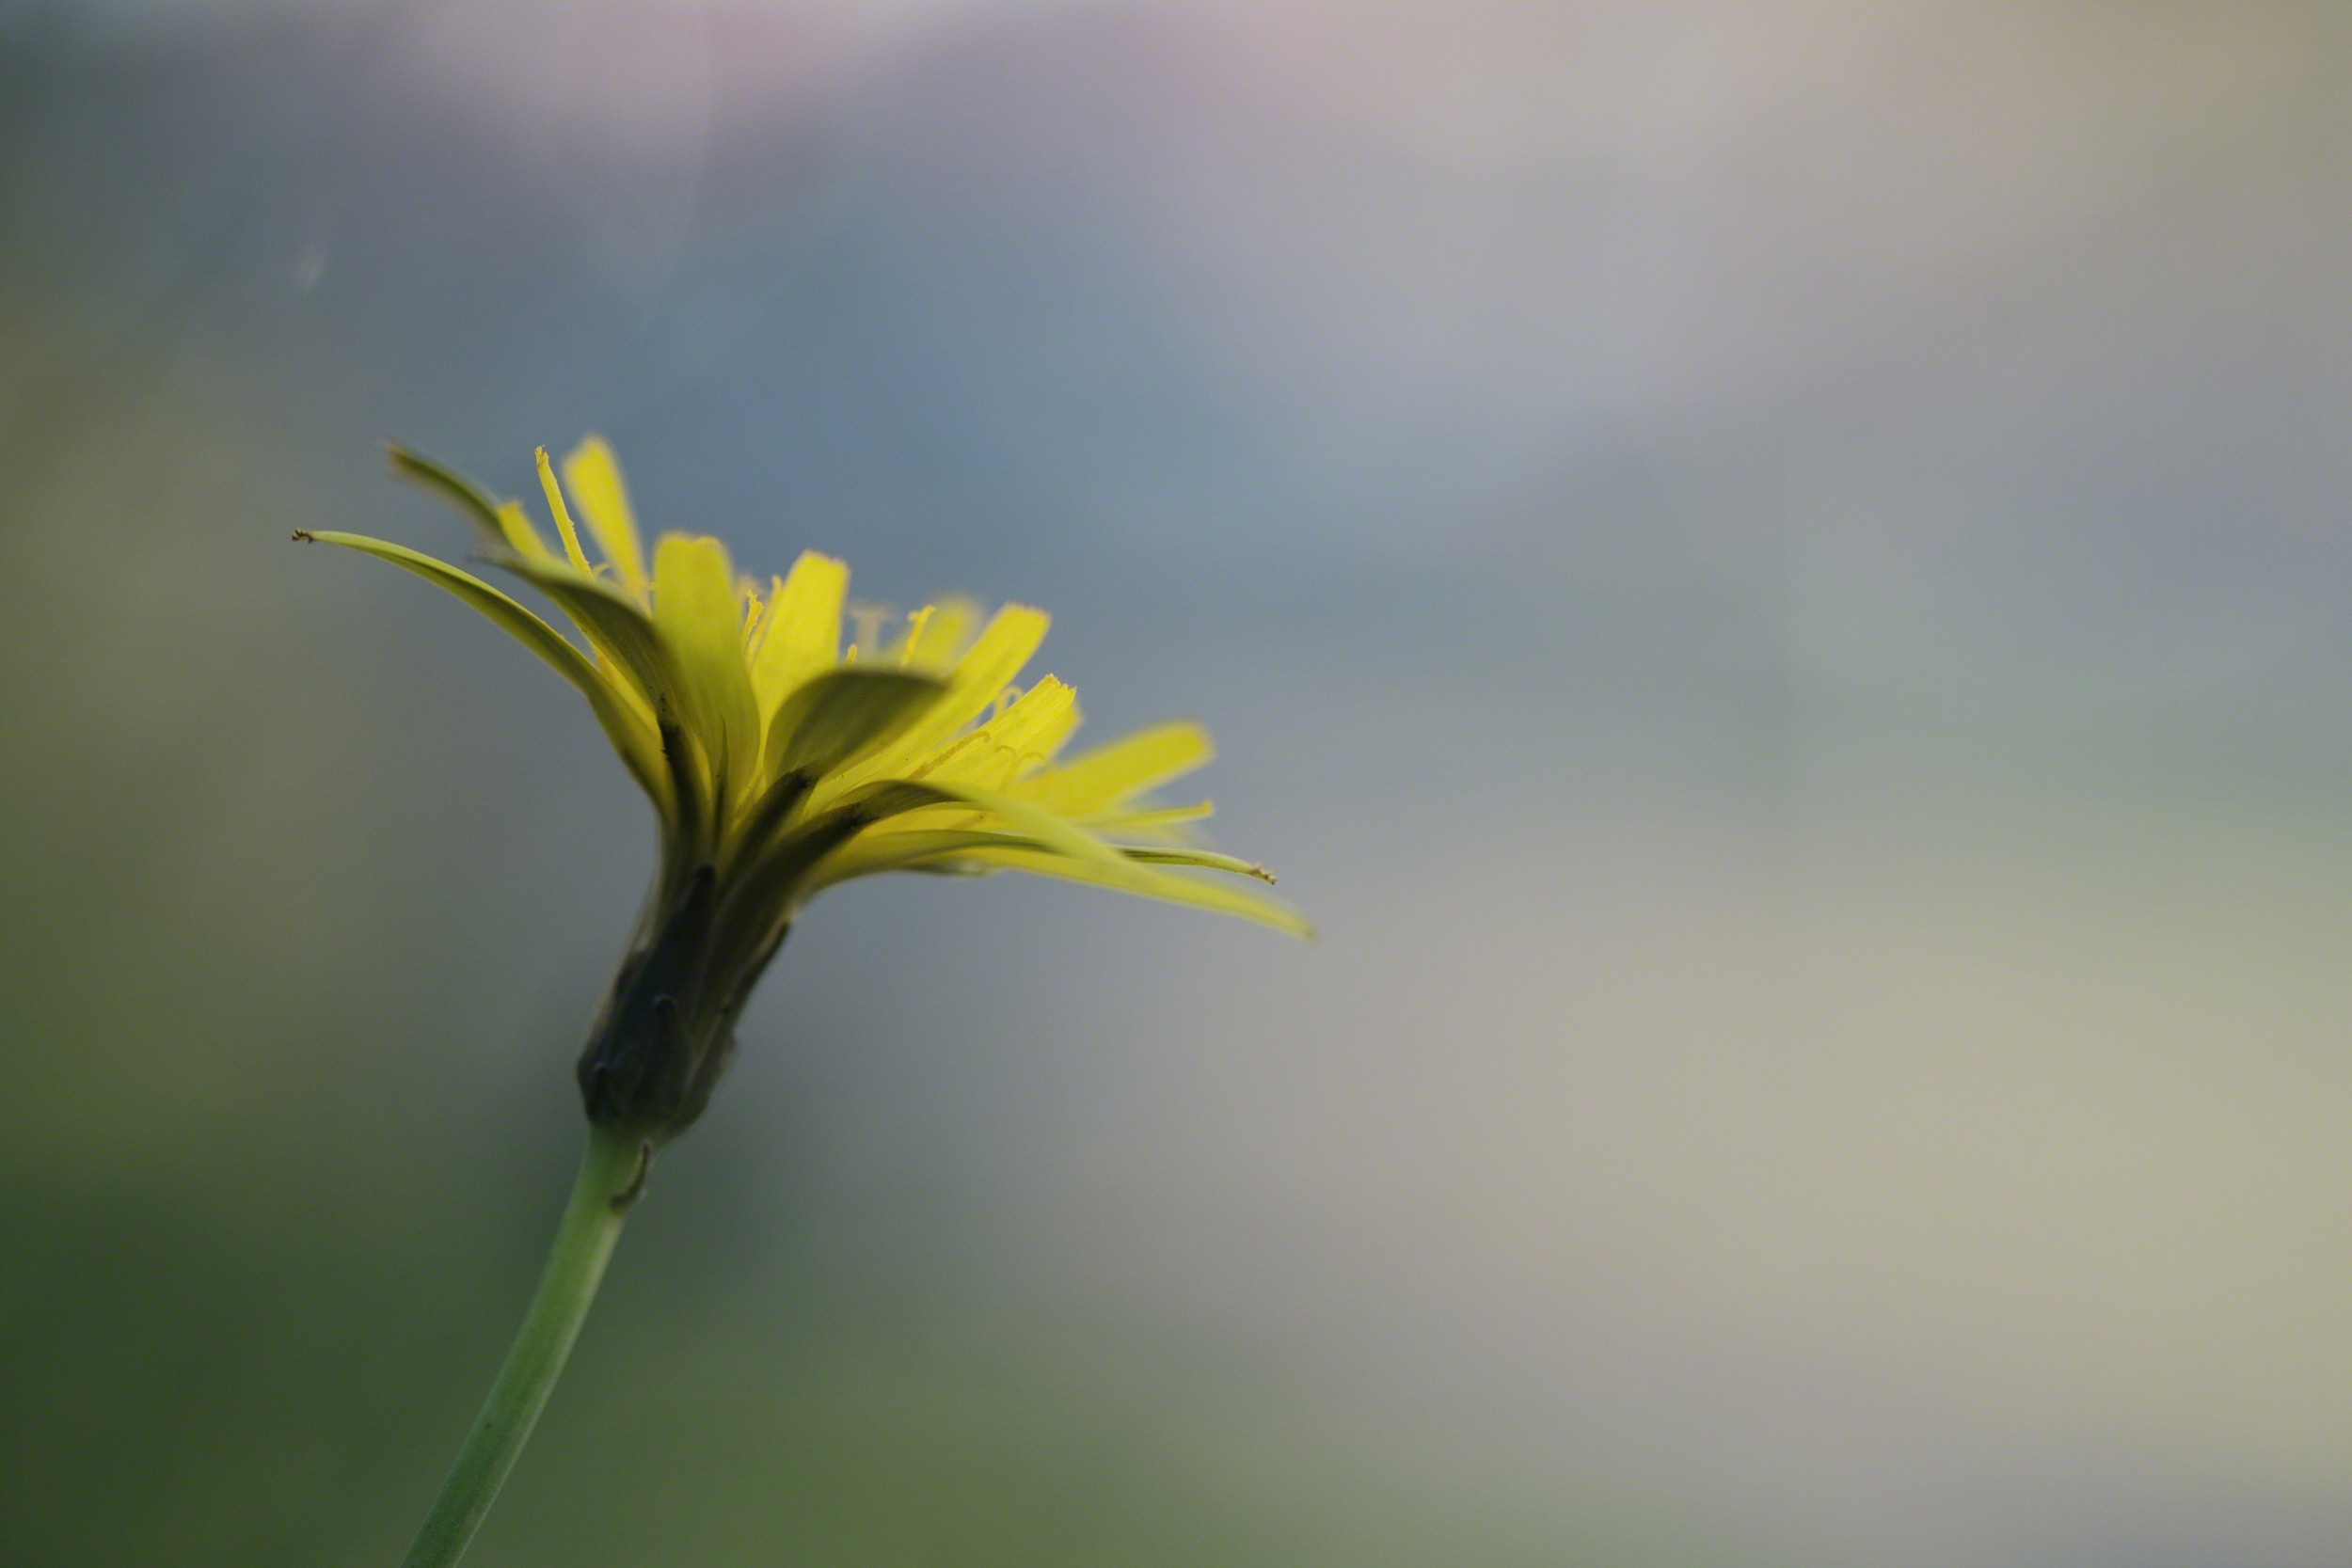
- Photographing this with a wide aperture (f/3.2) allowed me to keep the raindrops in focus while blurring the background.
Impressionistic style photography
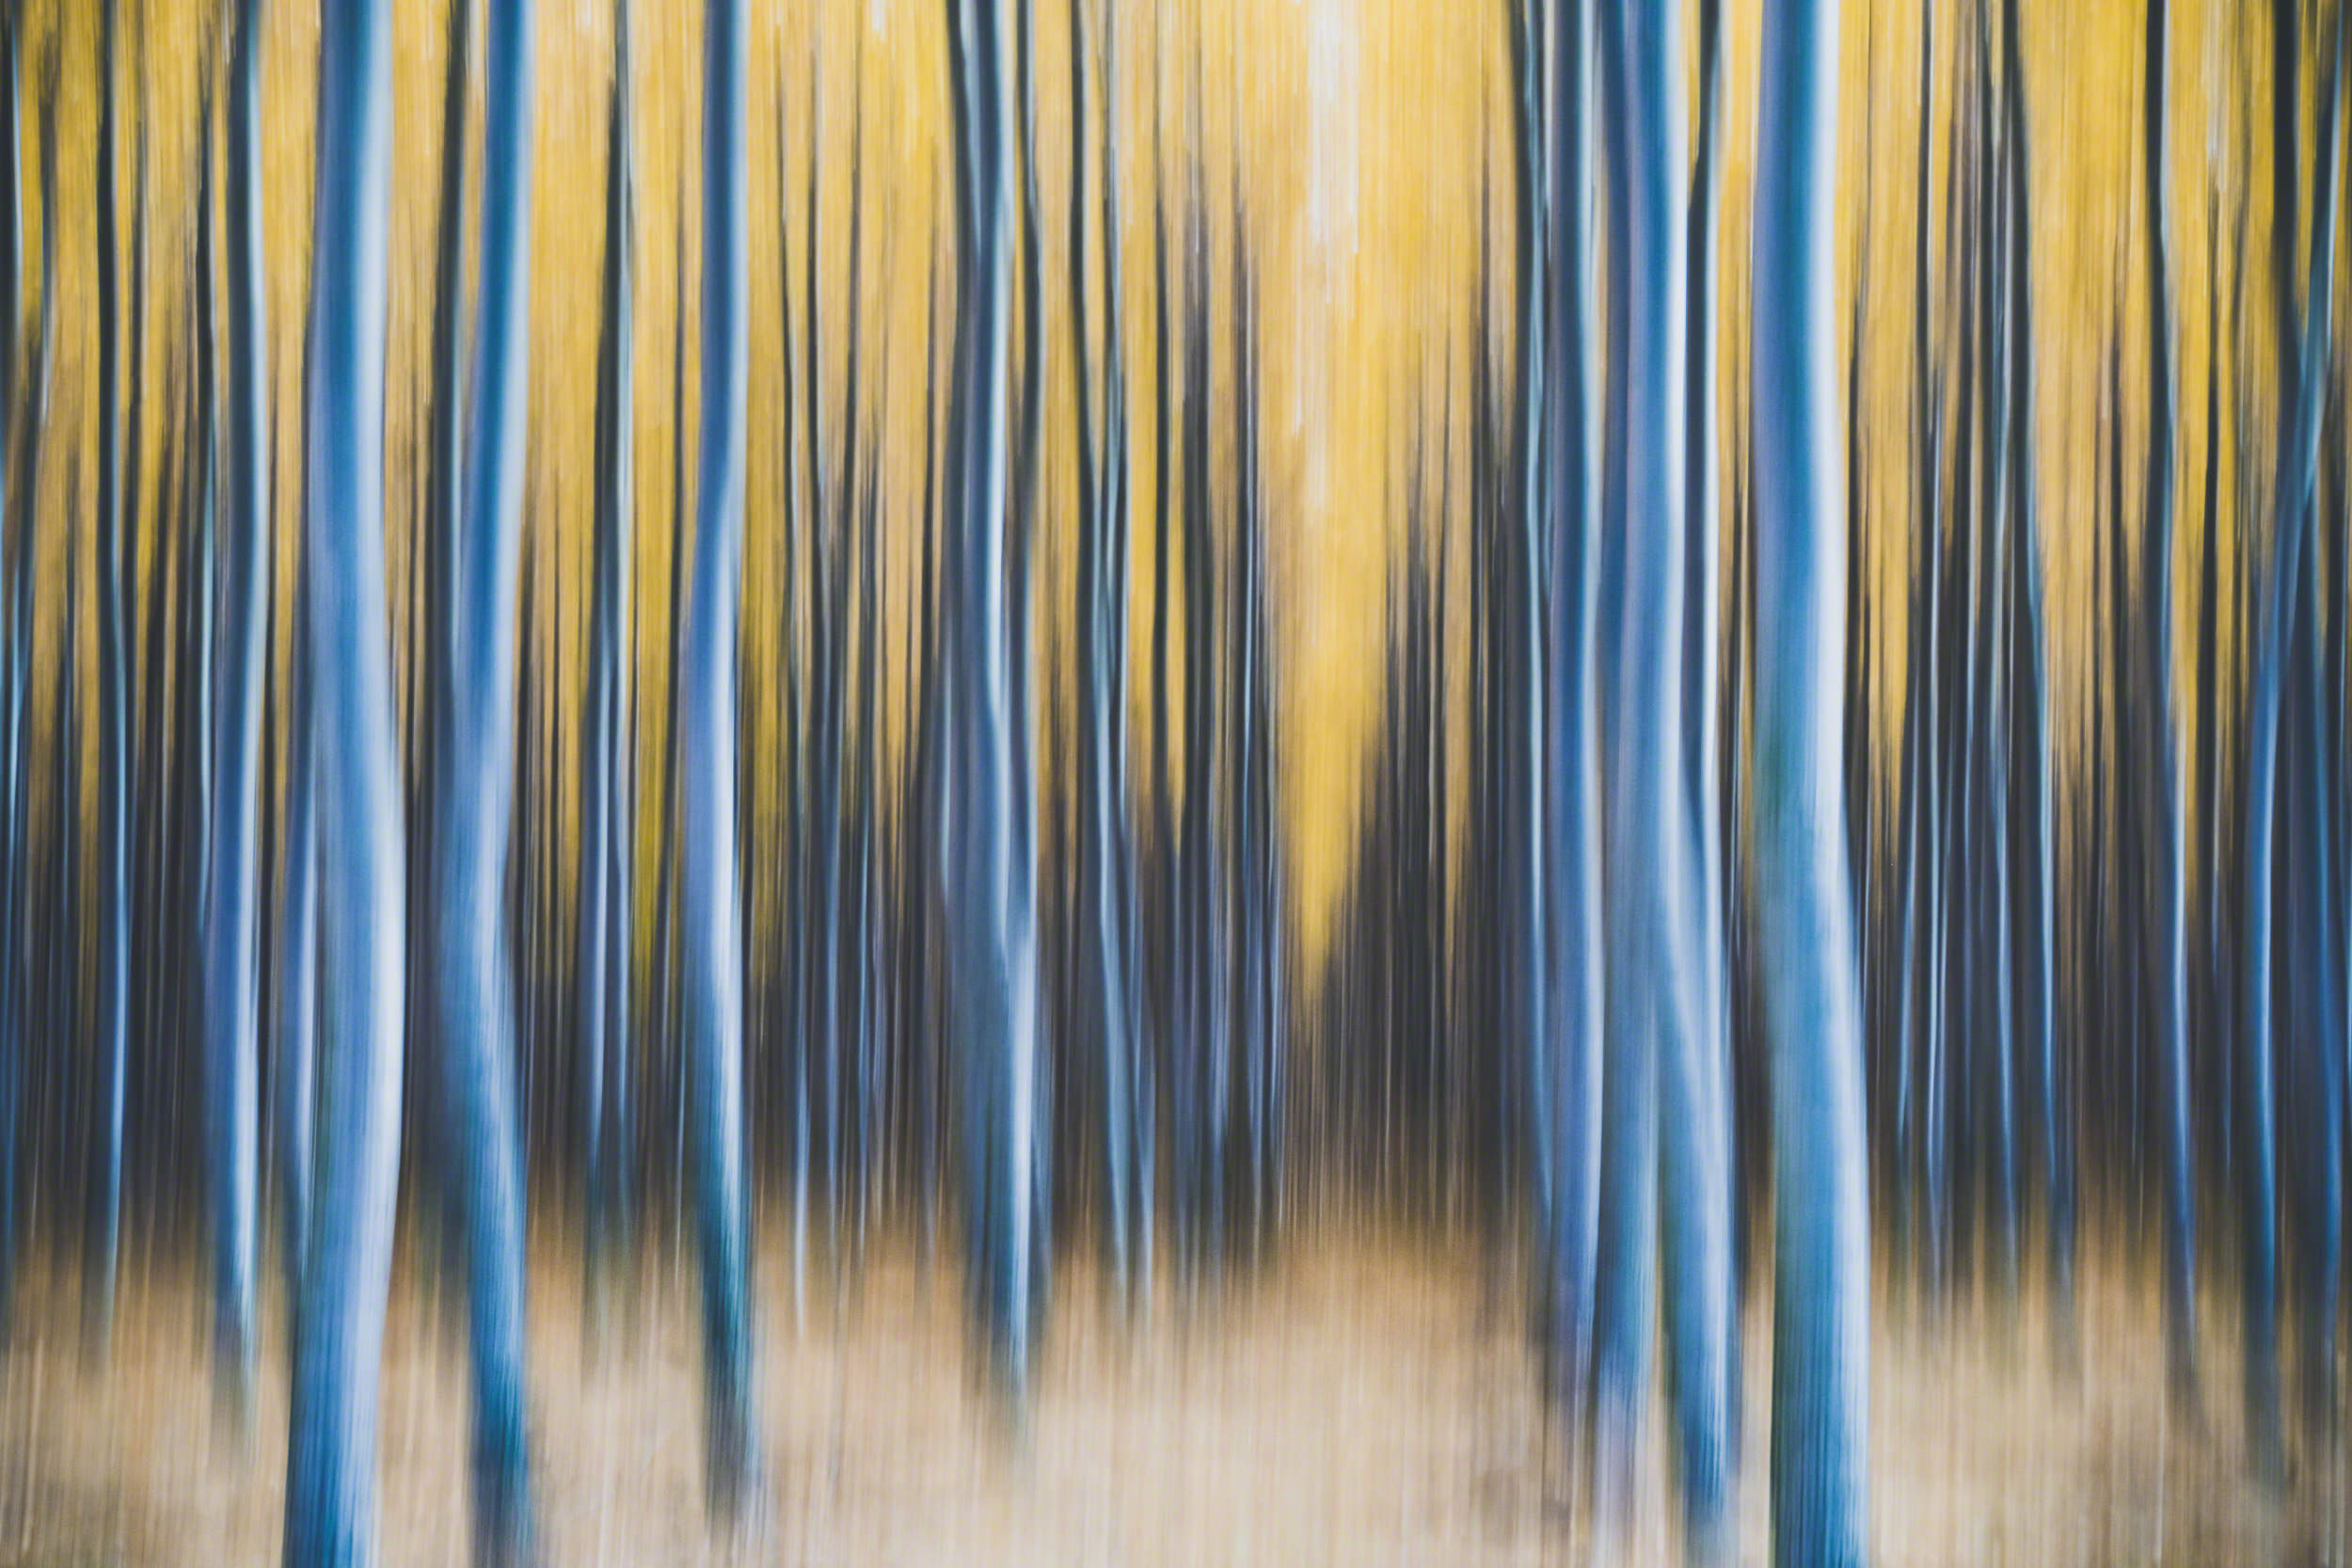
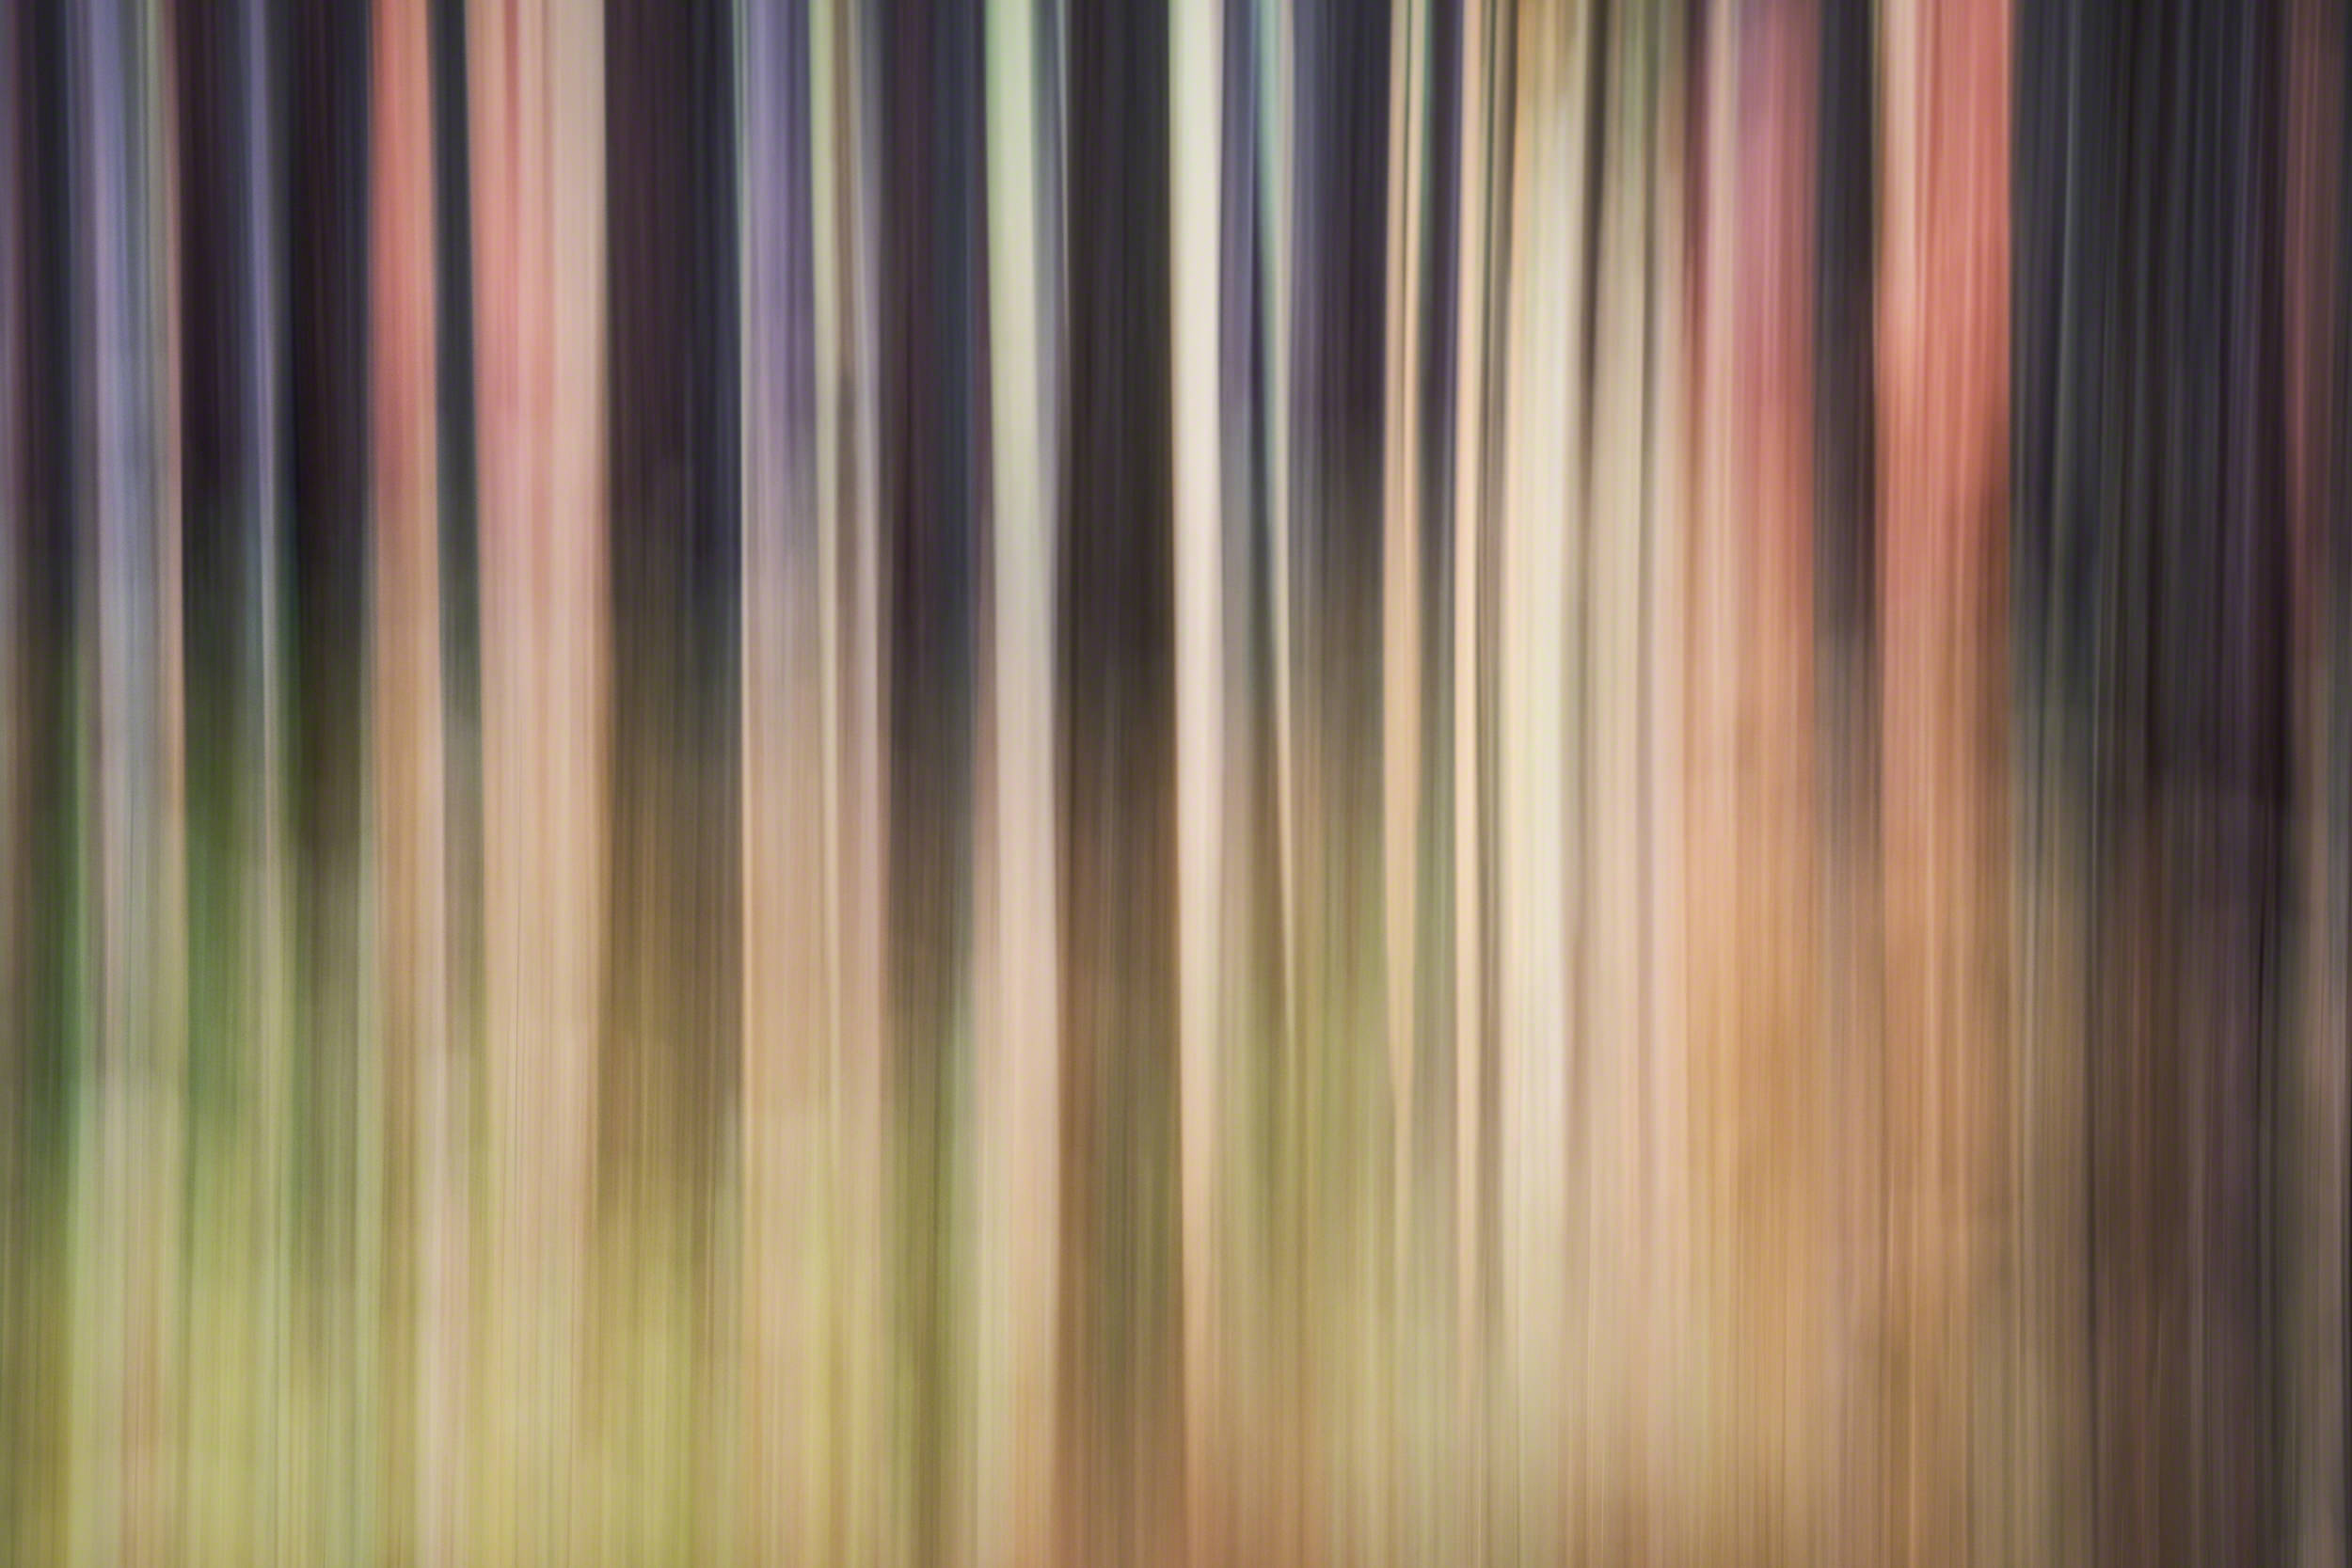
A fun way to blur a photograph is to use motion blur. To create this effect you set the shutter speed to a slow setting (I typically start out with 1/8 sec and go from there). Then, as you press the shutter speed, move the camera. I also tend to set the camera mode to one of the continuous settings to create more than one photograph for each pass. It takes a lot of experimenting with both the shutter speed and movement, but can be a lot of fun and you can end up with some fantastic results.
Tip: Use the subject to help determine camera direction. I will oftentimes use this technique when photographing trees in the forest, and usually move the camera up-and-down to move vertically with the shape of the trees.
-
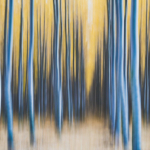
- I used a slower shutter speed (1/8 sec) and photographed this with an up-down sweeping motion to blur the trees.
-
- I used a slower shutter speed (1/15 sec) and photographed this with an up-down sweeping motion to blur the trees.
Add blur with software
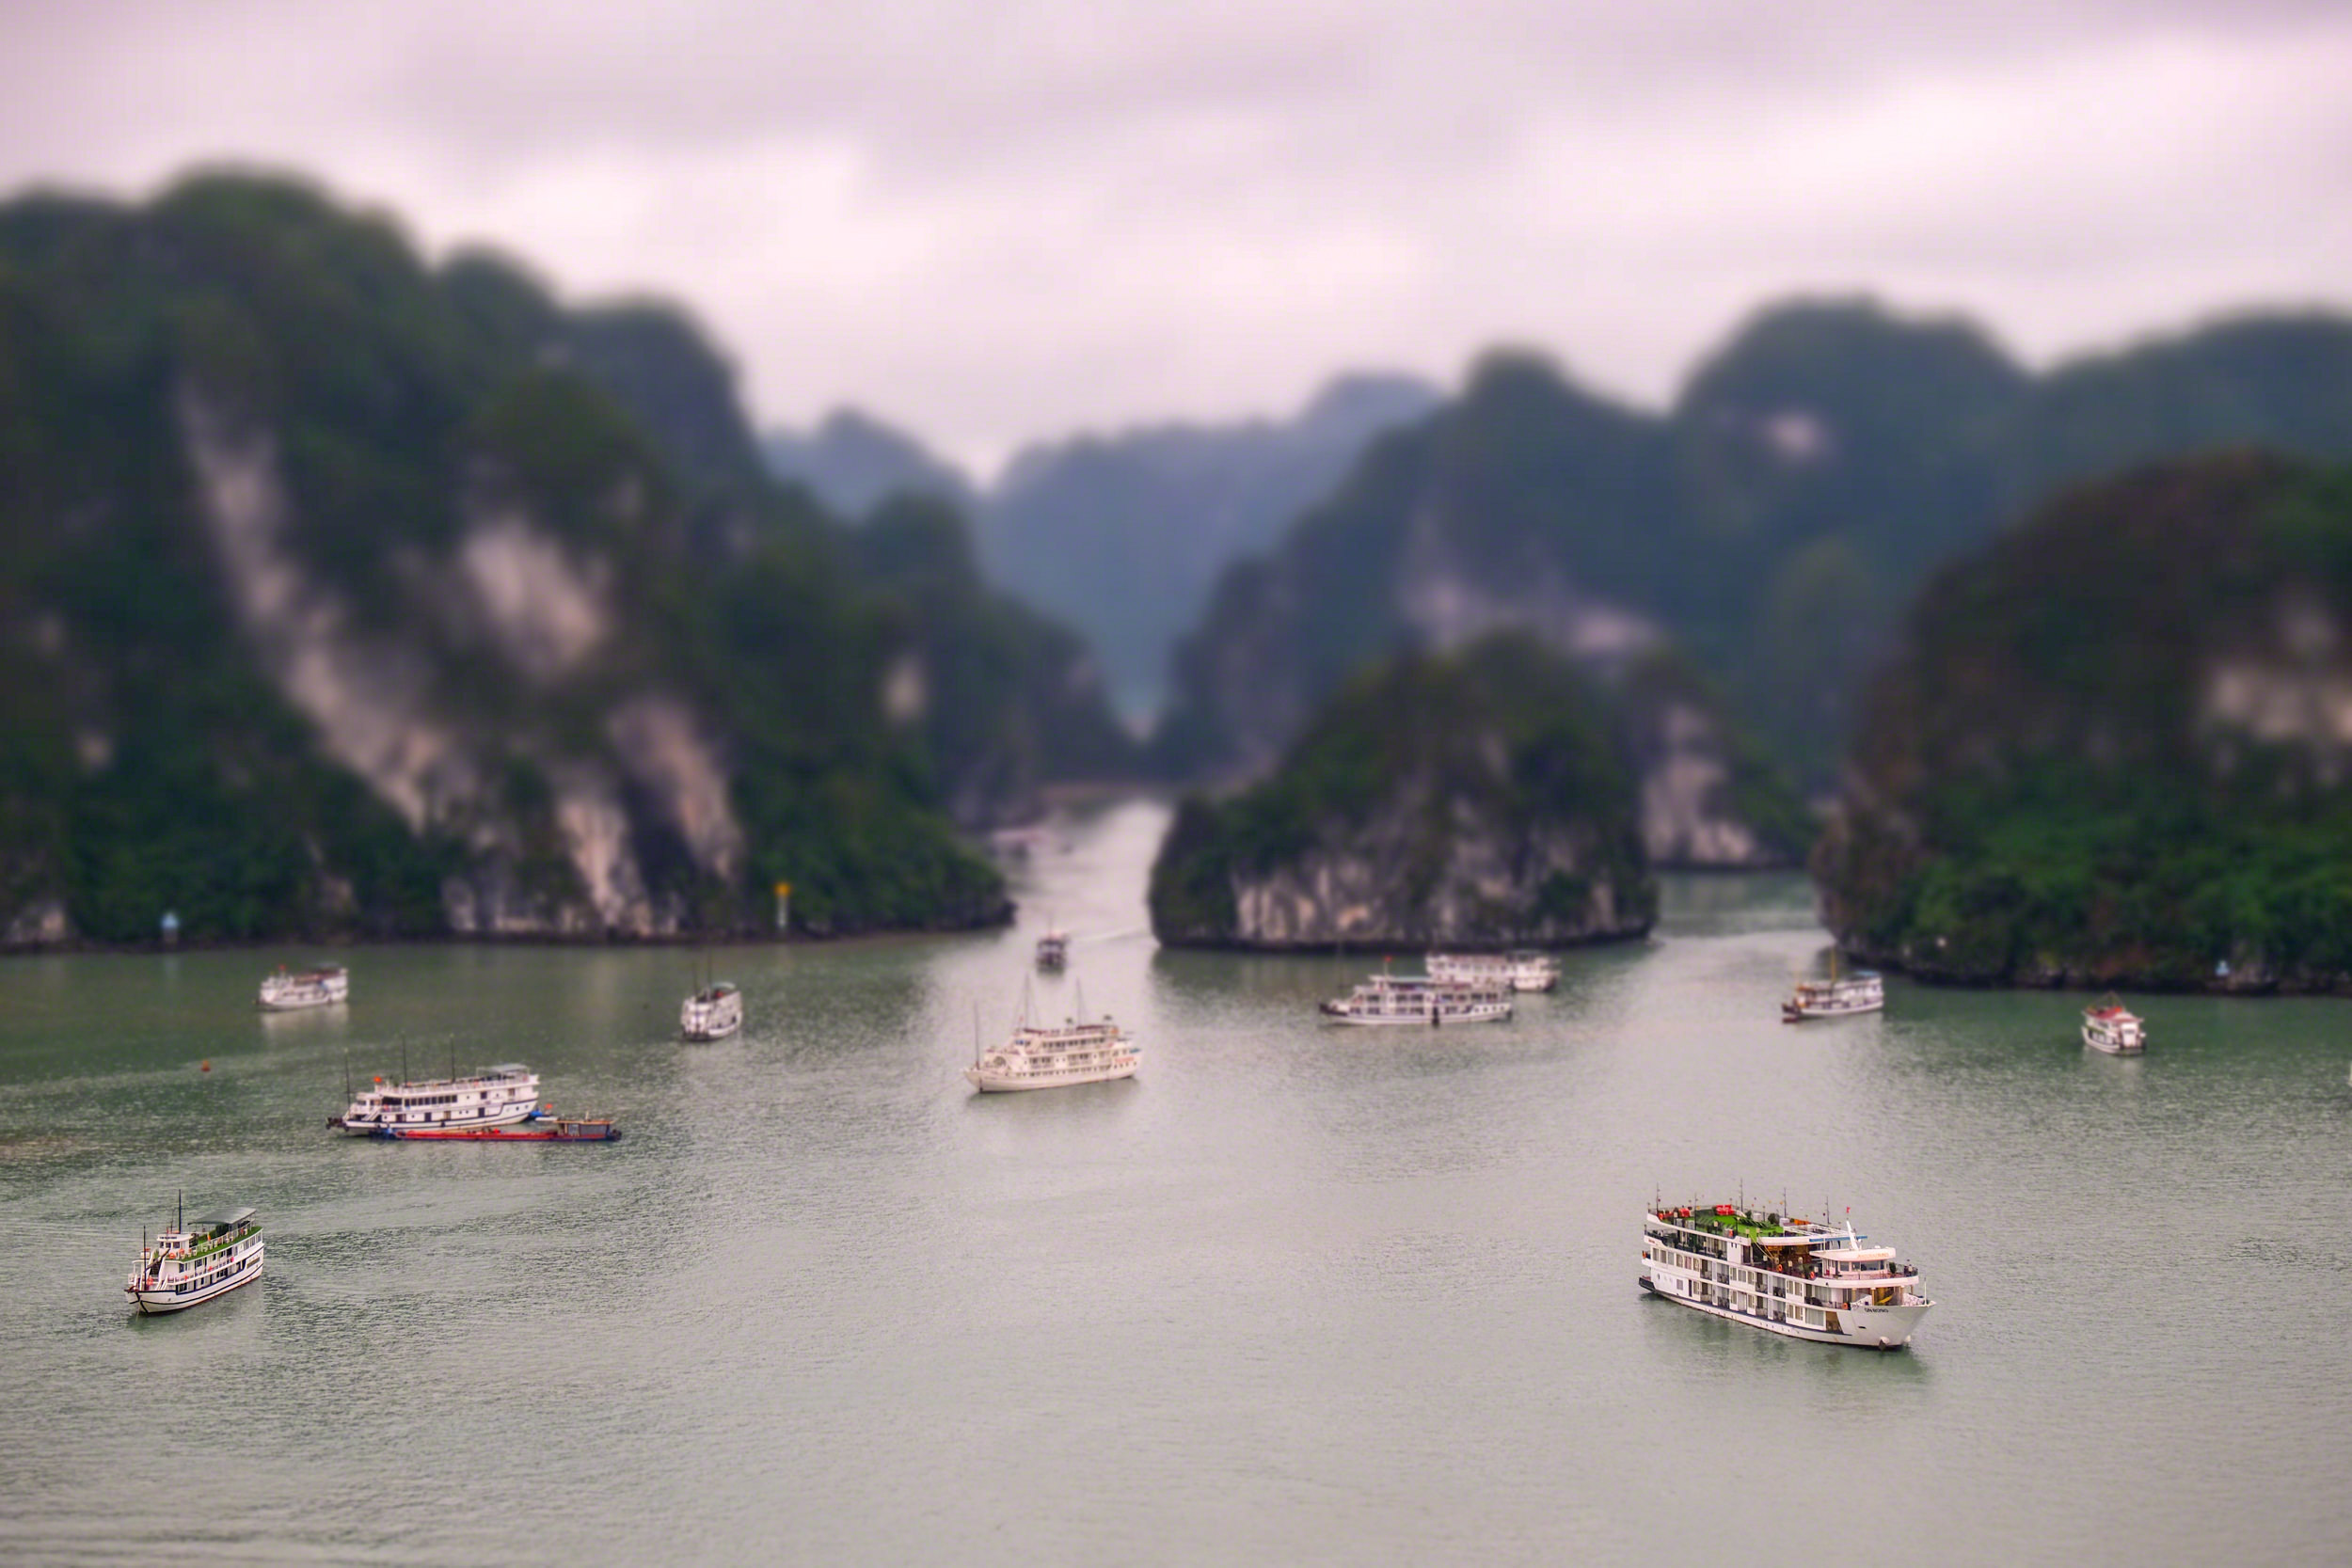
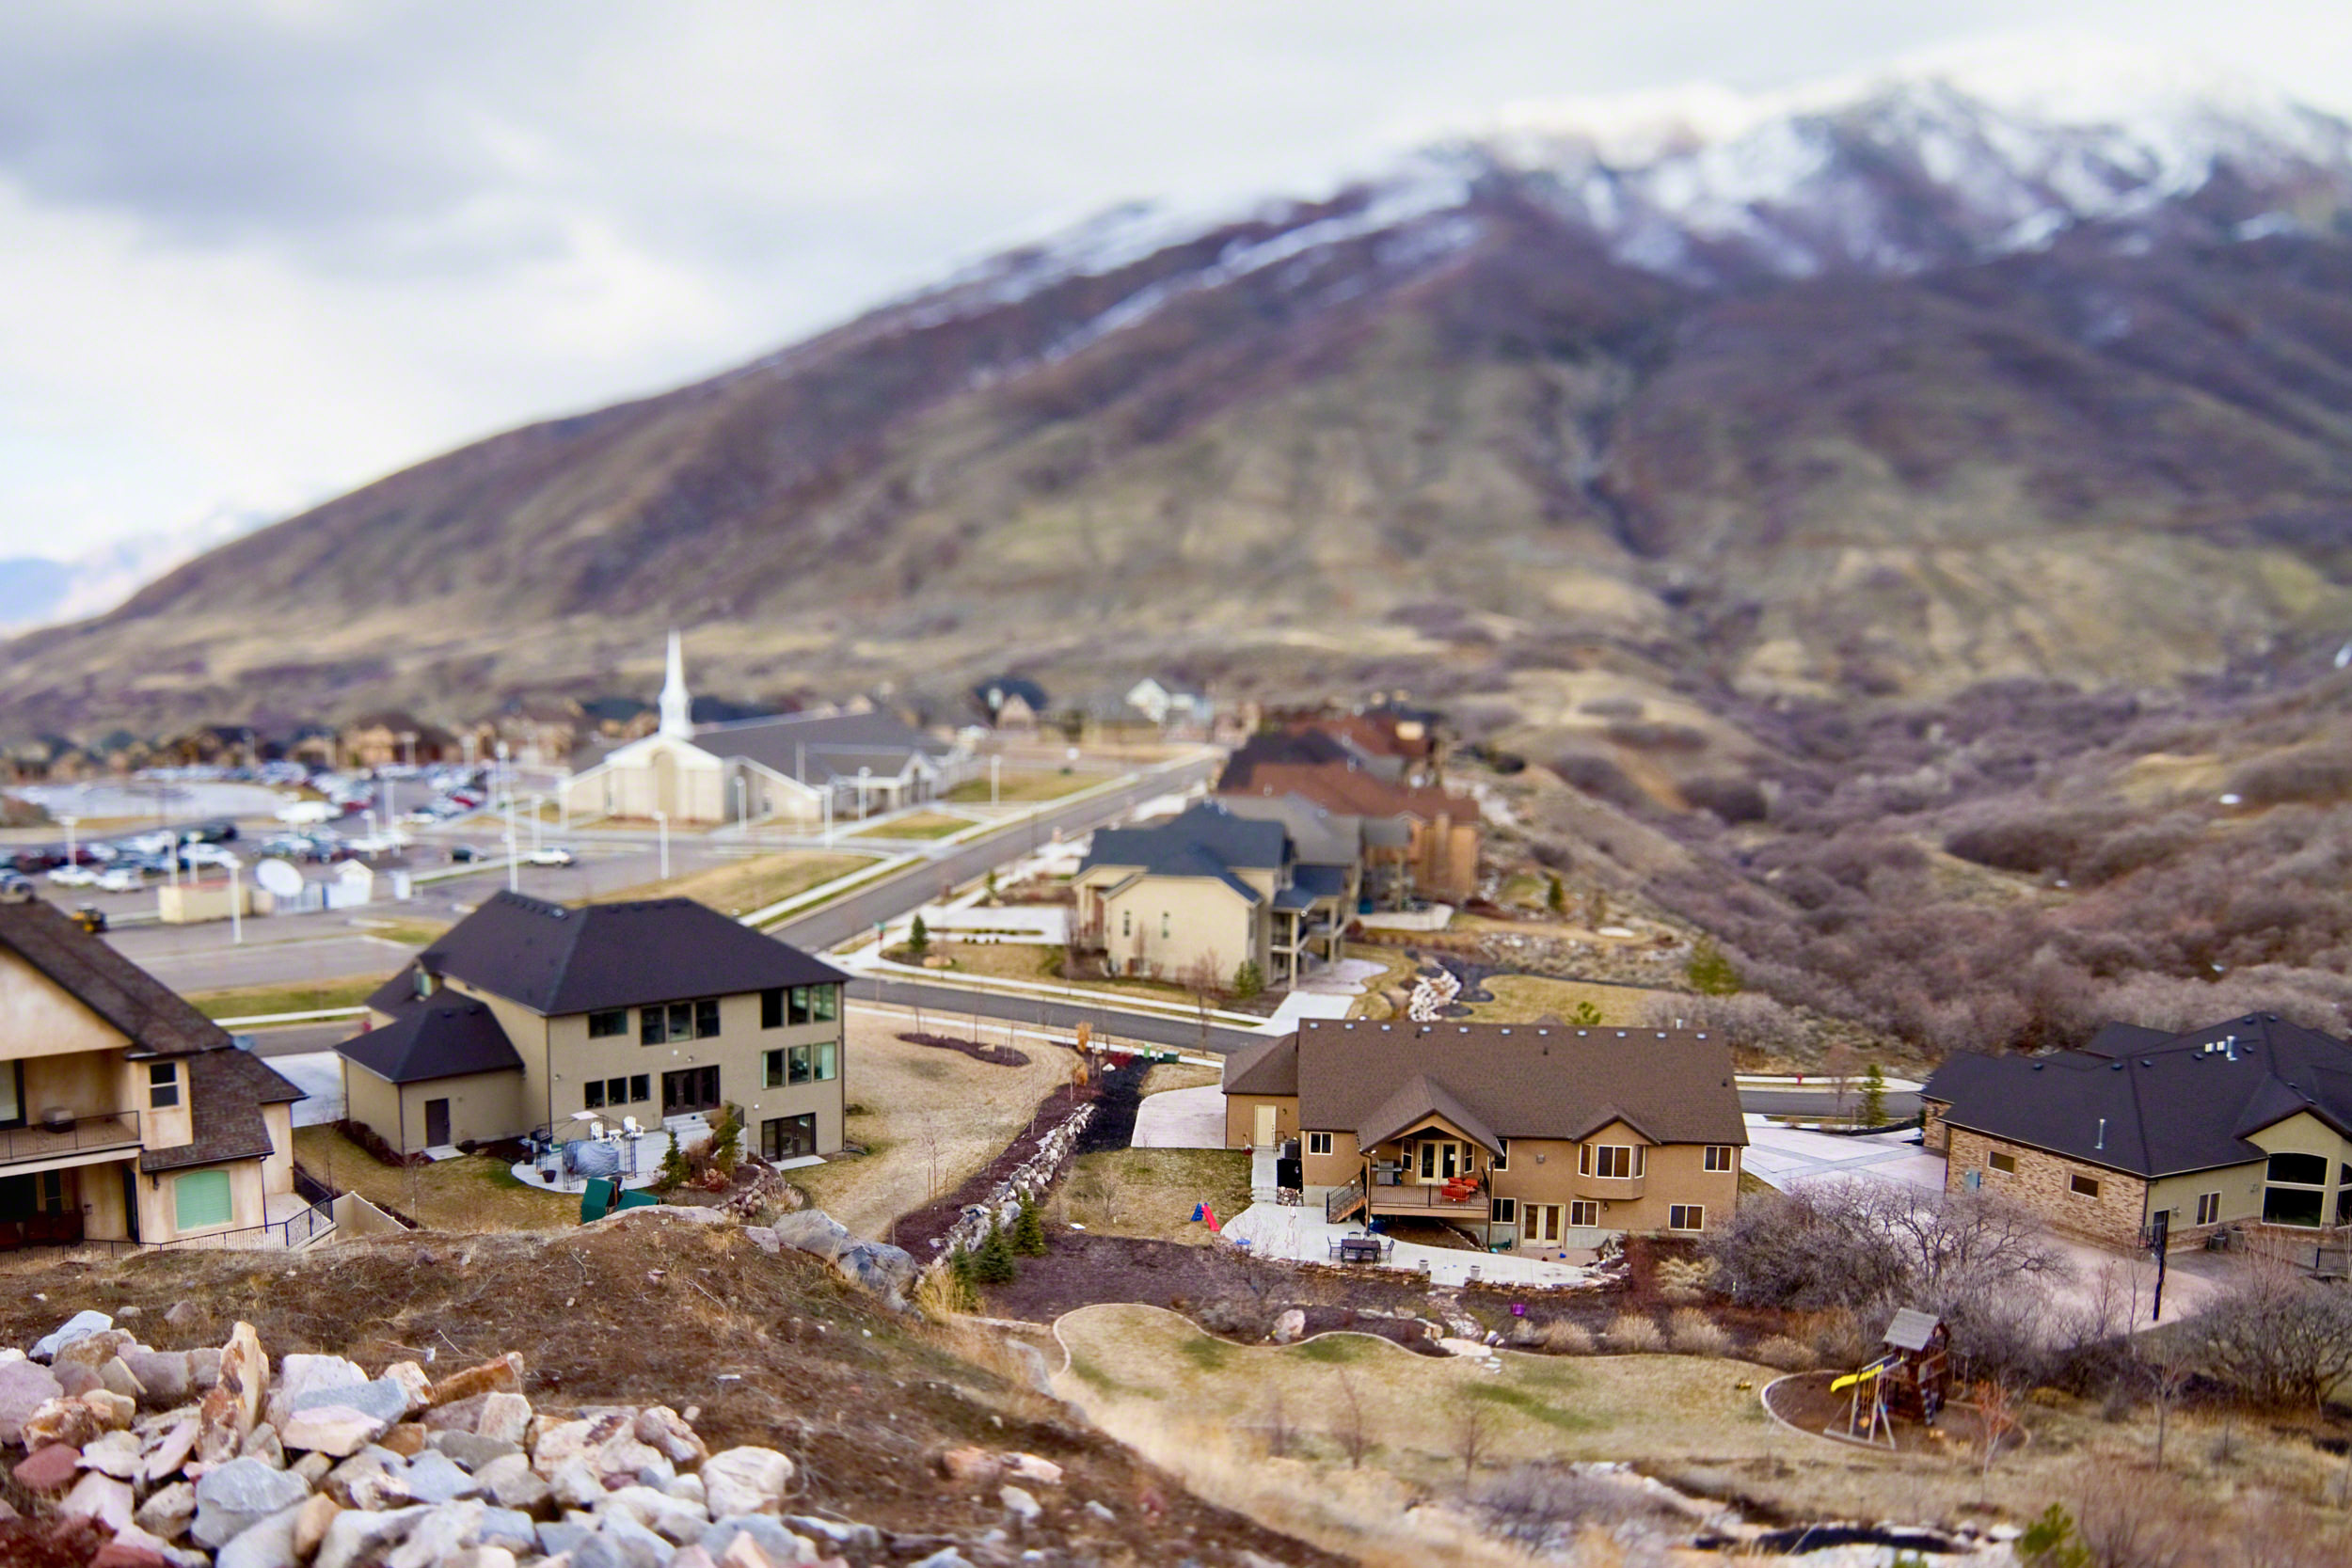
Another way to add blur is to use software. This can be done either in-camera (depending on your camera), or using software such as Photoshop. I use Fujifilm cameras, and many of them have an “advanced” filter that allows me to create a miniature-style photograph which replicates the tilt-shift look.
-
- In used the in-camera “Miniature” setting on my FUJIFILM camera to create this effect.

-
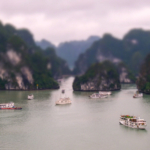
- In used the in-camera “Miniature” setting on my FUJIFILM camera to create this effect.
Adding blur in Photoshop is relatively simple. There’s a filter called “Blur gallery” that allows you to easily drop in a tilt-shift or field blur effect with only a few clicks:
- In Photoshop, go to Filter > Blur Gallery > Tilt Shift (or choose any of the other items in this list)
- Next, click in the image to “pin” the blur to the photo.
- Adjust the settings to achieve your desired look, and click OK when finished.
(You can also use ON1 Photo RAW’s “Lens Blur” filter to achieve a similar effect.)


Panning
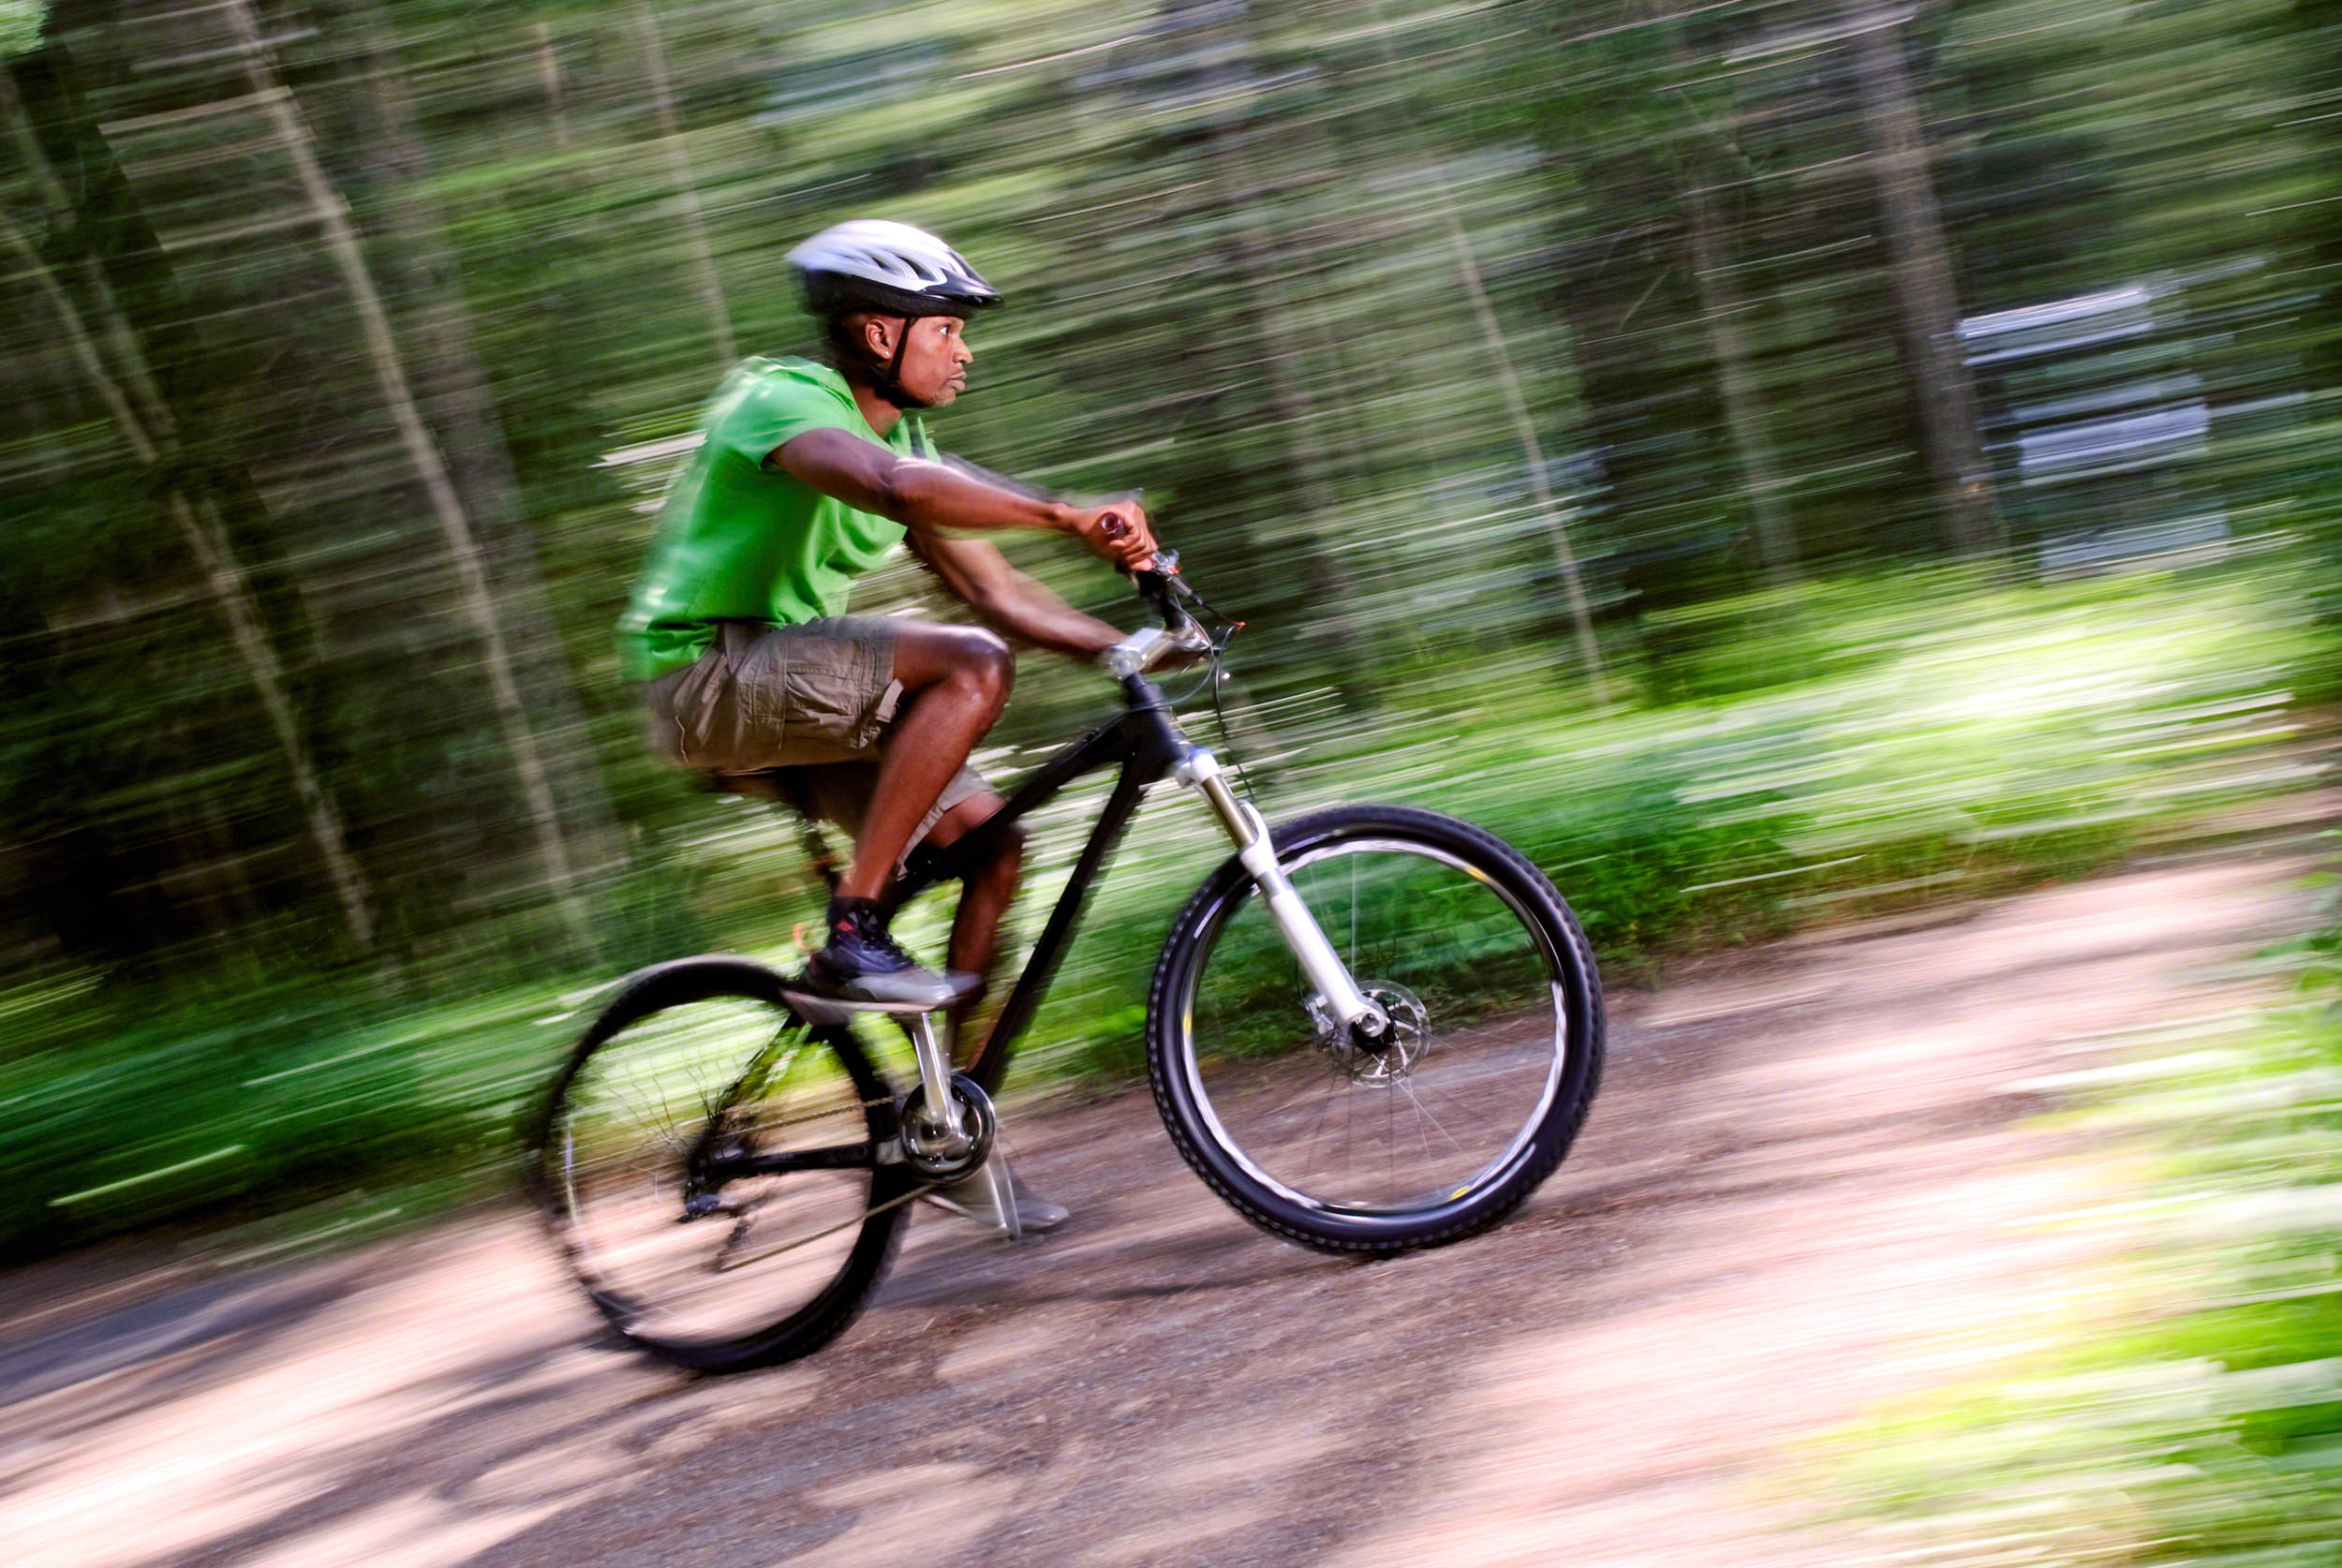
Panning is the art of moving your camera with a fast-moving subject, while also using a low shutter speed, with the intention to keep the subject in-focus and visible while also adding motion blur to the surrounding scene. It’s very experimental and can take several tries to get down the proper shutter speed and movement. A lot of it depends on how quickly your subject is moving, along with how close you are to the subject itself. Something that is close to you (while using a wider lens) will require more camera movement with a slower shutter speed, whereas something further away (with a longer lens) will need a faster shutter speed but less camera movement.
Tip: If you have a flash or strobe handy it will help to “freeze” the subject in place and keep the main part of the image looking crisp and bright.
-
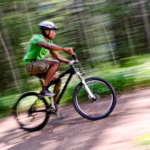
- I used a slow shutter speed (1/15 sec) and followed the man on his bike to blur the scene, and then froze the action using a strobe.
-
- This panning shot of a Sandhill Crane in Bosque del Apache was created by following the bird as it flew through the air.
Use a unique lens
Some lenses will allow you to add a lot of interesting blur effects in-camera. Tilt-shift lenses are an option, and one thing they allow you to do is create a unique focus. However they can be quite expensive and are not available for all camera models.
-
- A tilt-shift camera helped to add a unique blur to this portrait.

-
- A tilt-shift camera helped create a miniature effect on this small town.
If you enjoy seeing things differently in-camera, then you may want to give a Lensbaby a try. These manual-focus lenses are truly unique and allow you to add interesting blur in the camera. Over the years they have expanded their offerings, and have many different types of lenses that each create their own effect.
-
- This was created using the Lensbaby Composer.
-
- This was created using the Lensbaby Composer.
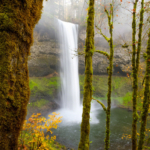
Experiment with slow shutter speeds
Slow shutter speeds can be helpful for both long-exposure images photographed from a tripod, or by using a shutter speed that is just slow enough to capture movement with a hand-held photograph. I love to photograph both waterfalls and waves (crashing against a rocky shoreline), and using a slow shutter speed can give the water a beautiful and soft effect. The longer the shutter speed the more “cotton candy-like” the water will become. It’s fun to experiment with different settings to see what it does to the water. (Click here to learn more about creating long-exposure water photographs.)
-
- A shutter speed of only 0.5 seconds is all that was needed to blur the waterfall in this image.
-
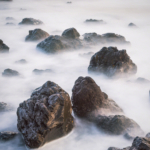
- A 15-second exposure created a cloud-like effect to the water in this rocky shoreline.
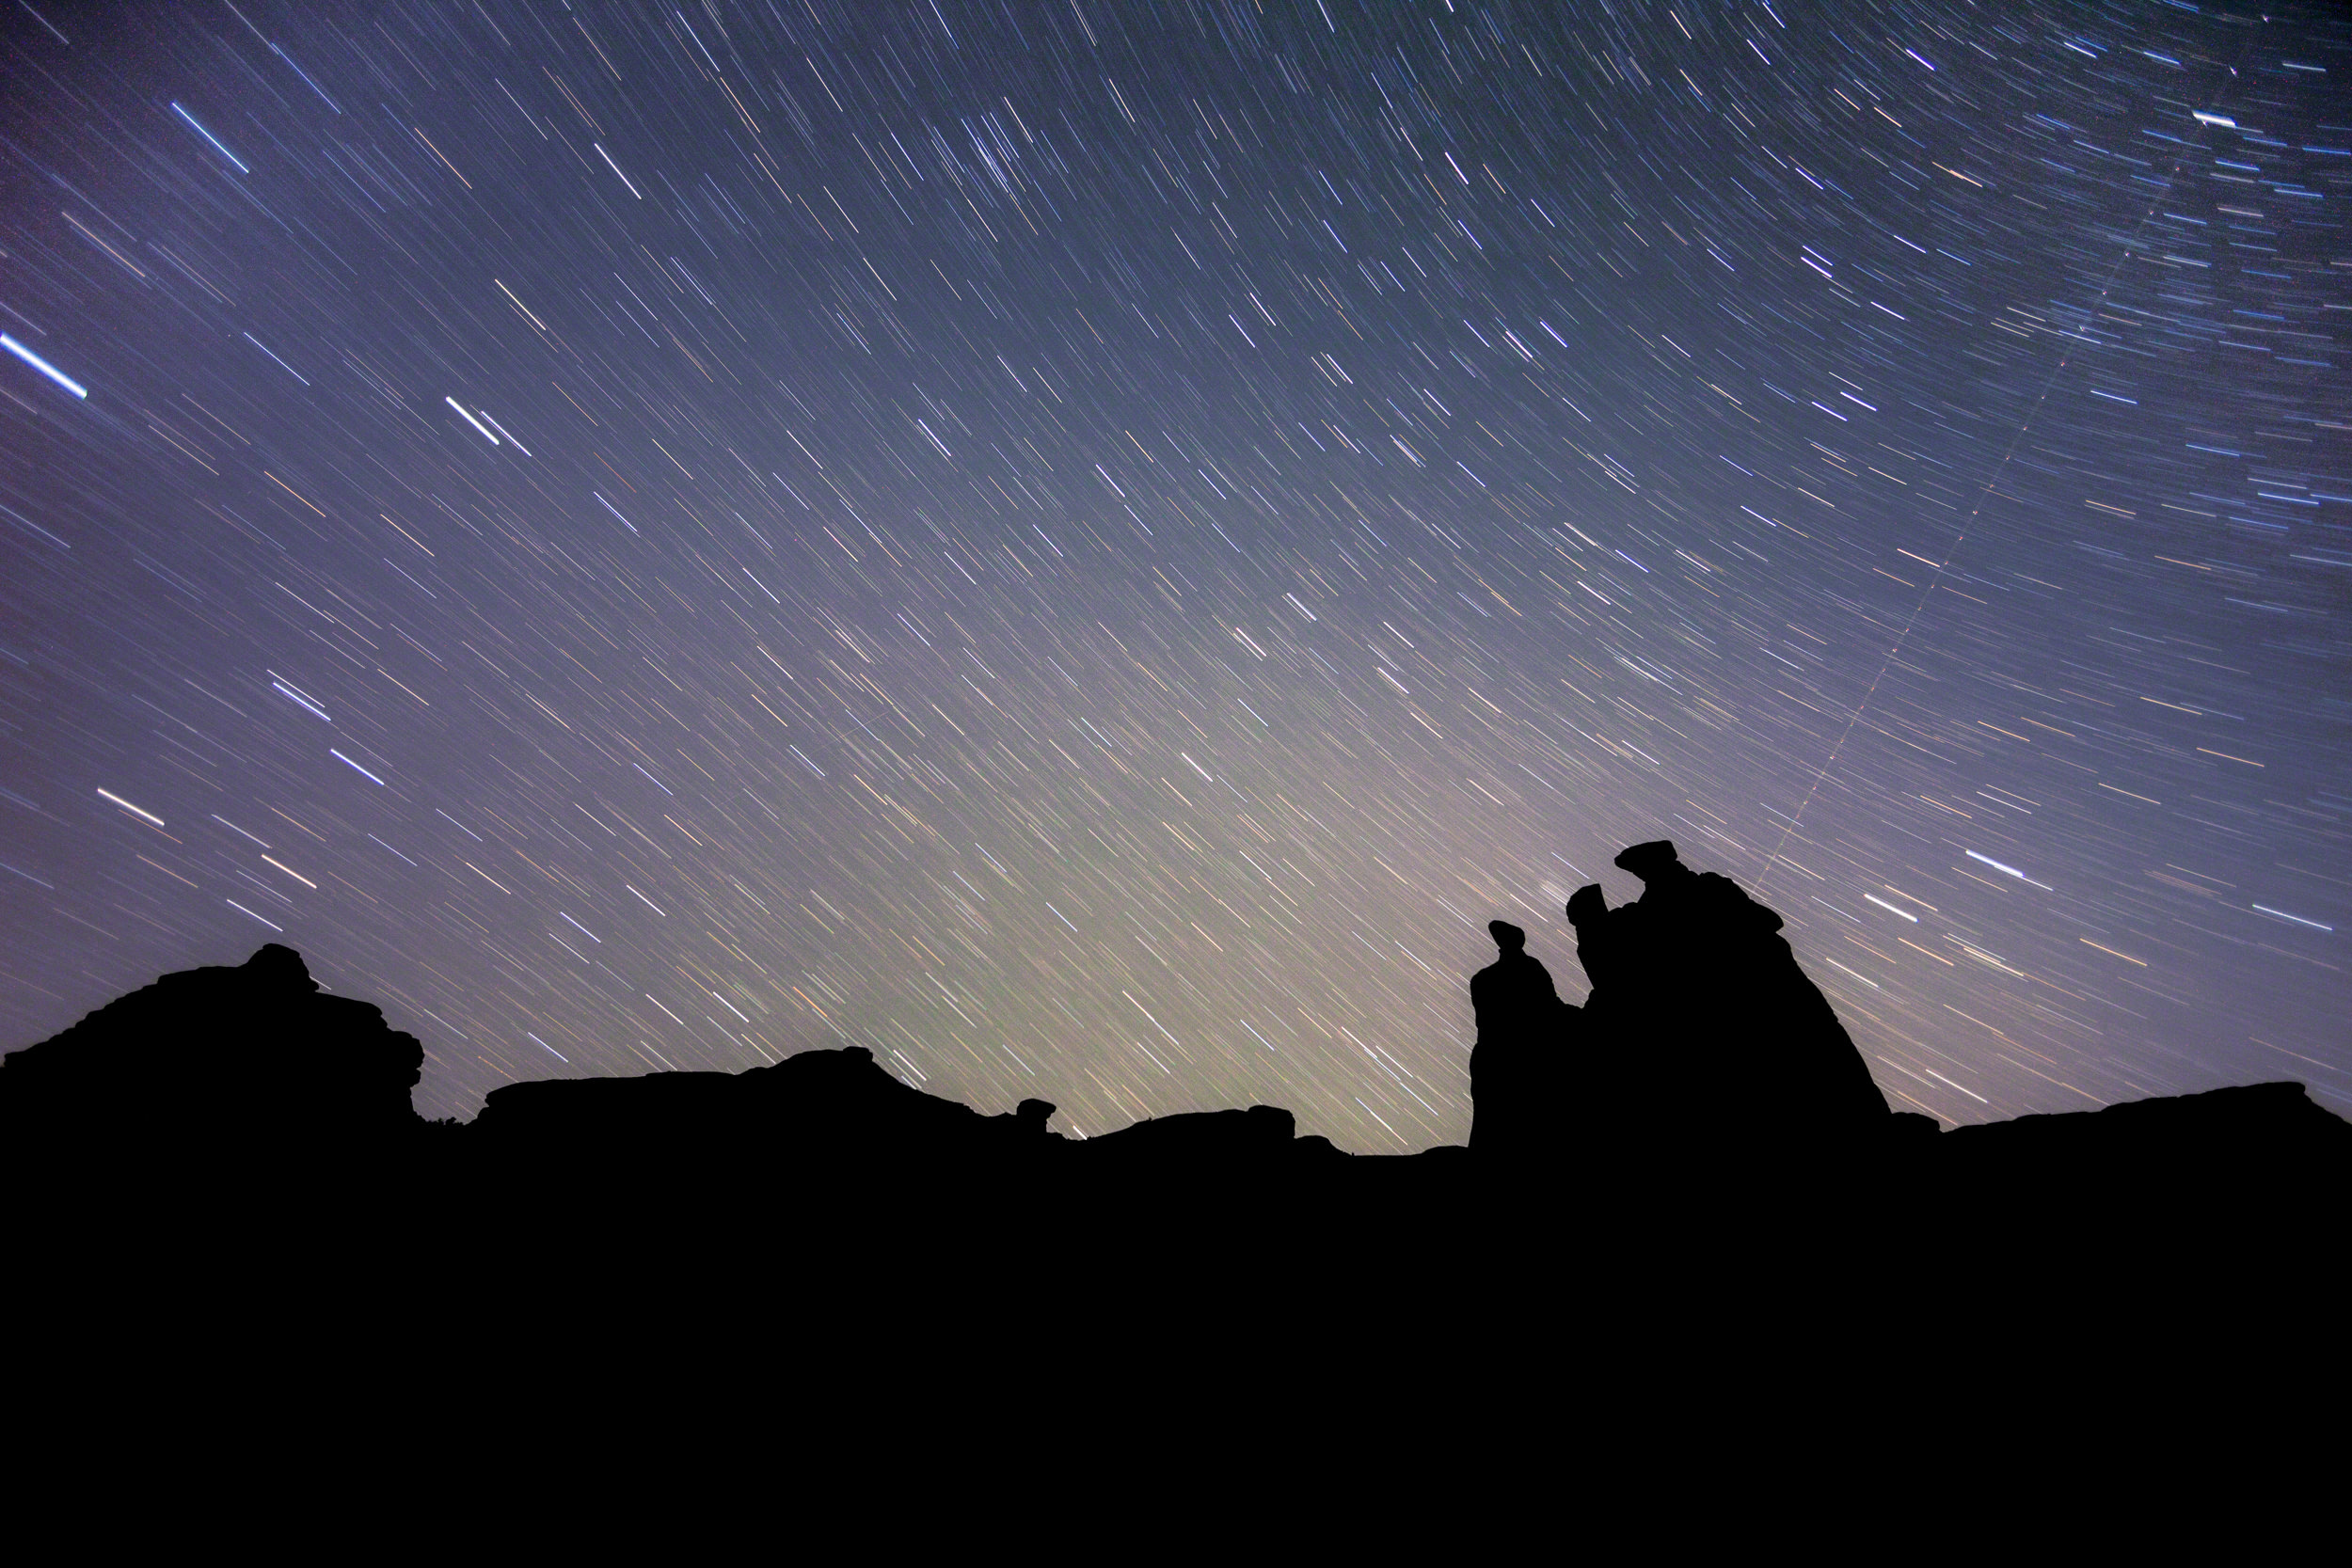
This technique also works well with fast-moving clouds, cars at night, starry skies, people, and any fast-moving object. It’s fun to play around with your camera settings to see what kinds of interesting effects you can make with both handheld and tripod-mounted long exposures. (View the collection below to get an idea of what settings work with different situations.)
-

- For this image I mounted my camera out the window on the back seat and created several photos (a 2-second exposure). This was the best of the bunch.

-
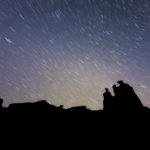
- Photographing star trains is a fun way to create a long-exposure photograph.
-
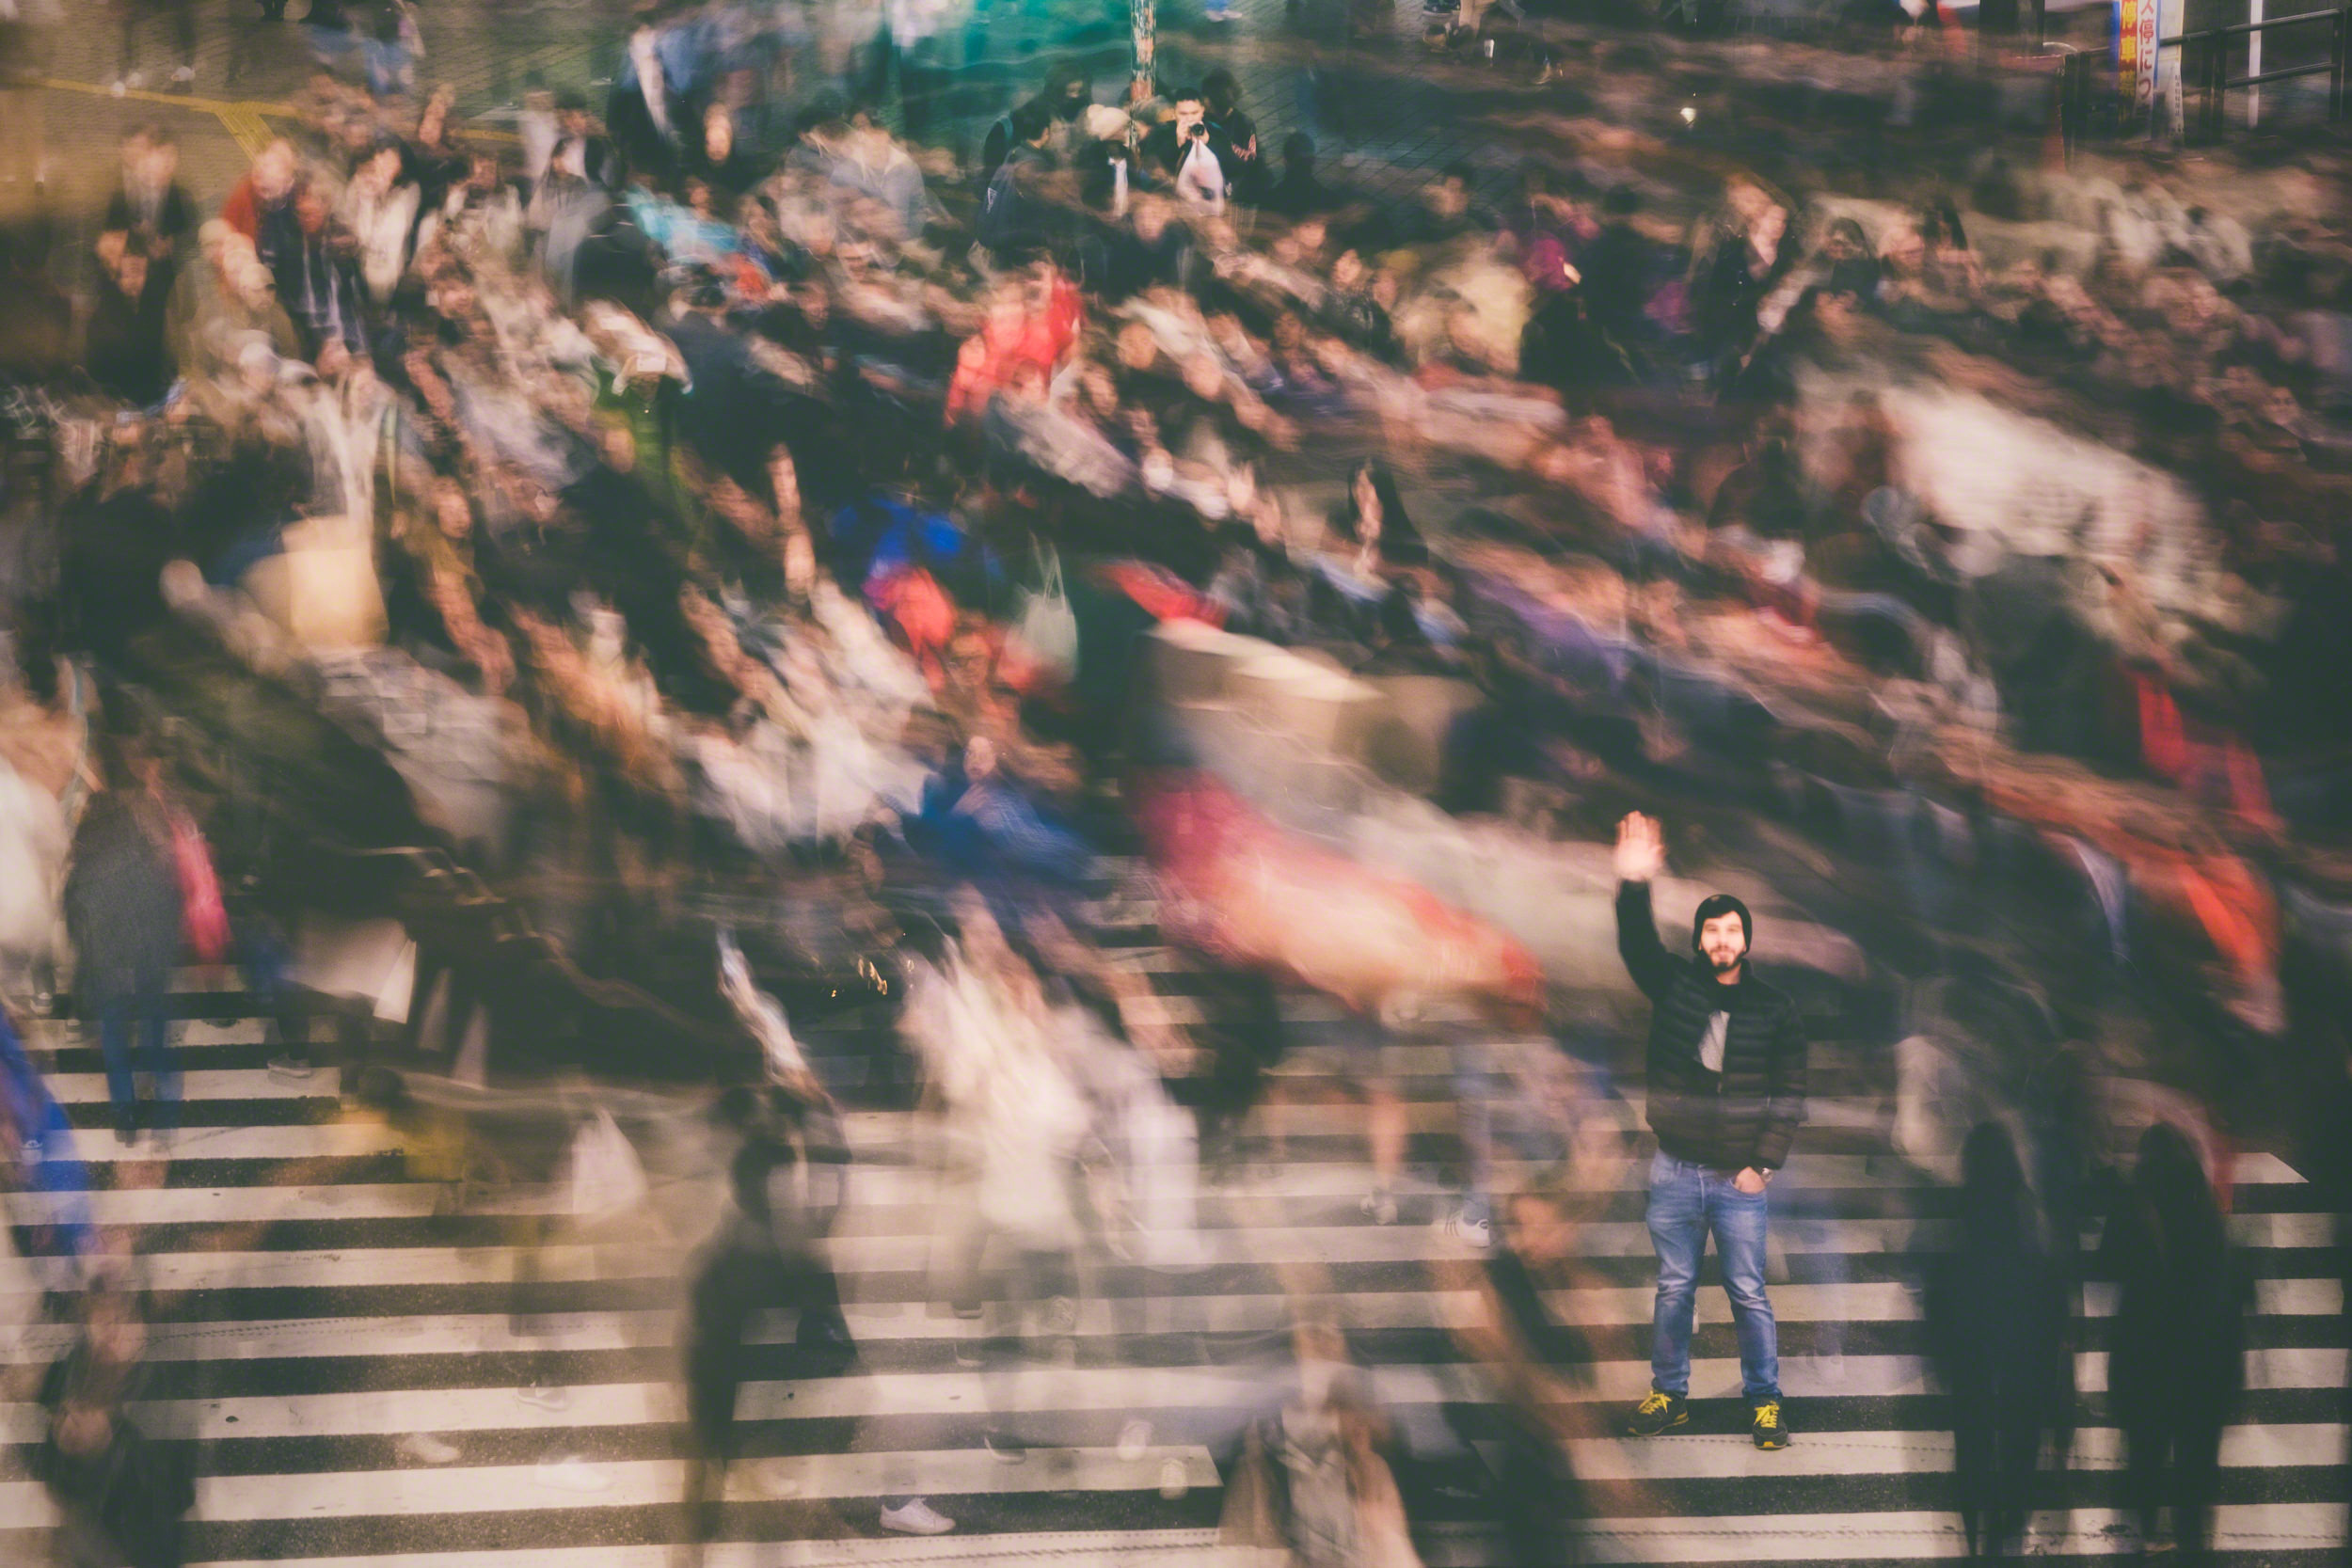
- The crowds crossing the streets in Shibuya, Tokyo.
-

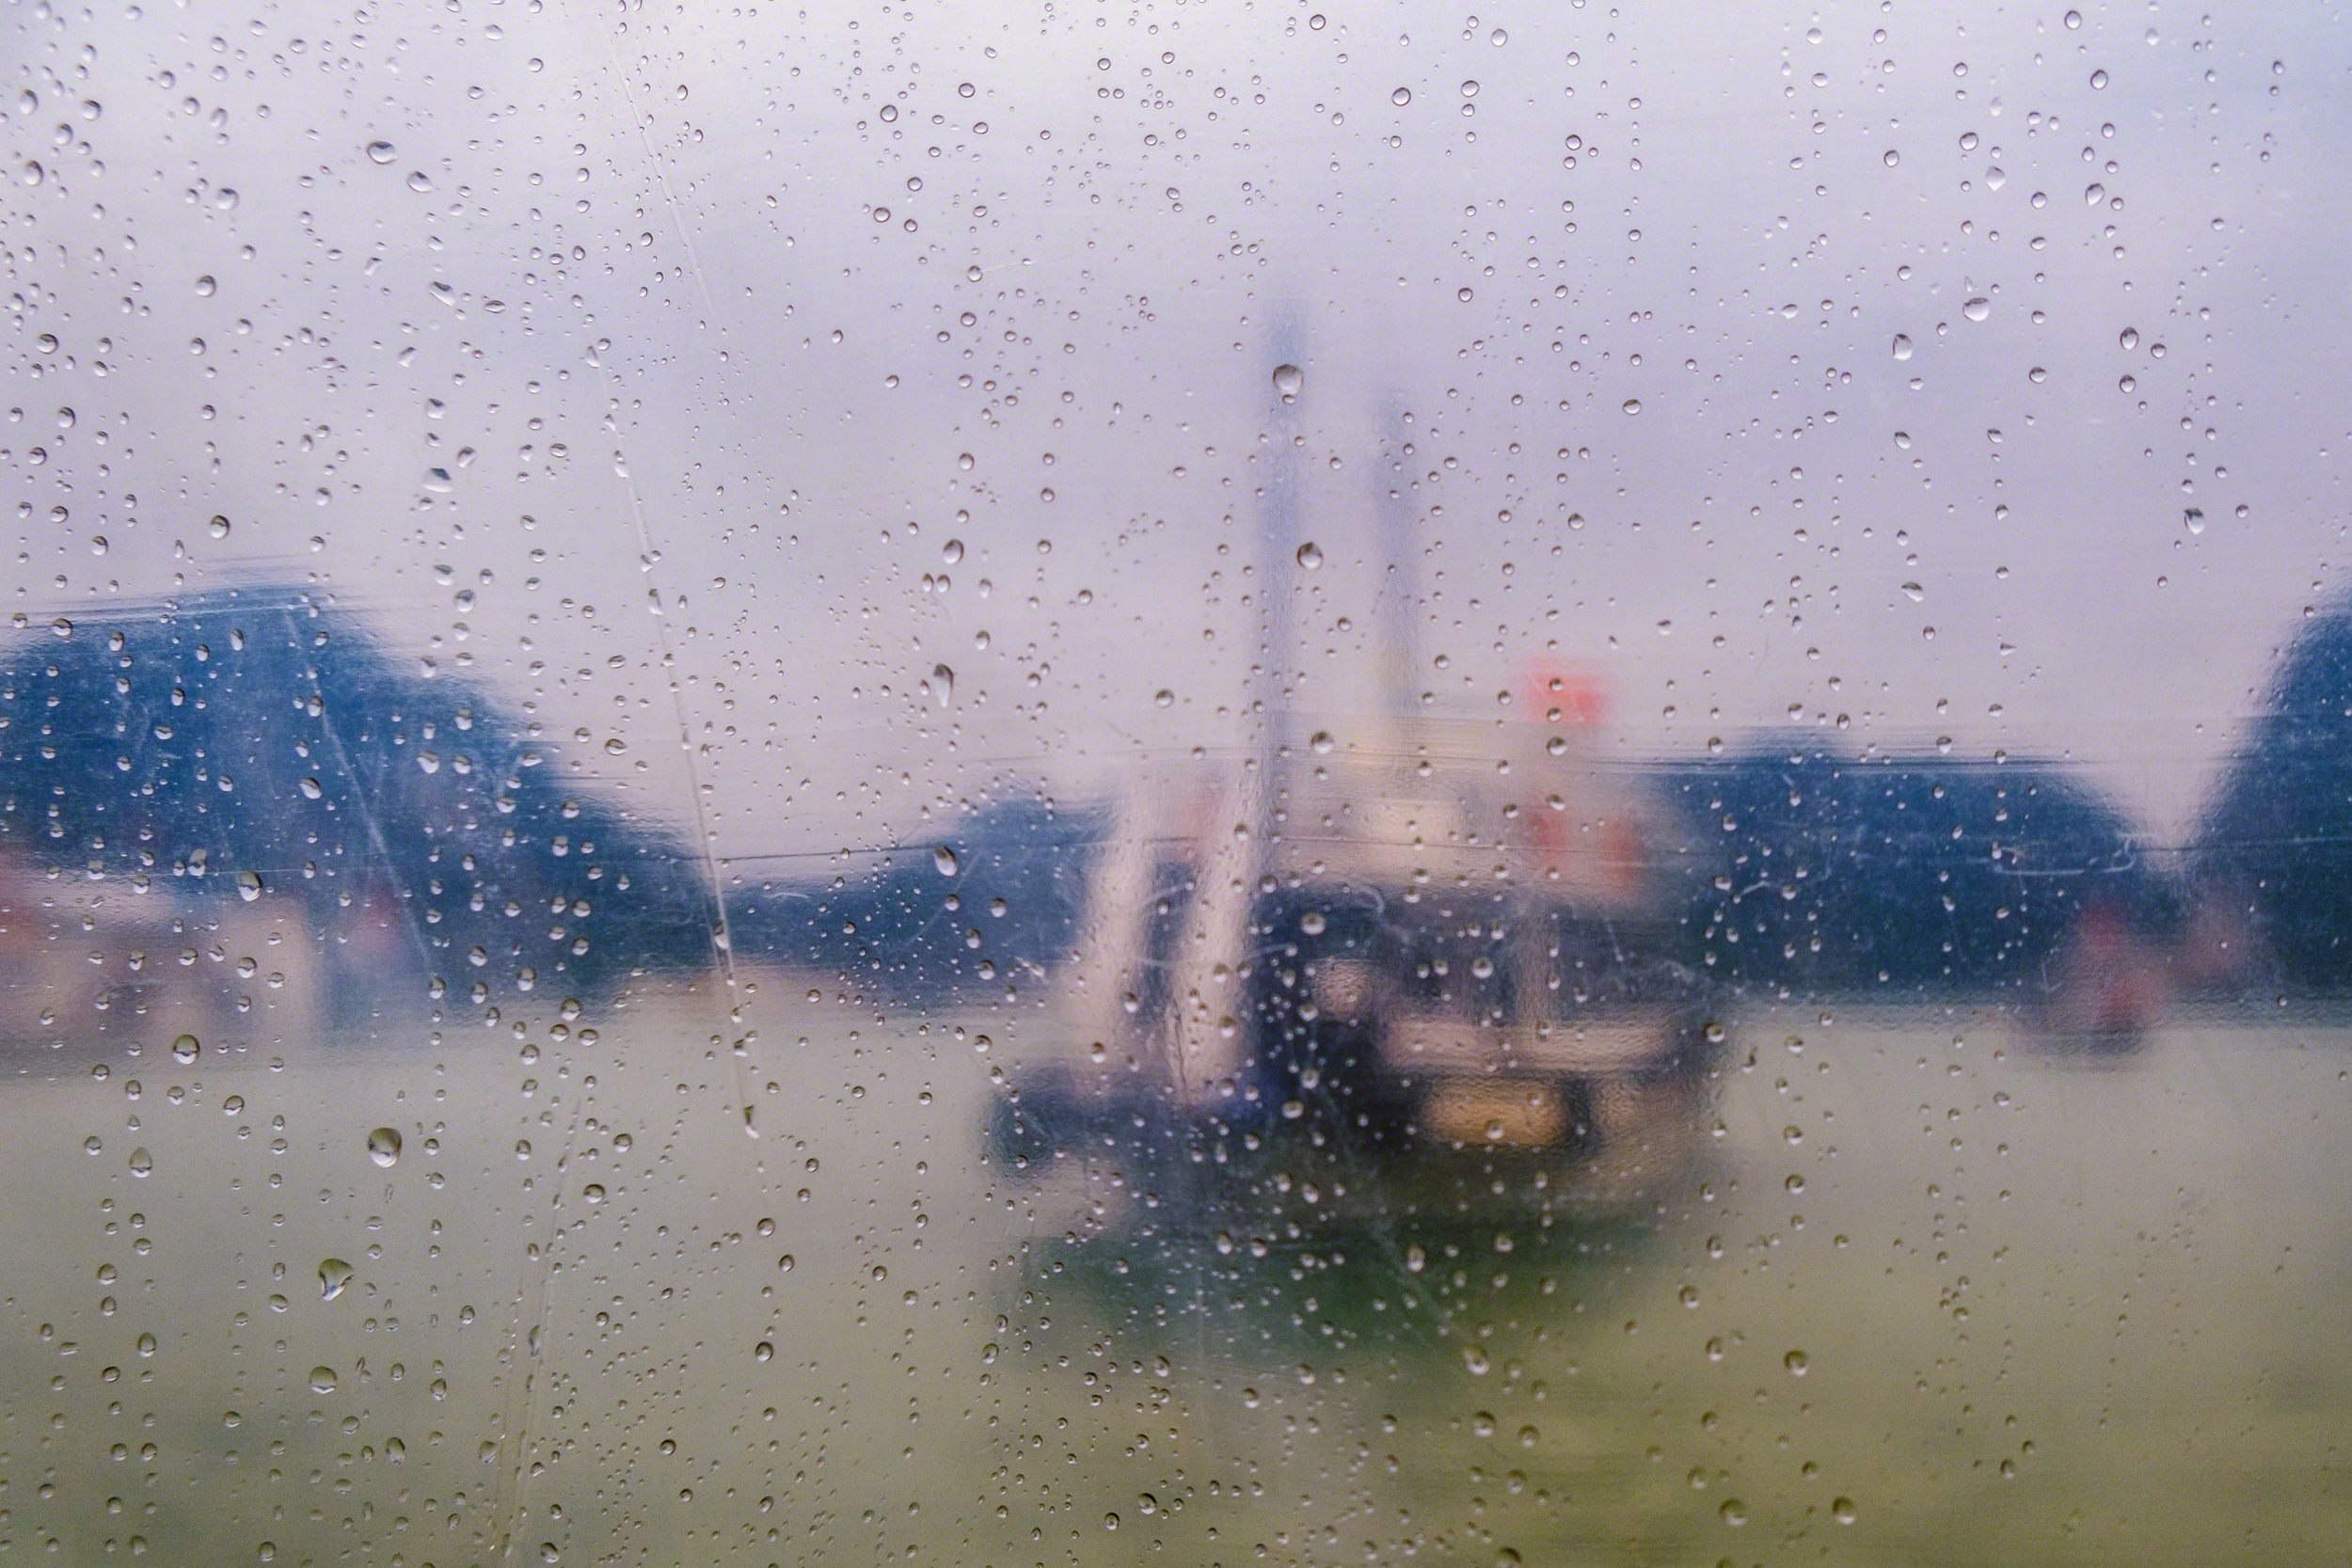
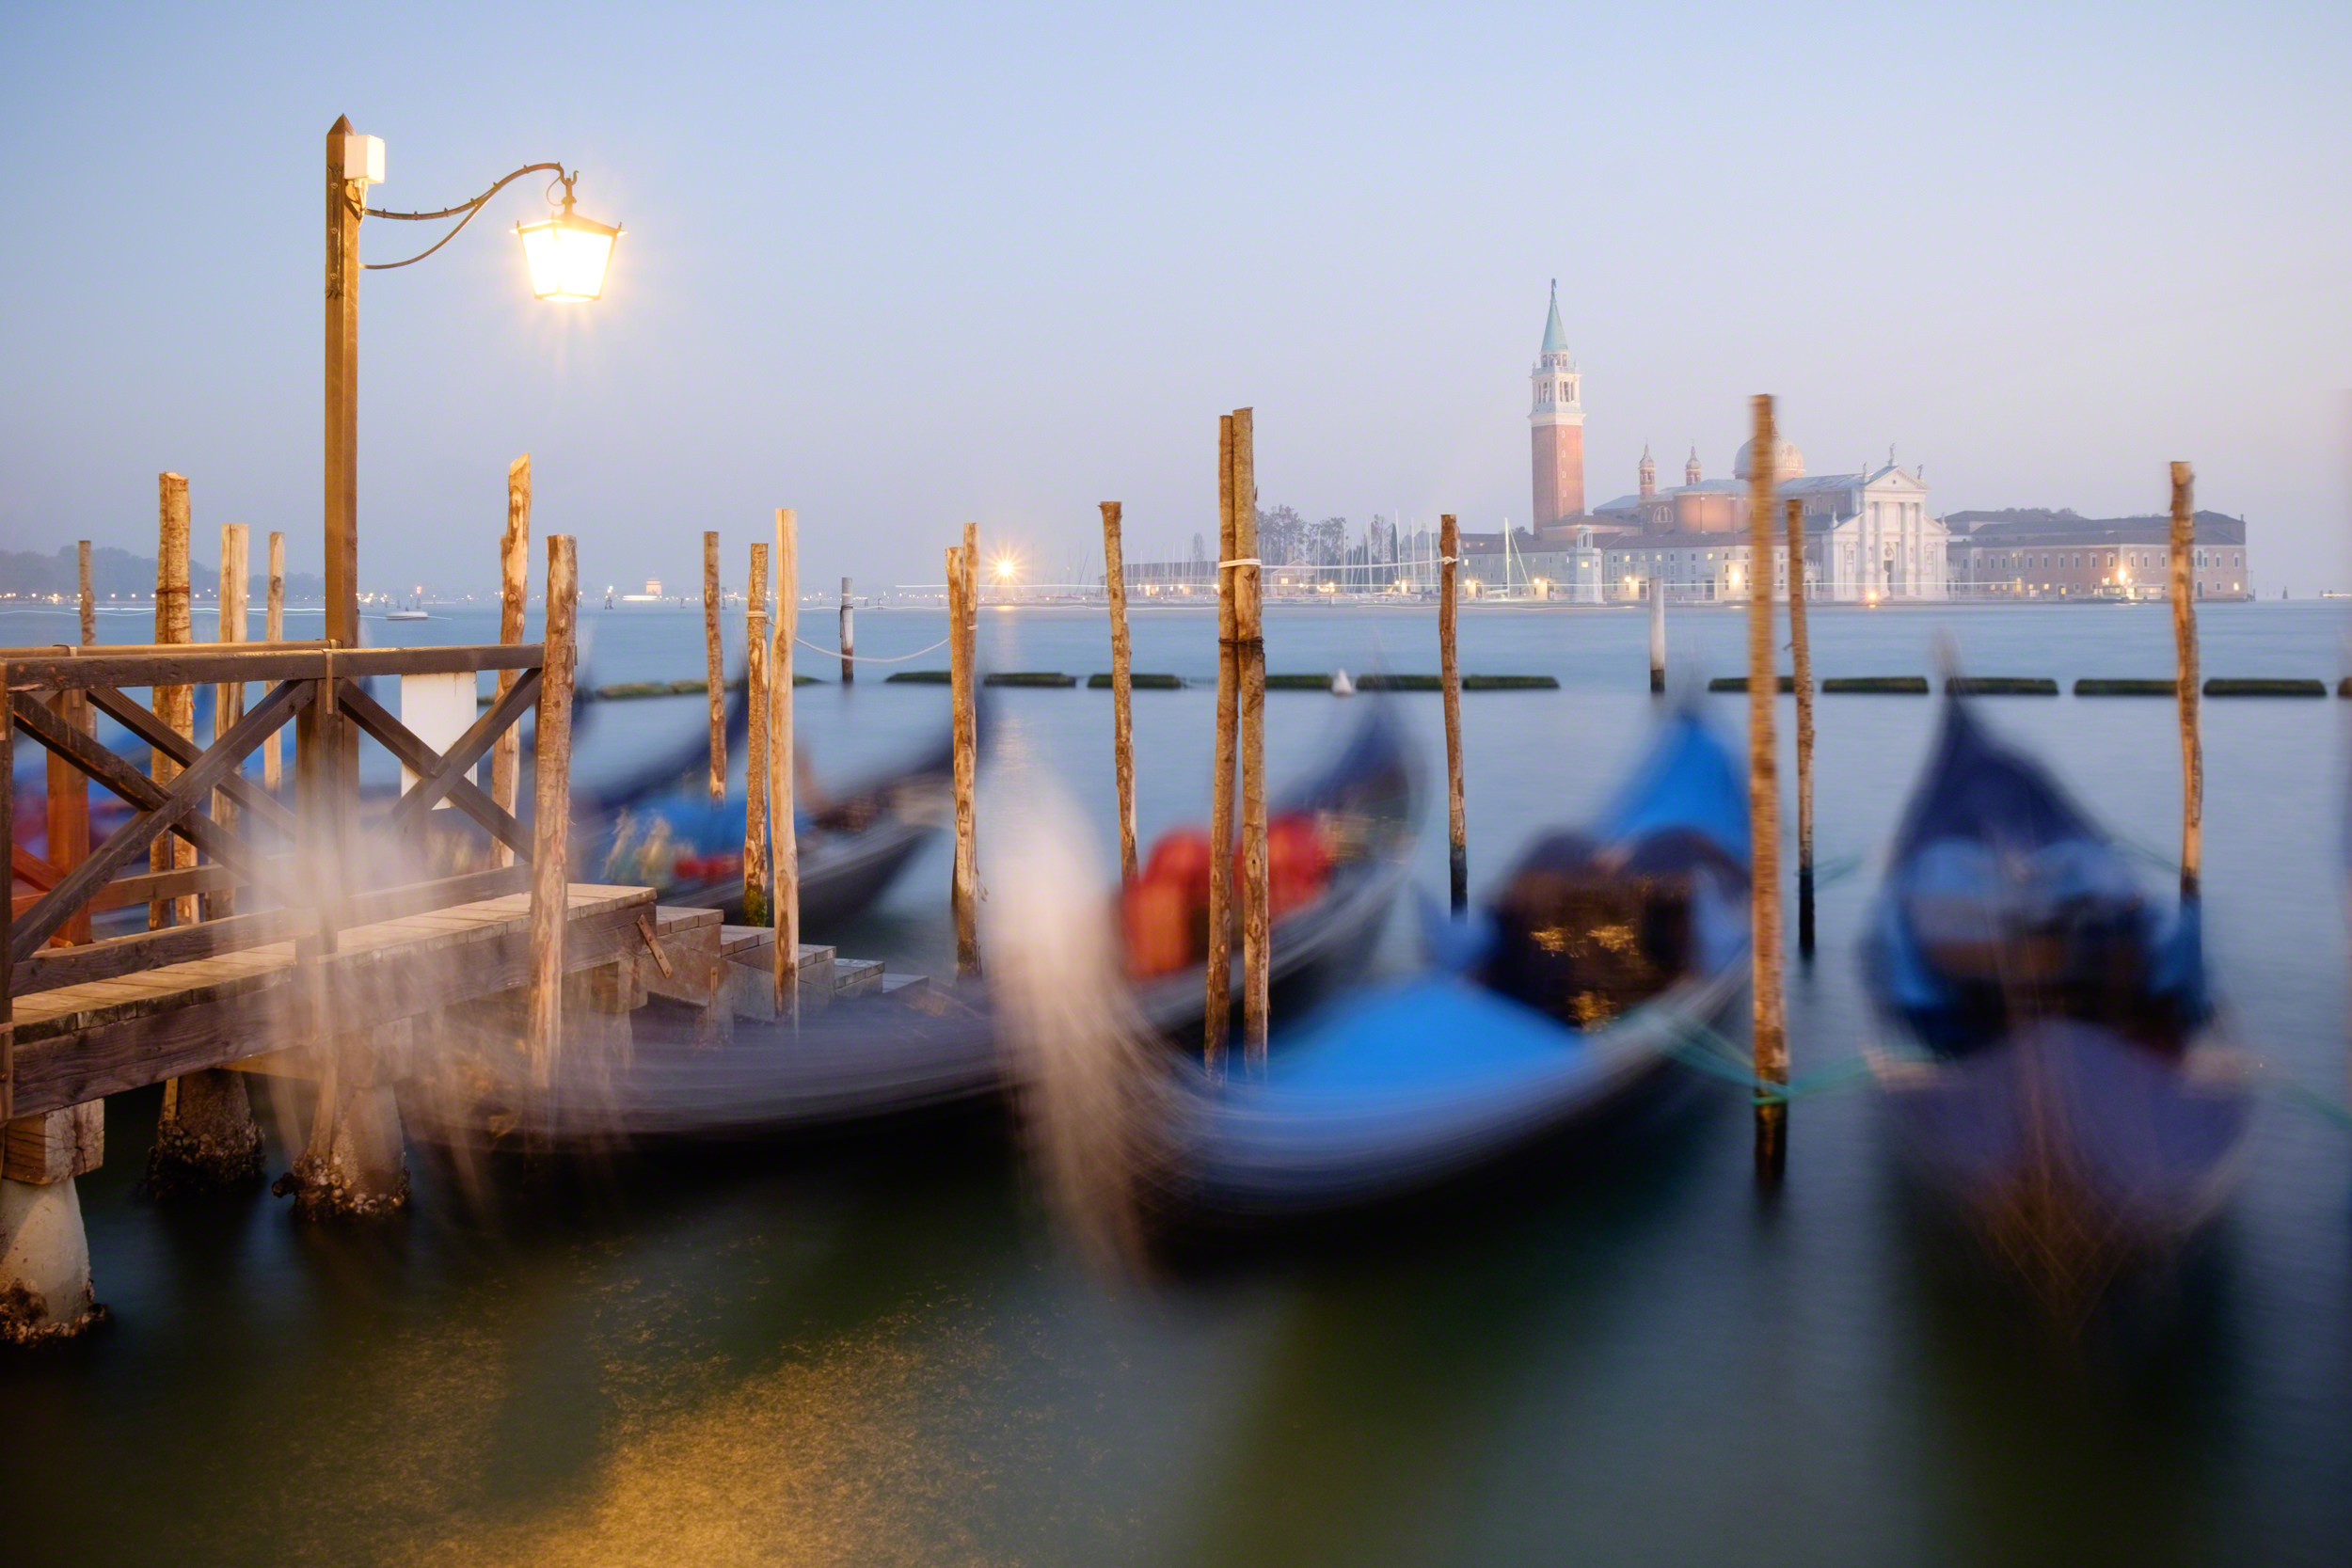
- Boats in the water made for a nice subtle blur effect in this image, photographed in Venice, Italy.
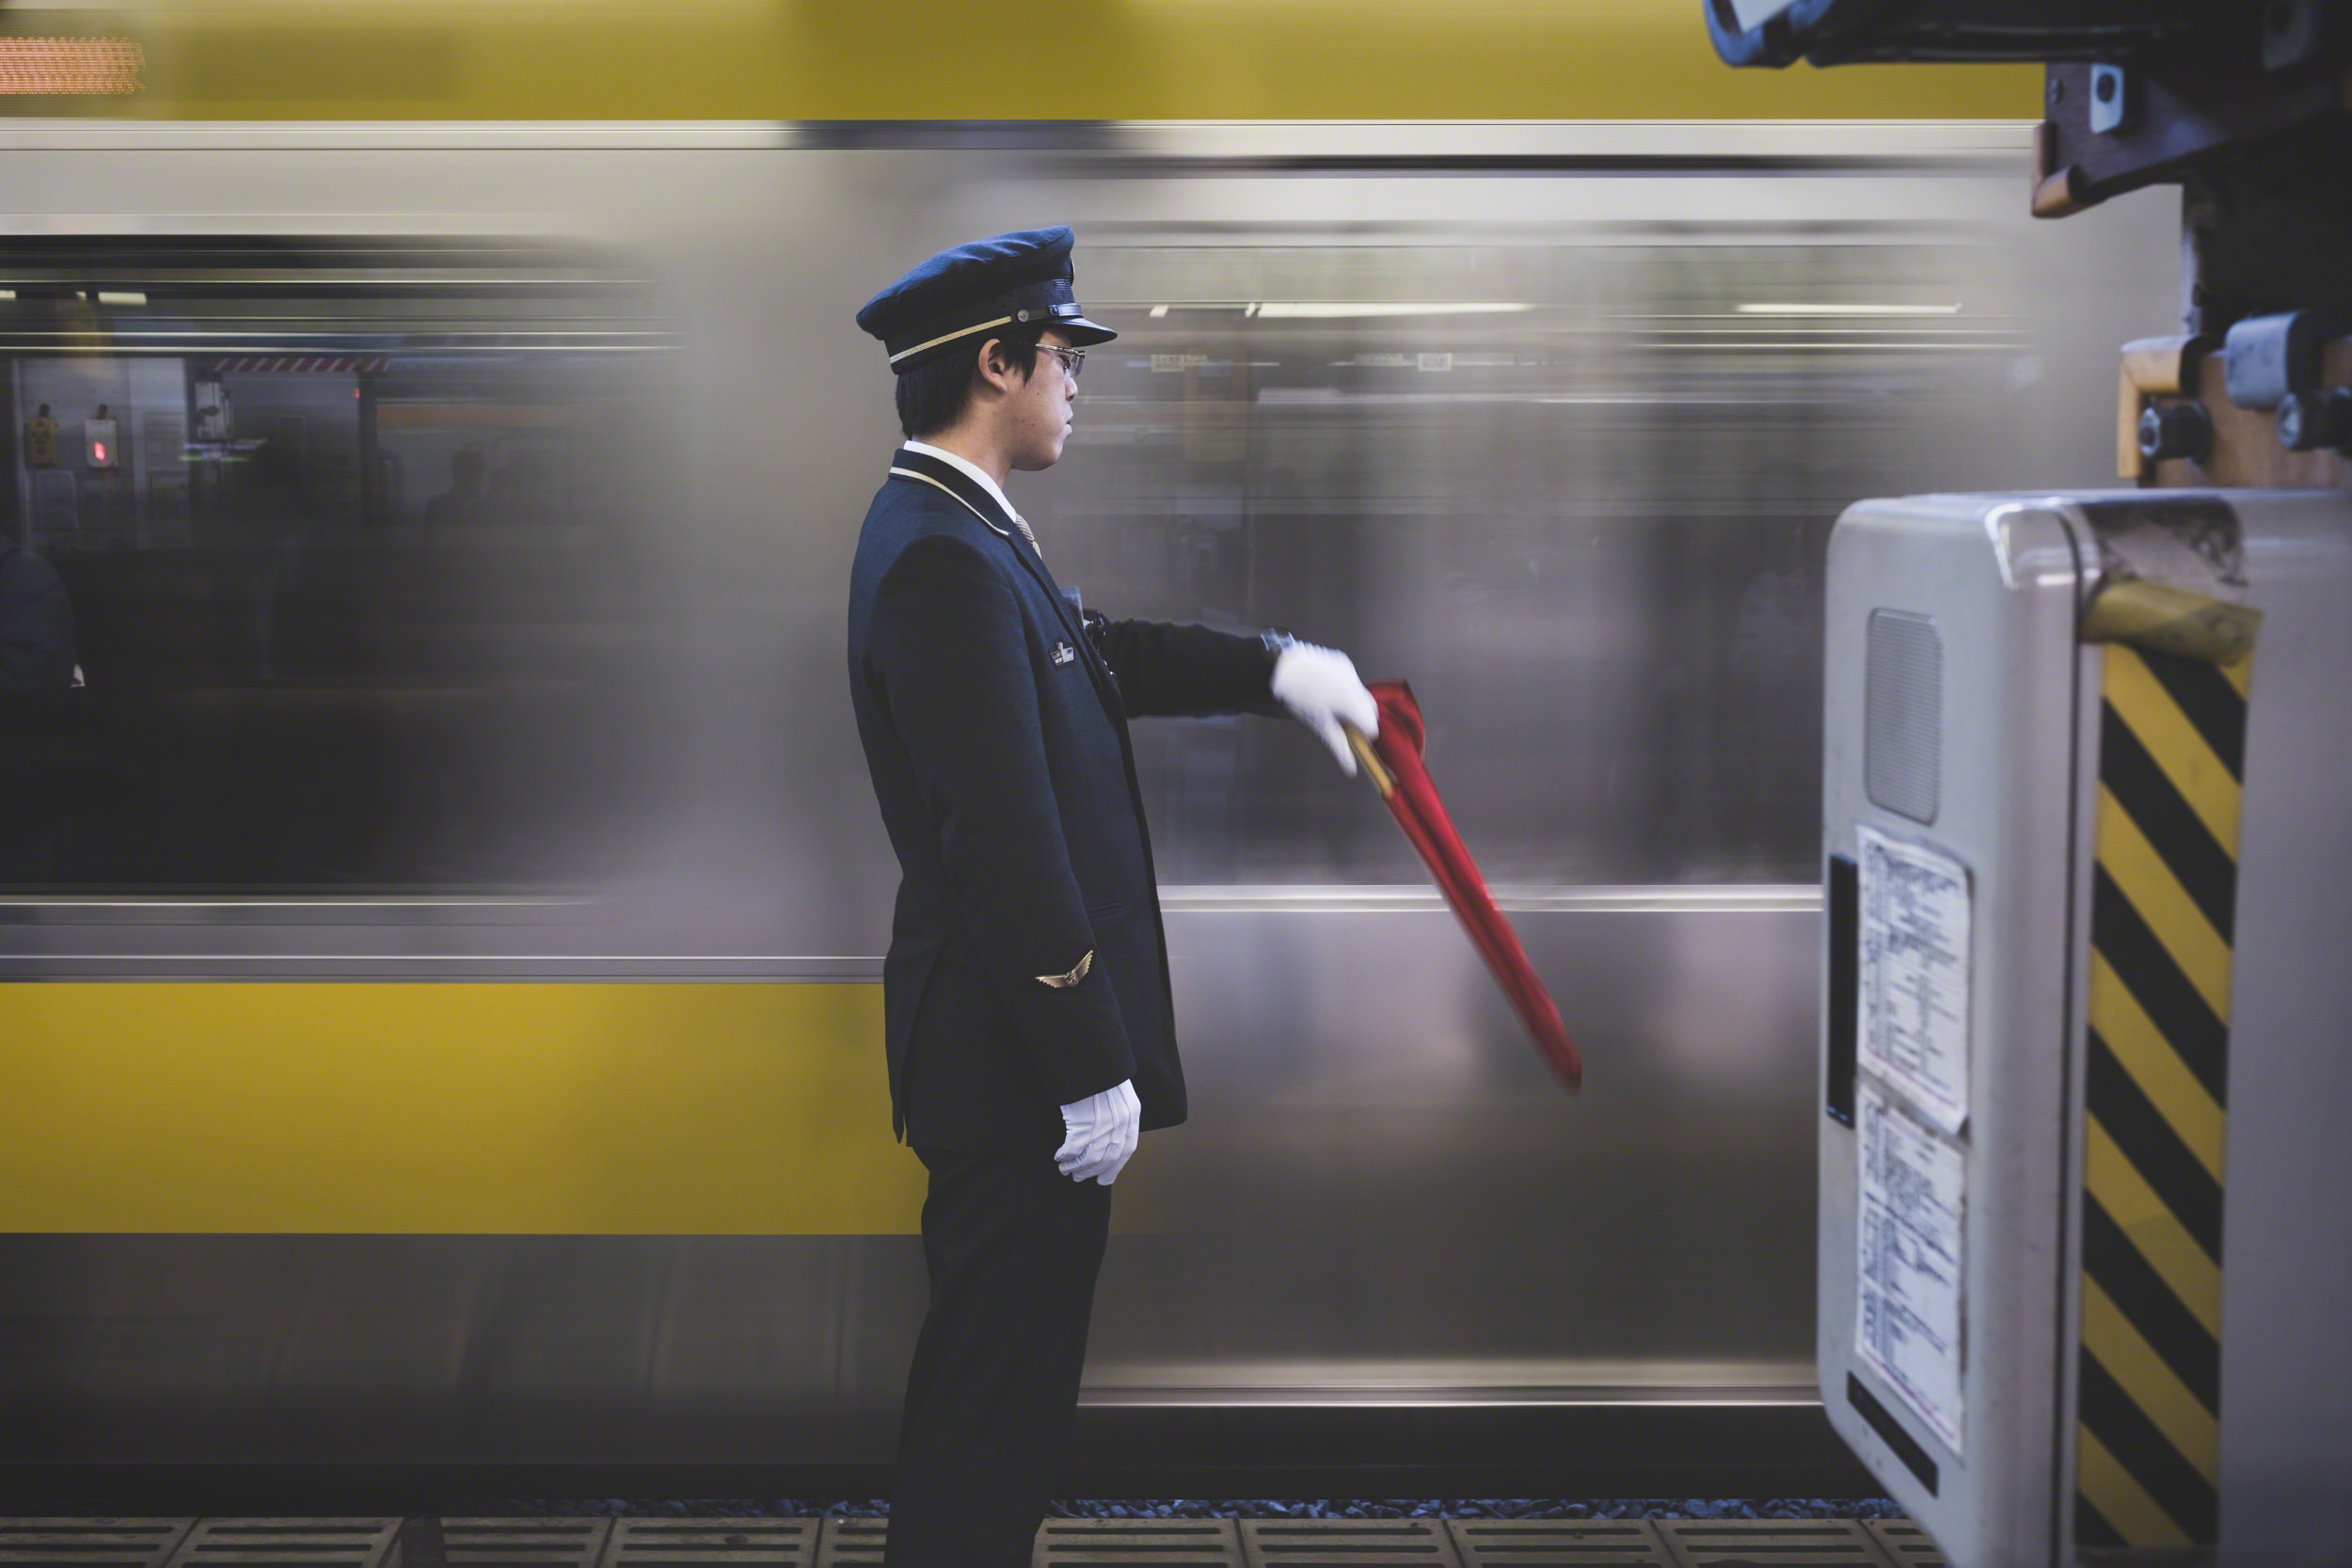
-
- It was possible to blur the train in this hand-held shot due to the speed of the train moving past.
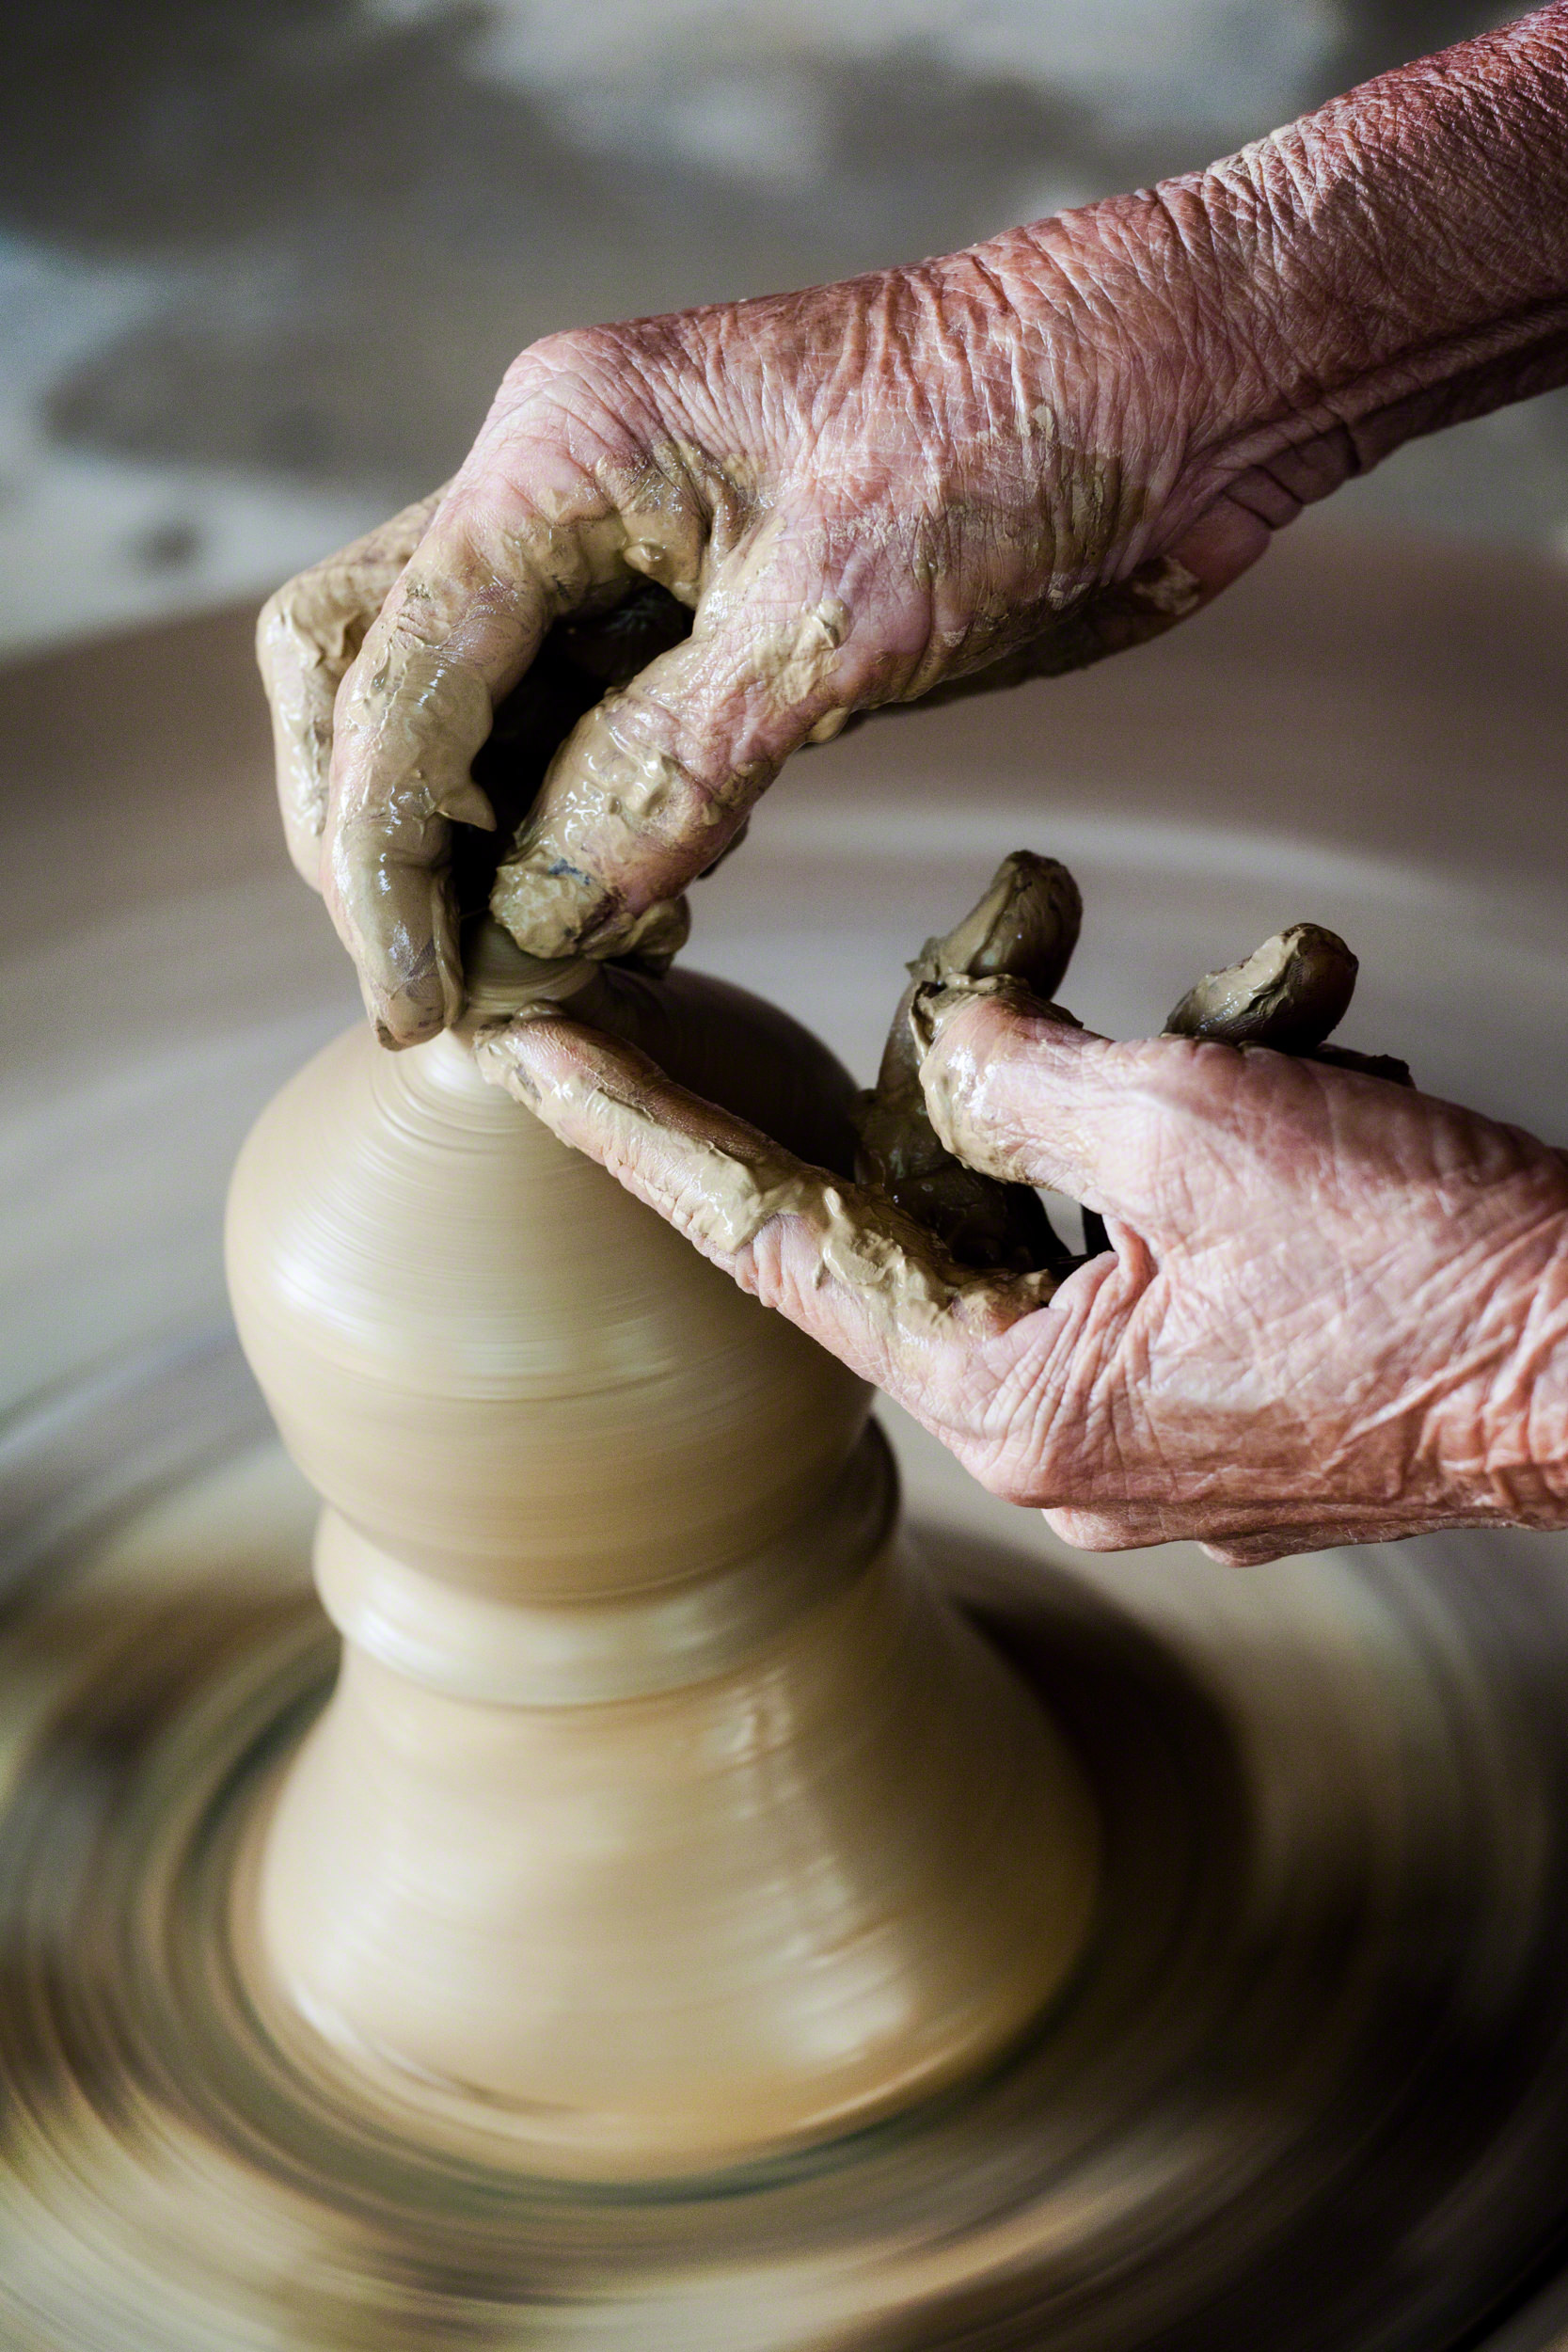
-
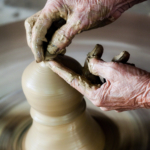
- This hand-held image, photographed at 1/40 sec, allowed me to blur the movement of the pottery wheel while preventing significant movement in the hands.
If you want to have a little fun with your images, why not add some blur? There are a lot of different types of blur you can add, and below I’ve listed some of the methods I enjoy using to add a creative addition to my photographs.
Increase the size of the aperture
The most obvious way to add blur to a photograph is to photograph with a wide aperture. The extent of the blur you add to a photo will depend on a few different factors.
First, the lens you use will physically allow you to open the aperture only to a certain width. Lenses that go to f/2.8 and wider will typically let you to blur any element that is not your in-focus subject quite well.
But aperture alone is not the only factor that determines how the amount of blur added the rest of a photo. Focal length, along with your distance to the subject (and the subject’s distance to the background/foreground), can also play a very big role. Simply put, the longer your focal length, and the farther away you are from the subject (and the subject is from its background), the more blurry the background (or foreground) will become in your photo. Couple this with a wide aperture and you have a very out-of-focus background. (Click here to learn more about this technique, also referred to as lens compression.)
-
- I used a wide aperture (f/2.4) to blur everything except the flower in this photo.
-
- Photographing this with a wide aperture (f/3.2) allowed me to keep the raindrops in focus while blurring the background.
Impressionistic style photography
A fun way to blur a photograph is to use motion blur. To create this effect you set the shutter speed to a slow setting (I typically start out with 1/8 sec and go from there). Then, as you press the shutter speed, move the camera. I also tend to set the camera mode to one of the continuous settings to create more than one photograph for each pass. It takes a lot of experimenting with both the shutter speed and movement, but can be a lot of fun and you can end up with some fantastic results.
Tip: Use the subject to help determine camera direction. I will oftentimes use this technique when photographing trees in the forest, and usually move the camera up-and-down to move vertically with the shape of the trees.
-
- I used a slower shutter speed (1/8 sec) and photographed this with an up-down sweeping motion to blur the trees.
-
- I used a slower shutter speed (1/15 sec) and photographed this with an up-down sweeping motion to blur the trees.
Add blur with software
Another way to add blur is to use software. This can be done either in-camera (depending on your camera), or using software such as Photoshop. I use Fujifilm cameras, and many of them have an “advanced” filter that allows me to create a miniature-style photograph which replicates the tilt-shift look.
-
- In used the in-camera “Miniature” setting on my FUJIFILM camera to create this effect.
-
- In used the in-camera “Miniature” setting on my FUJIFILM camera to create this effect.
Adding blur in Photoshop is relatively simple. There’s a filter called “Blur gallery” that allows you to easily drop in a tilt-shift or field blur effect with only a few clicks:
- In Photoshop, go to Filter > Blur Gallery > Tilt Shift (or choose any of the other items in this list)
- Next, click in the image to “pin” the blur to the photo.
- Adjust the settings to achieve your desired look, and click OK when finished.
(You can also use ON1 Photo RAW’s “Lens Blur” filter to achieve a similar effect.)
Panning
Panning is the art of moving your camera with a fast-moving subject, while also using a low shutter speed, with the intention to keep the subject in-focus and visible while also adding motion blur to the surrounding scene. It’s very experimental and can take several tries to get down the proper shutter speed and movement. A lot of it depends on how quickly your subject is moving, along with how close you are to the subject itself. Something that is close to you (while using a wider lens) will require more camera movement with a slower shutter speed, whereas something further away (with a longer lens) will need a faster shutter speed but less camera movement.
Tip: If you have a flash or strobe handy it will help to “freeze” the subject in place and keep the main part of the image looking crisp and bright.
-
- I used a slow shutter speed (1/15 sec) and followed the man on his bike to blur the scene, and then froze the action using a strobe.
-
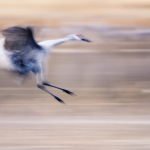
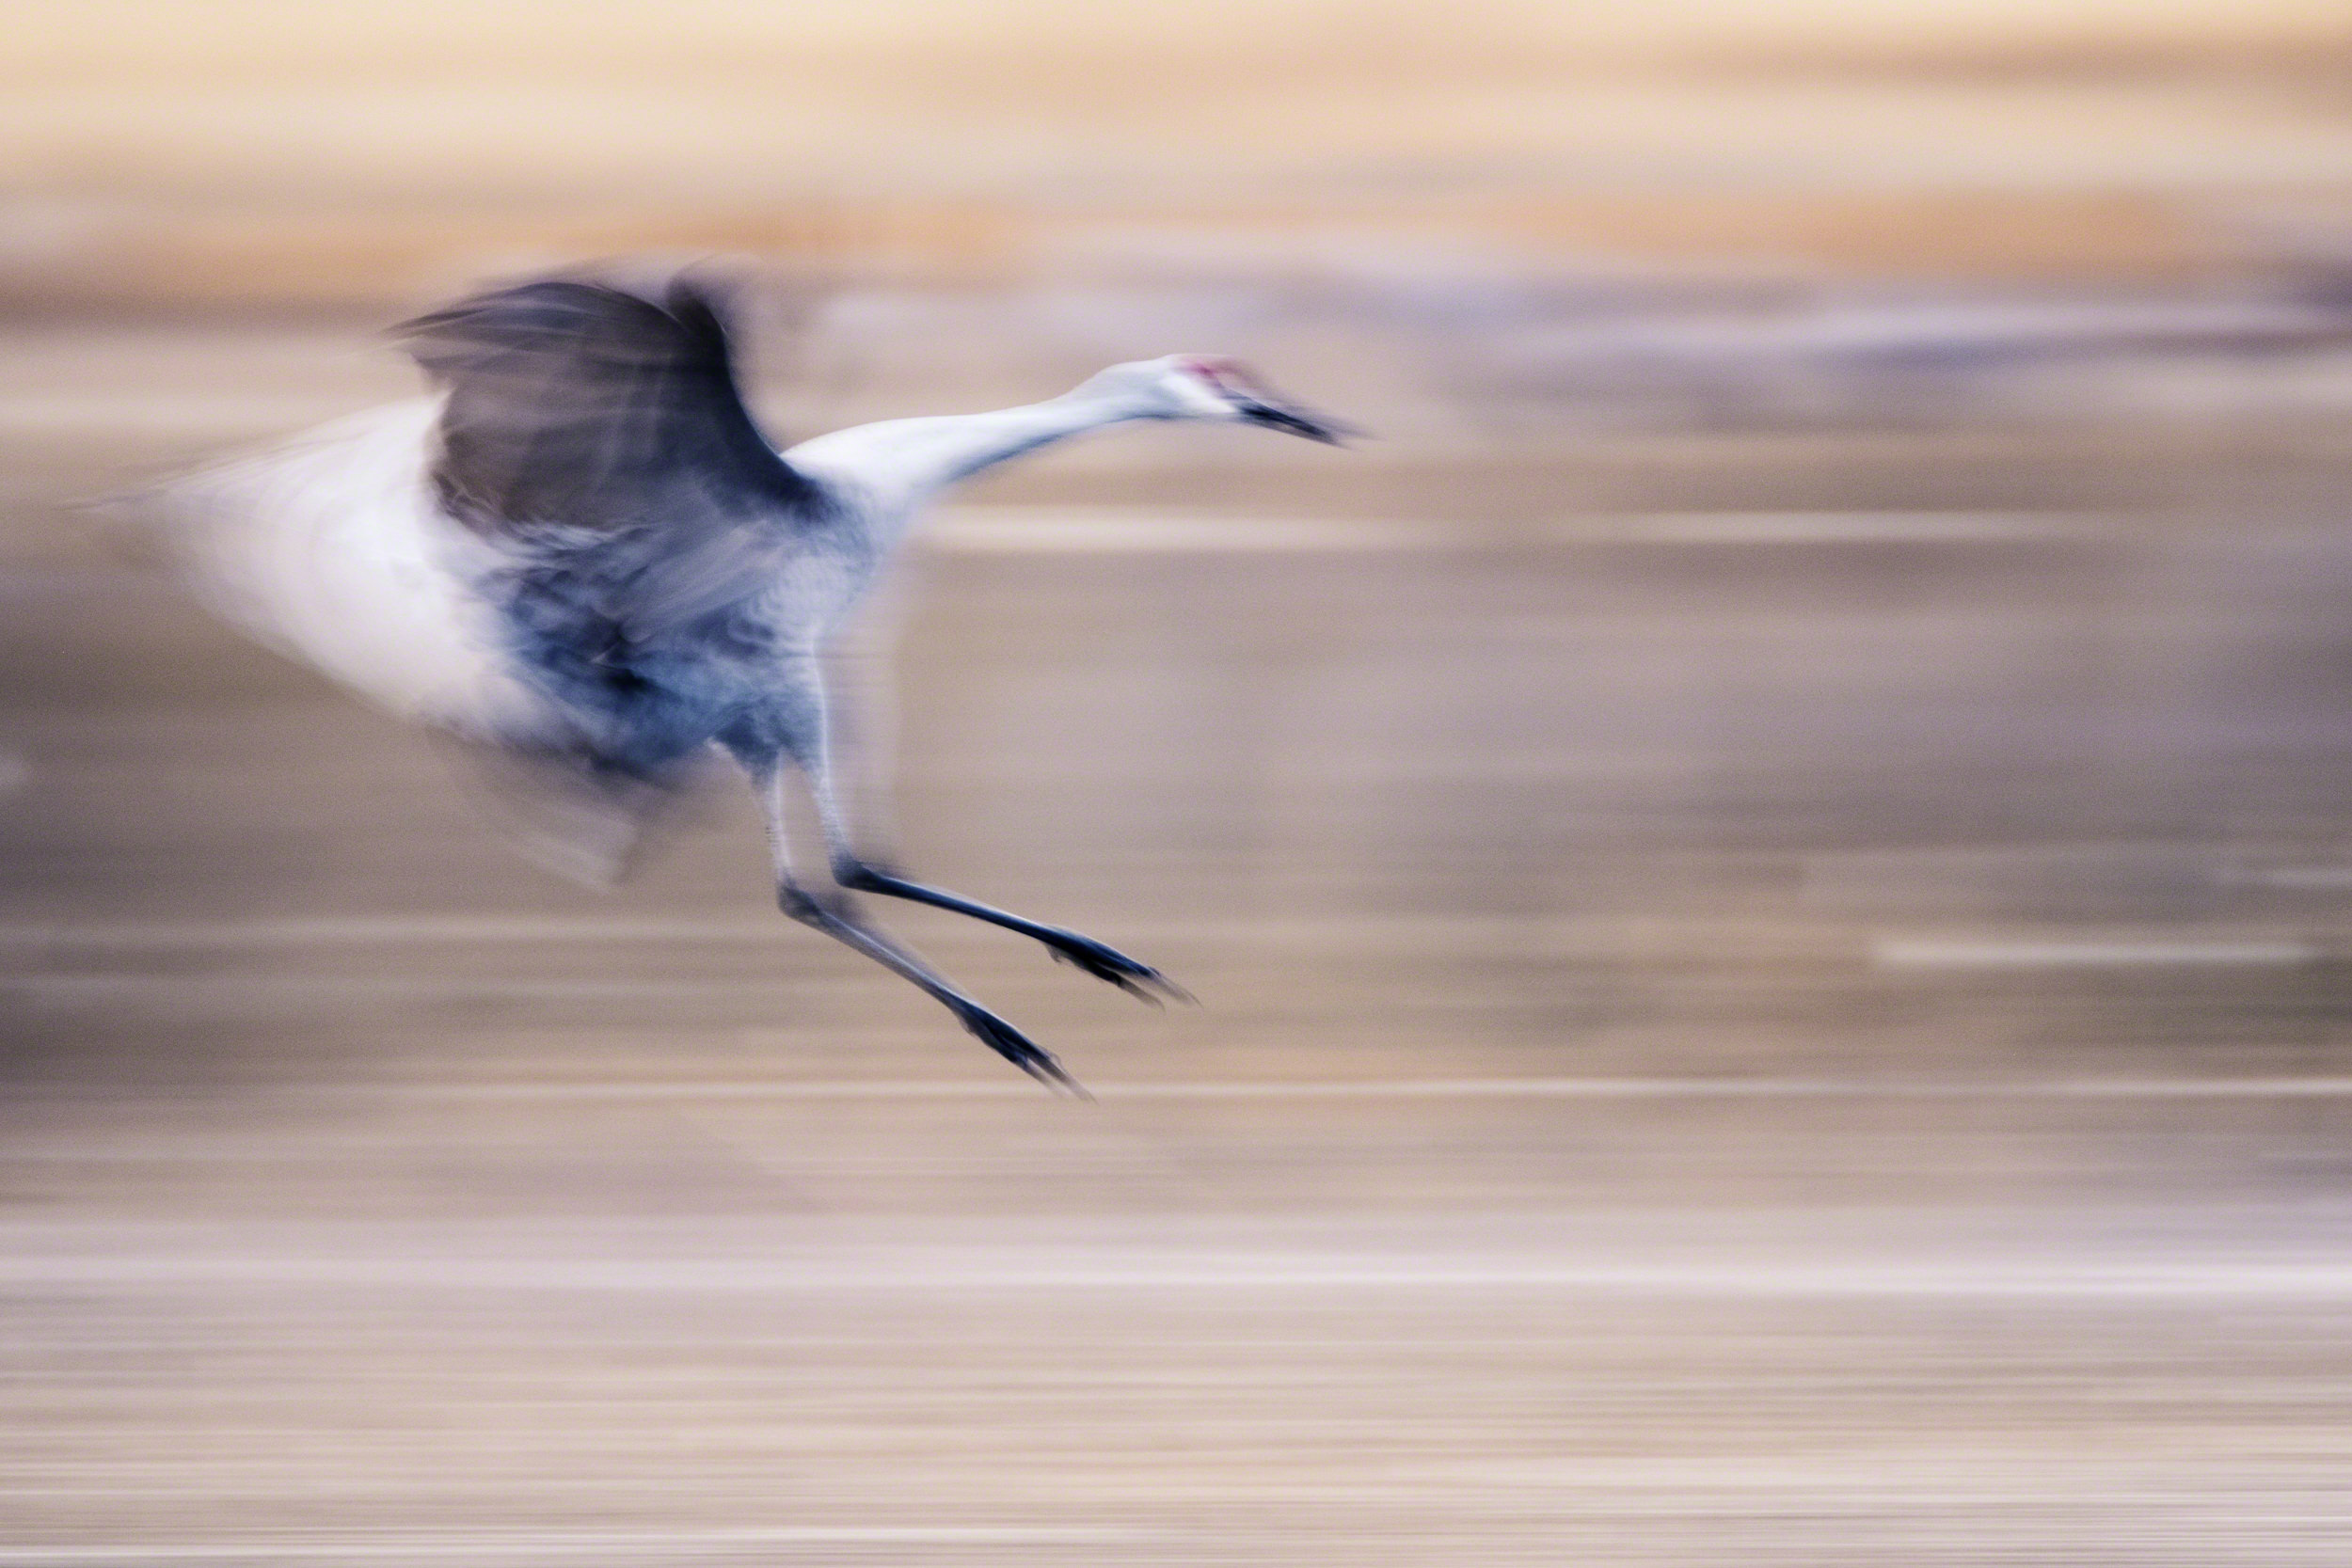
- This panning shot of a Sandhill Crane in Bosque del Apache was created by following the bird as it flew through the air.
Use a unique lens
Some lenses will allow you to add a lot of interesting blur effects in-camera. Tilt-shift lenses are an option, and one thing they allow you to do is create a unique focus. However they can be quite expensive and are not available for all camera models.
-
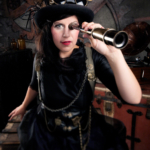
- A tilt-shift camera helped to add a unique blur to this portrait.
-
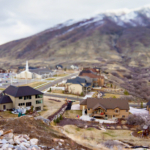
- A tilt-shift camera helped create a miniature effect on this small town.
If you enjoy seeing things differently in-camera, then you may want to give a Lensbaby a try. These manual-focus lenses are truly unique and allow you to add interesting blur in the camera. Over the years they have expanded their offerings, and have many different types of lenses that each create their own effect.
-
- This was created using the Lensbaby Composer.
-
- This was created using the Lensbaby Composer.
Experiment with slow shutter speeds
Slow shutter speeds can be helpful for both long-exposure images photographed from a tripod, or by using a shutter speed that is just slow enough to capture movement with a hand-held photograph. I love to photograph both waterfalls and waves (crashing against a rocky shoreline), and using a slow shutter speed can give the water a beautiful and soft effect. The longer the shutter speed the more “cotton candy-like” the water will become. It’s fun to experiment with different settings to see what it does to the water. (Click here to learn more about creating long-exposure water photographs.)
-
- A shutter speed of only 0.5 seconds is all that was needed to blur the waterfall in this image.
-
- A 15-second exposure created a cloud-like effect to the water in this rocky shoreline.
This technique also works well with fast-moving clouds, cars at night, starry skies, people, and any fast-moving object. It’s fun to play around with your camera settings to see what kinds of interesting effects you can make with both handheld and tripod-mounted long exposures. (View the collection below to get an idea of what settings work with different situations.)
-
- For this image I mounted my camera out the window on the back seat and created several photos (a 2-second exposure). This was the best of the bunch.
-
- Photographing star trains is a fun way to create a long-exposure photograph.
-
- The crowds crossing the streets in Shibuya, Tokyo.
-
- Boats in the water made for a nice subtle blur effect in this image, photographed in Venice, Italy.
-
- It was possible to blur the train in this hand-held shot due to the speed of the train moving past.
-
- This hand-held image, photographed at 1/40 sec, allowed me to blur the movement of the pottery wheel while preventing significant movement in the hands.

Nicole is a photographer, published author, and educator specializing in Lightroom, Photoshop, and photography. She is best known for her books on food photography but is widely versed in various photographic genres, including landscape, nature, stock, travel, and experimental imagery.


Hi Nicole, this must be providence, as on my way back from PDX today, I stopped at the Lensbaby store in Portland and bought my first Lensbaby , a Composer Pro II, with a sweet 50. For the rest of my drive home I listened to the latest NoName Photo Show, with you and Brian. Now, to get my creative juices flowing and have some fun!
Have fun with that new lens, Lisa! :)