
About Luminar 2018
The new version of Luminar 2018 is the first iteration to be available on both Mac and Windows. Because it is newly-developed for Windows not all of the features made it into the software at the time of release. However, the software is being updated incrementally and will soon have feature parity (be identical) with the Mac version.
To make it easy for Windows users to visualize the differences—particularly when watching Mac-platform education content—I put together this visual comparison guide. While I have done my best to make this as comprehensive as possible, it’s possible I may have missed a few features. If you notice something that is not listed here, please feel free to comment below so that I can consider adding it to the list.
Please note that I am NOT an employee of Skylum Software and have only an affiliate relationship with them. If you have specific technical questions for the Luminar team, please click here to contact them directly.
Current Luminar Version: 1.3.0
The following items have been removed from the list below due to the software being updated:
- Batch processing: This feature is now available in Luminar for Windows
- Tools Menu: The Transform tool is now available in Luminar for Windows
- Color Temperature Filter: The white balance adjustments and eyedropper are now available in Luminar for Windows
- Save History: It is now possible to use the “Save History” option when saving a file in Luminar for Windows
- Layers Options: Rename Layers is now available in Luminar for Windows (other differences still apply)
ADJUSTABLE GRADIENT FILTER
Mac
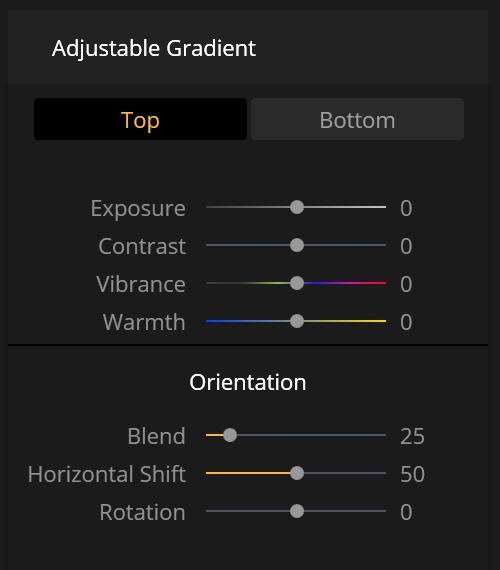
There are few differences between the functions of this filter, but the its look is slightly different between the Mac and Windows versions. On the Mac version, you can set the orientation of the filter by dragging the line within the image, and the additional settings are located on the top.


Windows
There are few differences between the functions of this filter, but the its look is slightly different between the Mac and Windows versions. On the Windows version, all settings for the filter are located within the Filters panel.
BI-COLOR TONING FILTER
Mac
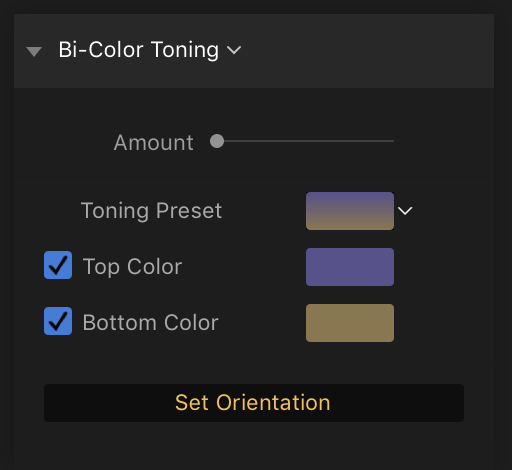
There are few differences between the functions of this filter, but the its look is slightly different between the Mac and Windows versions. On the Mac version, you can set the orientation of the filter by dragging the line within the image, and the additional settings are located on the top.

Windows
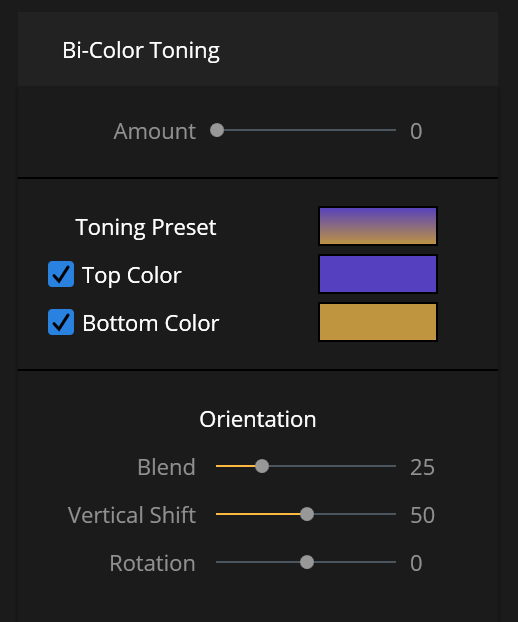
There are few differences between the functions of this filter, but the its look is slightly different between the Mac and Windows versions. On the Windows version, all settings for the filter are located within the Filters panel.
CROP TOOL OPTIONS
Mac
The Mac has all available crop tool options.

Windows
The Windows version is missing the flip and rotate buttons.

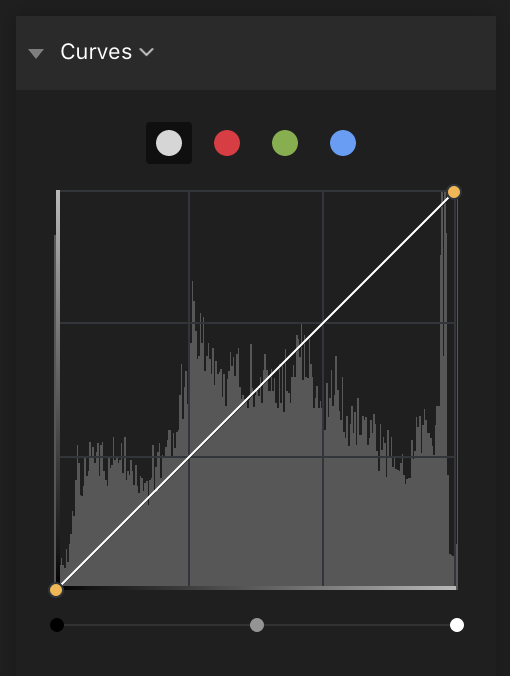
CURVES FILTER
Mac
There are no differences between the functions of this filter, but the its look is slightly different between the Mac and Windows versions.
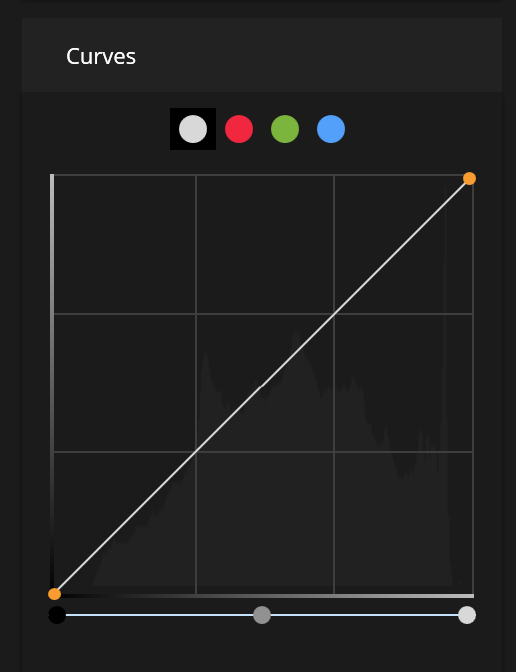
Windows
There are no differences between the functions of this filter, but the its look is slightly different between the Mac and Windows versions.
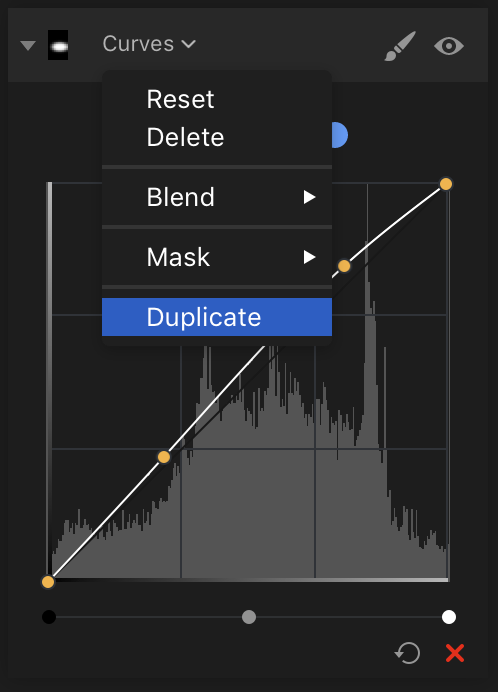
DUPLICATING FILTERS
Mac
The Mac version allows you to duplicate filters by clicking on the drop down on the filter name.
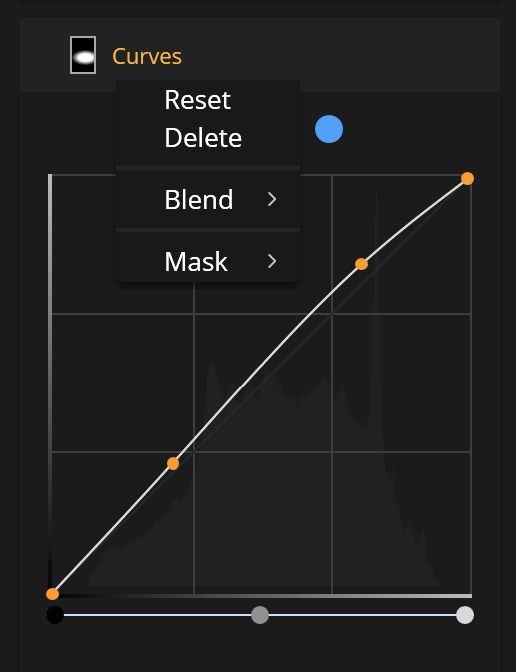
Windows
While it contains the other options, the Windows version does not yet have the Duplicate filter in the drop down.
ERASE TOOL
Mac
The Mac versions has all options for the Erase tool.

Windows
The Windows version is missing the “Lasso” feature with the Erase tool.

FILTERS OPTIONS
Mac
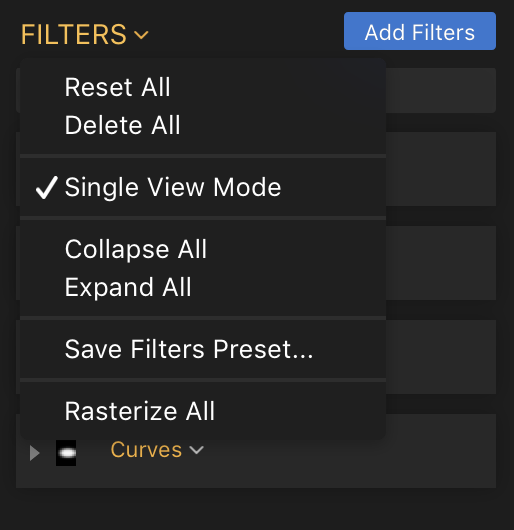
On the Mac version, clicking on the Filters drop down reveals several options.
Windows
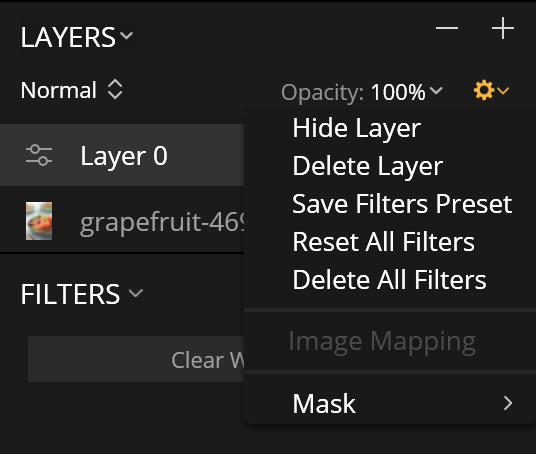
The Windows version only shows “Reset All” as an option from this same drop down.
Instead, some of these options (Delete All Filters being the most notable) is within the Layers options drop down.

FREE TRANSFORM
Mac
The Mac version has all available features of the Transform tool.
Windows
The Windows version now has the Transform tool, but is missing the Flip and Rotate features.
LAYERS OPTIONS
Mac
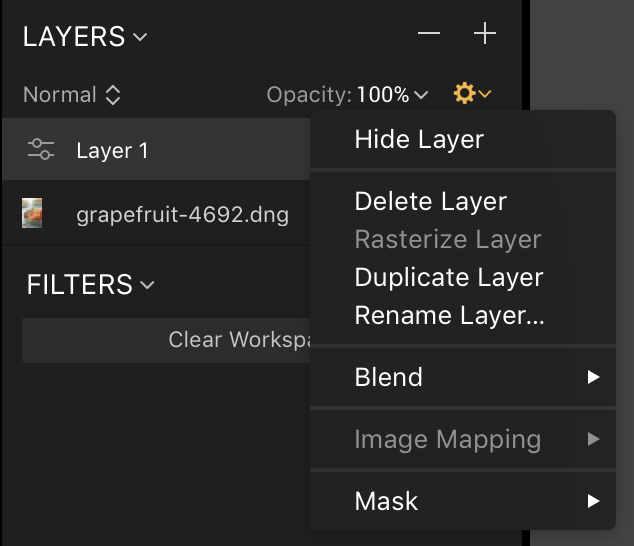
In the Mac version, you have the ability to Hide, Delete, Rasterize, Duplicate, and Rename layers.
Windows
In the Windows version, you have the ability to Hide, Delete, and Rename layers, but it is missing Rasterize and Duplicate.
Aslo, note that some of the options from the Filters menu (below the Layers panel) are listed within the Layers options (Save Filters Preset, Reset All Filters, and Delete All Filters).
MASKING (USE OF SHIFT KEY)
Mac
In the Mac version, you can draw a straight line with the Masking brush by pressing and holding the SHIFT key.

Windows
In the Windows version, holding the SHIFT key does nothing and does not create a straight-line as it does with the Mac version.

PHOTO FILTER
Mac
There are no differences between the functions of this filter, but the its look is slightly different between the Mac and Windows versions (a check box for Mac vs. a drop down for Windows).

Windows
There are no differences between the functions of this filter, but the its look is slightly different between the Mac and Windows versions (a check box for Mac vs. a drop down for Windows).

PLUGIN SUPPORT
Mac
The Mac version has the ability to export to third-party plugins from inside of Luminar.

Windows
The Windows version only allows for exporting to the computer, and sharing on a handful of social sites.

PRESETS: EDITING
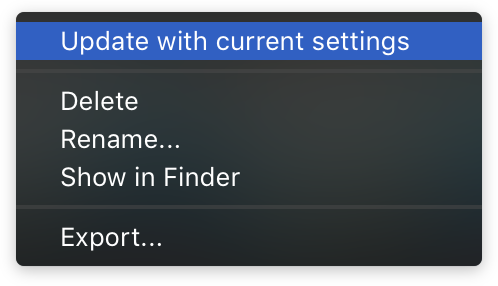
Mac
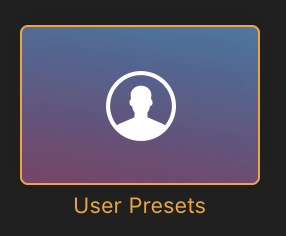
On a Mac, this category is called “User Presets”. After making a preset you can right-click over the preset in the Presets panel and edit it (update, rename, delete, etc.).
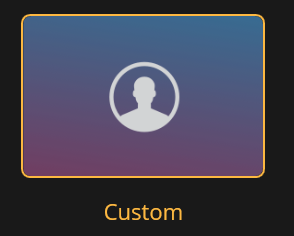
Windows
On Windows, this category is called “Custom”. However, after creating a user preset you cannot right-click over the preset and edit it.
TEXTURE OVERLAY FILTER
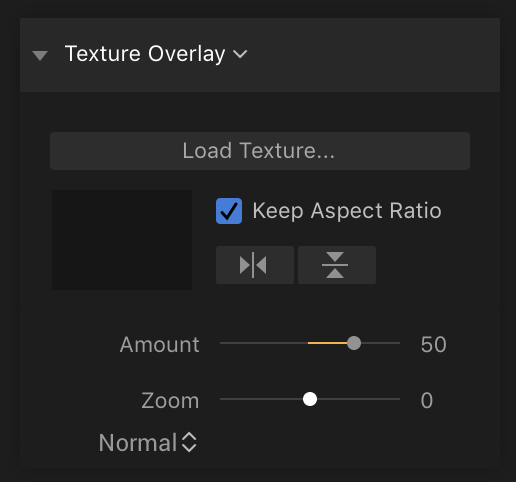
Mac
There are no differences between the functions of this filter, but the its look is slightly different between the Mac and Windows versions.
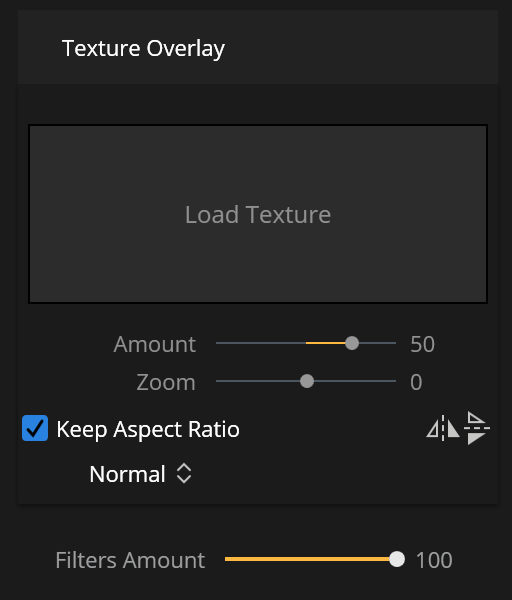
Windows
There are no differences between the functions of this filter, but the its look is slightly different between the Mac and Windows versions.
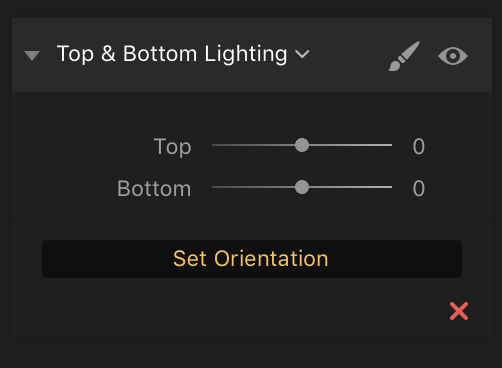
TOP & BOTTOM LIGHTING FILTER
Mac
There are few differences between the functions of this filter, but the its look is slightly different between the Mac and Windows versions. On the Mac version, you can set the orientation of the filter by dragging the line within the image, and the additional settings are located on the top.

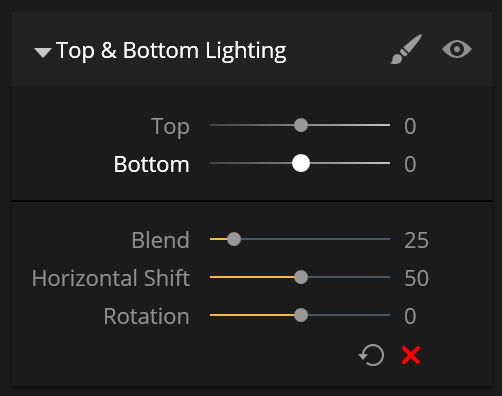
Windows
There are few differences between the functions of this filter, but the its look is slightly different between the Mac and Windows versions. On the Windows version, all settings for the filter are located within the Filters panel.
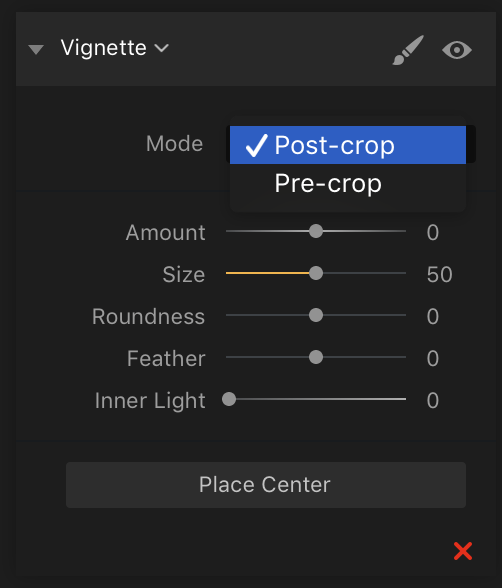
VIGNETTE FILTER
Mac
The Mac version’s Vignette Filter has the option of setting the Mode to Post-Crop or Pre-Crop.
It also has a “place center” option to reposition the center of the vignette within the image.
Windows
On the Windows version, the Vignette does not have a “mode” setting and instead is automatically set to “Post Crop” (which is the ideal cropping setting).
It also cannot be repositioned and will emanate from the center of the image.

About Luminar 2018
The new version of Luminar 2018 is the first iteration to be available on both Mac and Windows. Because it is newly-developed for Windows not all of the features made it into the software at the time of release. However, the software is being updated incrementally and will soon have feature parity (be identical) with the Mac version.
To make it easy for Windows users to visualize the differences—particularly when watching Mac-platform education content—I put together this visual comparison guide. While I have done my best to make this as comprehensive as possible, it’s possible I may have missed a few features. If you notice something that is not listed here, please feel free to comment below so that I can consider adding it to the list.
Please note that I am NOT an employee of Skylum Software and have only an affiliate relationship with them. If you have specific technical questions for the Luminar team, please click here to contact them directly.
Current Luminar Version: 1.3.0
The following items have been removed from the list below due to the software being updated:
- Batch processing: This feature is now available in Luminar for Windows
- Tools Menu: The Transform tool is now available in Luminar for Windows
- Color Temperature Filter: The white balance adjustments and eyedropper are now available in Luminar for Windows
- Save History: It is now possible to use the “Save History” option when saving a file in Luminar for Windows
- Layers Options: Rename Layers is now available in Luminar for Windows (other differences still apply)
ADJUSTABLE GRADIENT FILTER
Mac
There are few differences between the functions of this filter, but the its look is slightly different between the Mac and Windows versions. On the Mac version, you can set the orientation of the filter by dragging the line within the image, and the additional settings are located on the top.
Windows
There are few differences between the functions of this filter, but the its look is slightly different between the Mac and Windows versions. On the Windows version, all settings for the filter are located within the Filters panel.
BI-COLOR TONING FILTER
Mac
There are few differences between the functions of this filter, but the its look is slightly different between the Mac and Windows versions. On the Mac version, you can set the orientation of the filter by dragging the line within the image, and the additional settings are located on the top.
Windows
There are few differences between the functions of this filter, but the its look is slightly different between the Mac and Windows versions. On the Windows version, all settings for the filter are located within the Filters panel.
CROP TOOL OPTIONS
Mac
The Mac has all available crop tool options.
Windows
The Windows version is missing the flip and rotate buttons.
CURVES FILTER
Mac
There are no differences between the functions of this filter, but the its look is slightly different between the Mac and Windows versions.
Windows
There are no differences between the functions of this filter, but the its look is slightly different between the Mac and Windows versions.
DUPLICATING FILTERS
Mac
The Mac version allows you to duplicate filters by clicking on the drop down on the filter name.
Windows
While it contains the other options, the Windows version does not yet have the Duplicate filter in the drop down.
ERASE TOOL
Mac
The Mac versions has all options for the Erase tool.
Windows
The Windows version is missing the “Lasso” feature with the Erase tool.
FILTERS OPTIONS
Mac
On the Mac version, clicking on the Filters drop down reveals several options.
Windows
The Windows version only shows “Reset All” as an option from this same drop down.
Instead, some of these options (Delete All Filters being the most notable) is within the Layers options drop down.
FREE TRANSFORM
Mac
The Mac version has all available features of the Transform tool.
Windows
The Windows version now has the Transform tool, but is missing the Flip and Rotate features.
LAYERS OPTIONS
Mac
In the Mac version, you have the ability to Hide, Delete, Rasterize, Duplicate, and Rename layers.
Windows
In the Windows version, you have the ability to Hide, Delete, and Rename layers, but it is missing Rasterize and Duplicate.
Aslo, note that some of the options from the Filters menu (below the Layers panel) are listed within the Layers options (Save Filters Preset, Reset All Filters, and Delete All Filters).
MASKING (USE OF SHIFT KEY)
Mac
In the Mac version, you can draw a straight line with the Masking brush by pressing and holding the SHIFT key.
Windows
In the Windows version, holding the SHIFT key does nothing and does not create a straight-line as it does with the Mac version.
PHOTO FILTER
Mac
There are no differences between the functions of this filter, but the its look is slightly different between the Mac and Windows versions (a check box for Mac vs. a drop down for Windows).
Windows
There are no differences between the functions of this filter, but the its look is slightly different between the Mac and Windows versions (a check box for Mac vs. a drop down for Windows).
PLUGIN SUPPORT
Mac
The Mac version has the ability to export to third-party plugins from inside of Luminar.
Windows
The Windows version only allows for exporting to the computer, and sharing on a handful of social sites.
PRESETS: EDITING
Mac
On a Mac, this category is called “User Presets”. After making a preset you can right-click over the preset in the Presets panel and edit it (update, rename, delete, etc.).
Windows
On Windows, this category is called “Custom”. However, after creating a user preset you cannot right-click over the preset and edit it.
TEXTURE OVERLAY FILTER
Mac
There are no differences between the functions of this filter, but the its look is slightly different between the Mac and Windows versions.
Windows
There are no differences between the functions of this filter, but the its look is slightly different between the Mac and Windows versions.
TOP & BOTTOM LIGHTING FILTER
Mac
There are few differences between the functions of this filter, but the its look is slightly different between the Mac and Windows versions. On the Mac version, you can set the orientation of the filter by dragging the line within the image, and the additional settings are located on the top.
Windows
There are few differences between the functions of this filter, but the its look is slightly different between the Mac and Windows versions. On the Windows version, all settings for the filter are located within the Filters panel.
VIGNETTE FILTER
Mac
The Mac version’s Vignette Filter has the option of setting the Mode to Post-Crop or Pre-Crop.
It also has a “place center” option to reposition the center of the vignette within the image.
Windows
On the Windows version, the Vignette does not have a “mode” setting and instead is automatically set to “Post Crop” (which is the ideal cropping setting).
It also cannot be repositioned and will emanate from the center of the image.

Nicole is a photographer, published author, and educator specializing in Lightroom, Photoshop, and photography. She is best known for her books on food photography but is widely versed in various photographic genres, including landscape, nature, stock, travel, and experimental imagery.


Really appreciate your update re PC version of Luminar 2018
That a really good summing up of the feature difference. However can I point out where the filters have the Horizontal Shift you must rotate the shift slightly before it will work. It’s been like this since the release of both L18 and A18 and Skylum do not seem to be doing anything to change it, despite many Windows users asking for it to be fixed.
Bonjour,
Les actions manquantes sous windows seront elles rajoutées dans l’avenir ?
Cordialement
Thank you for this informative article showing the feature differences between the mac and winavedows versions. I am a windows user so in my opion we lack few features that makes using luminar a bit easier for mac users. For example I would have enjoyed exporting my files directly to flickr. Can we expect this and other features for windows as updates in the near. future.
Nevertheless I enjoy luminar and your good work. Thanks again.
Thanks for this information, it has been helpful.
Thanks for the explanation, but when will the Windows version be identical to the MAC version particularly the ” export to ” feature?
I don’t have any information of future updates.
I have not been able to find how to close a file when finished edit.
You can save and close a file in Luminar just like any other program. If you want to save a finished JPEG, use the “export” button on the top-right of the window.
Can we have some answers to these questions please ???
If you’re referring to when Luminar will be feature parity with Mac, or when the next update is, I don’t know the answer to that. I also don’t work for Skylum, and if you would like to contact them you’ll want to use their support page: https://macphun.com/support
If you have another questions then I’m happy to help.
Just last week an update was made available for download. I run both versions, and for me the Mac OS is much more efficient, and apps run faster and smoother.
Hi Nicole, good info as usual. Is there a chance you could put this into a pdf so I can print it please??
Hi Ian! Unfortunately, that type of work is very time-consuming. But you are welcome to save this page as a PDF. Most computers allow you to do this in the Print window. On Windows, I believe you change the “Printer” selection at the top to “Microsoft Print to PDF”.
Does the Windows version of Luminar 2018 have the “Luminosity Mask” feature?
Yes, the Windows version has the Luminosity mask feature.
What is the Luminar 2018 equivalent to HSR setting sin Lightroom 6?
On a Mac, this category is called “User Presets”. After making a preset you can right-clicl over the preset in the Presets panel and edit it (update, rename, delete, etc.).
I think you meant right-click!
You’ve never right-clicl’d before? ;) Thanks, fixed the typo just now.