

When I was creating stock photography full-time, I used my Alien Bee lights on a regular basis. I photographed a lot of people in indoor environments and needed to create my own light. I still create images for stock and have a growing portfolio on Stocksy, but until now my images have mostly consisted of food, landscape, and travel photography. But now that I’m in Nebraska—and living close to my nieces and nephews—I expect my portfolio to change.
This weekend I had the pleasure of hosting 3/4 of the kids, including two girls who love to be photographed (lucky us!). In the morning we had originally planned to do some outdoor photographs, but those plans quickly changed after an early-morning storm rolled through. So instead, I decided to set up the lights in our new (still in-progress) basement studio space and have fun photographing their portraits.
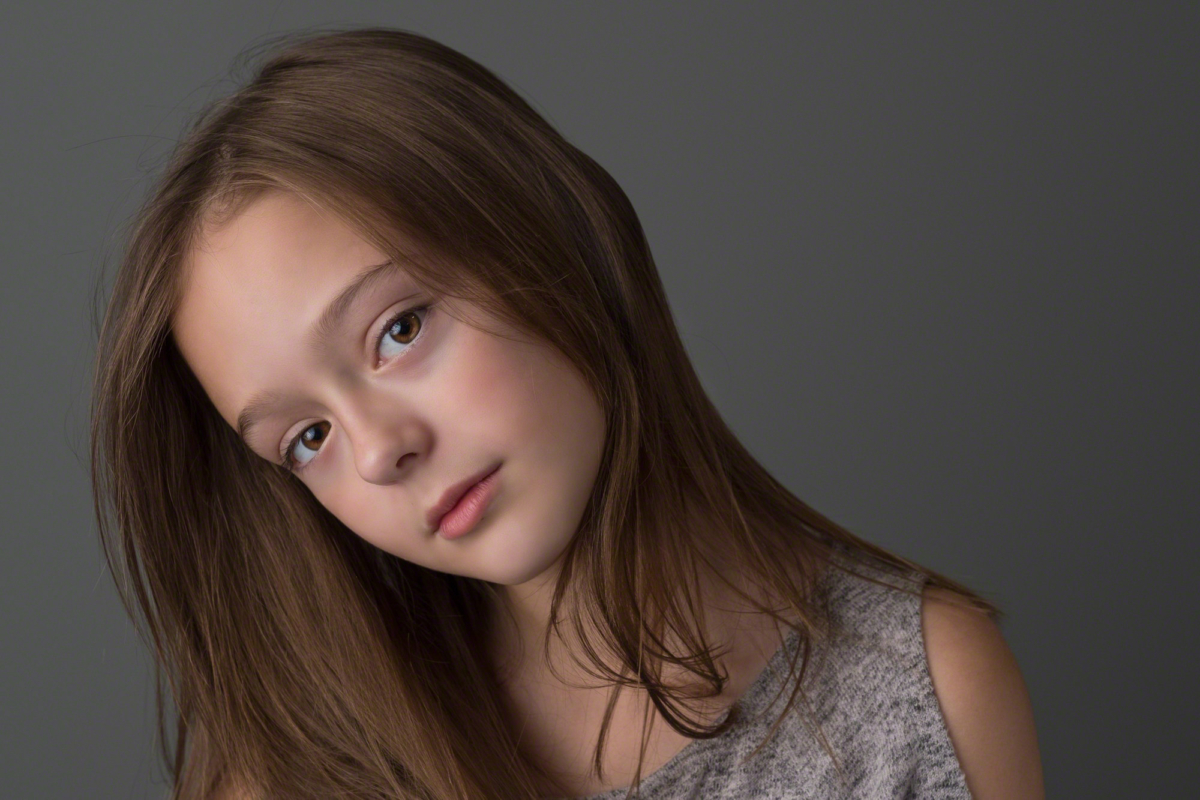
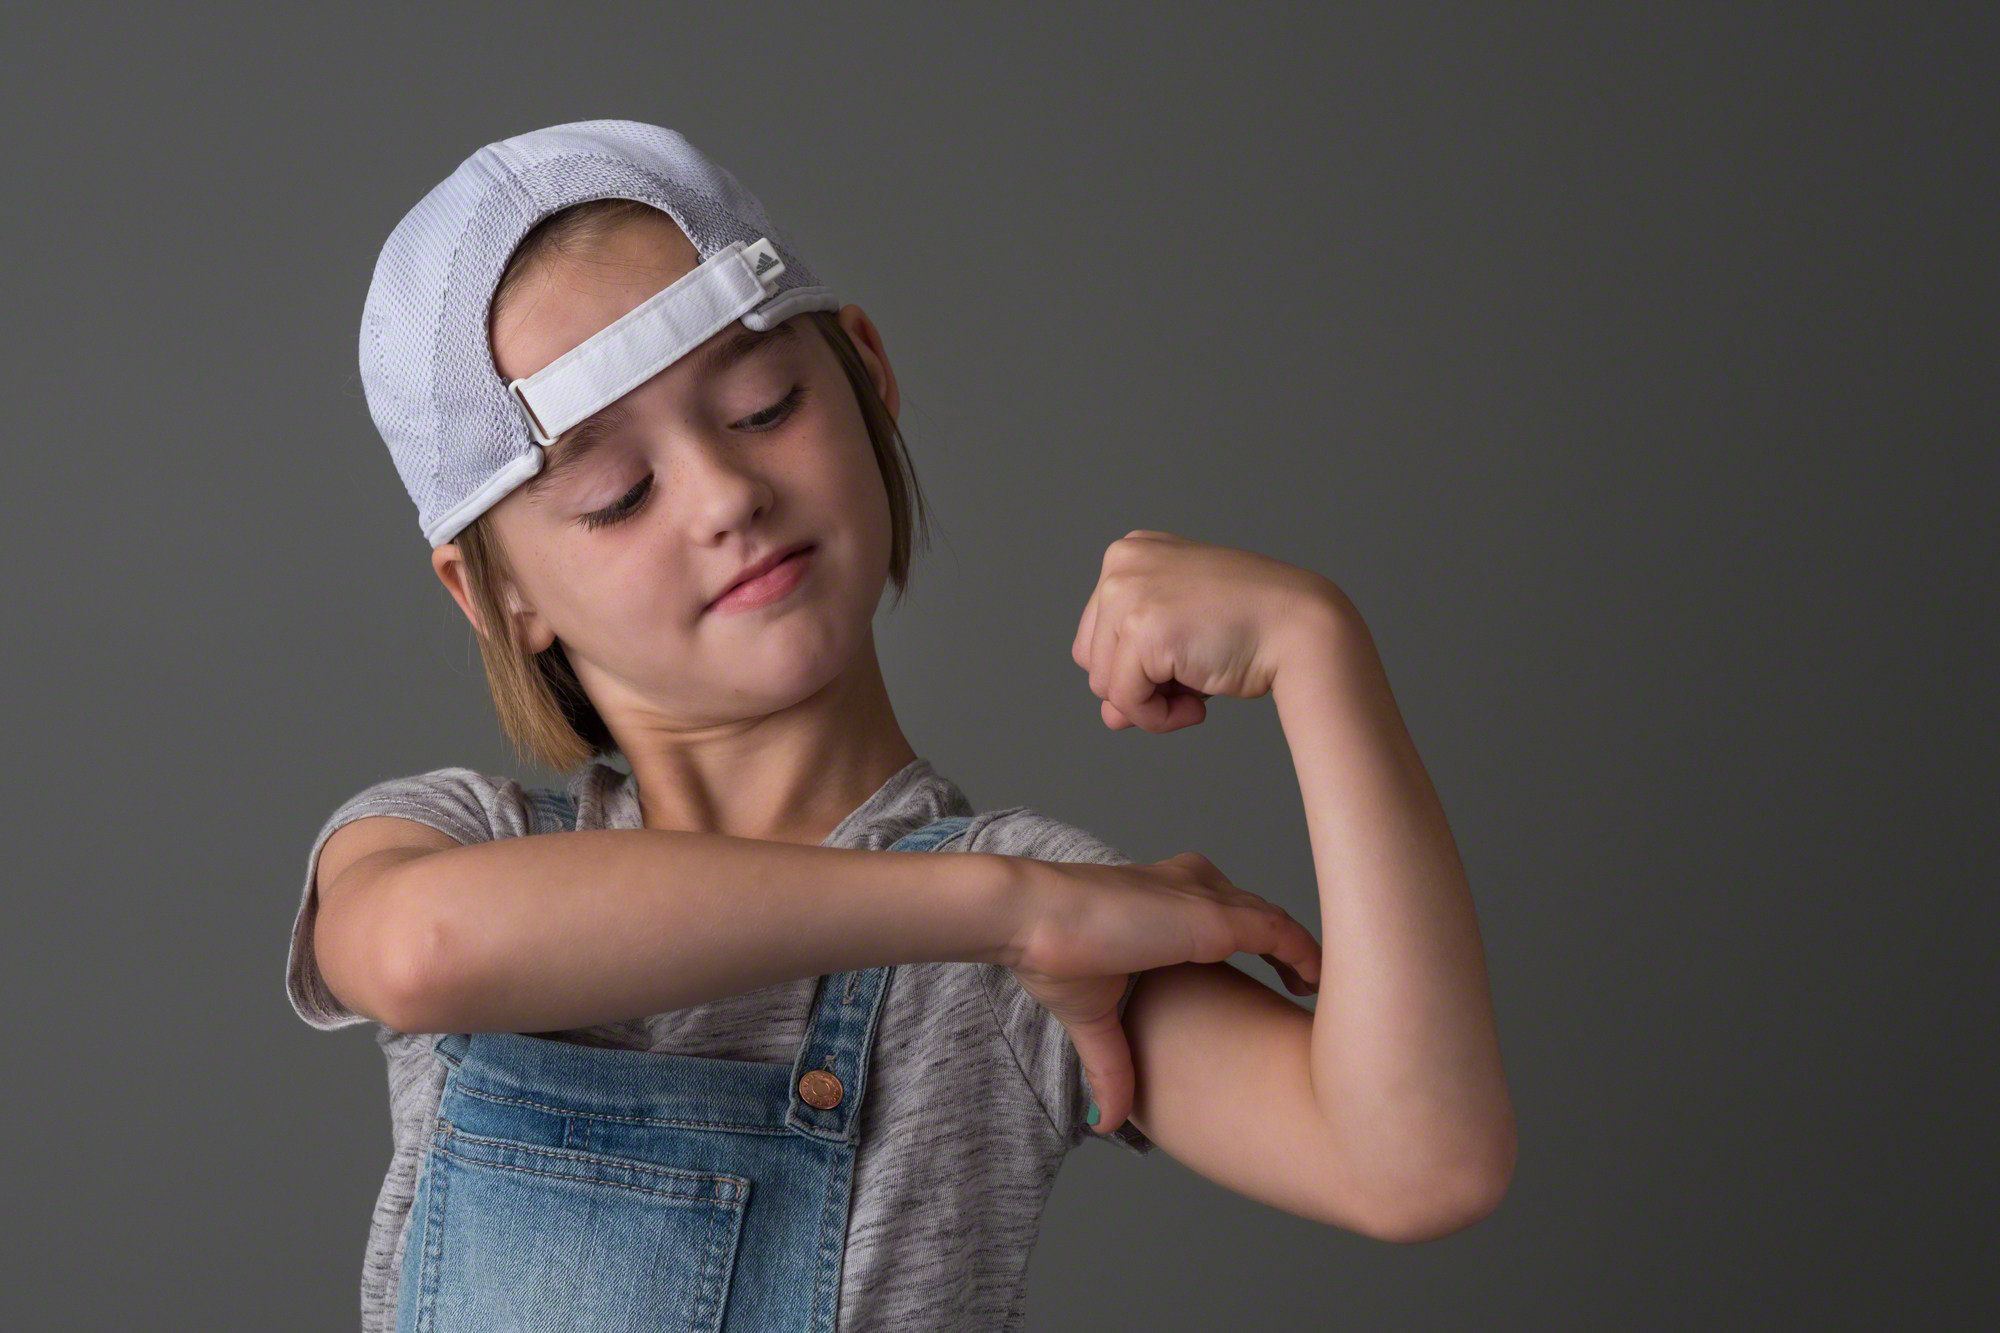
To be honest, I wasn’t even sure if we would be able to do any photographs at all. Not only did I have to search for the box with the lights (somewhere in the garage, still filled with plenty of unpacked moving boxes), but these are lights that I have not used in several years. After making my online store the main focus of my business, my photography has shifted so much that the two lights I was able to locate had not even seen the light of day during the entire 3.5 years that we lived in Portland. I wasn’t even sure if they would work! Thankfully, after I plugged them in, one of them was functional (unfortunately the other was completely fried). So the two-light setup I was hoping for now turned into a one-light setup. Sometimes you need to work with what you have, and in retrospect, I’m really pleased with how the images turned out.
-
- © Nicole S. Young — nicolesy.com
-

- © Nicole S. Young — nicolesy.com
Setup
- Main light: I positioned the light-source to the left of the model and used the giant shoot-through umbrella (PLM) to give the light beautiful and wide soft quality. I moved the light as close as possible to the model to make the light as soft as possible.
- Fill: I used either a reflector or a white board for fill light, positioned on the right and connected to a second light stand with a clamp.
- Background: We have a nice dark gray wall on the basement walls, so I opted to use that as a simple backdrop for these portraits. The umbrella I used spread the light out enough to light the background so that it retained some of the gray tones (and didn’t go completely black). The model was sitting approximately three feet from the wall.
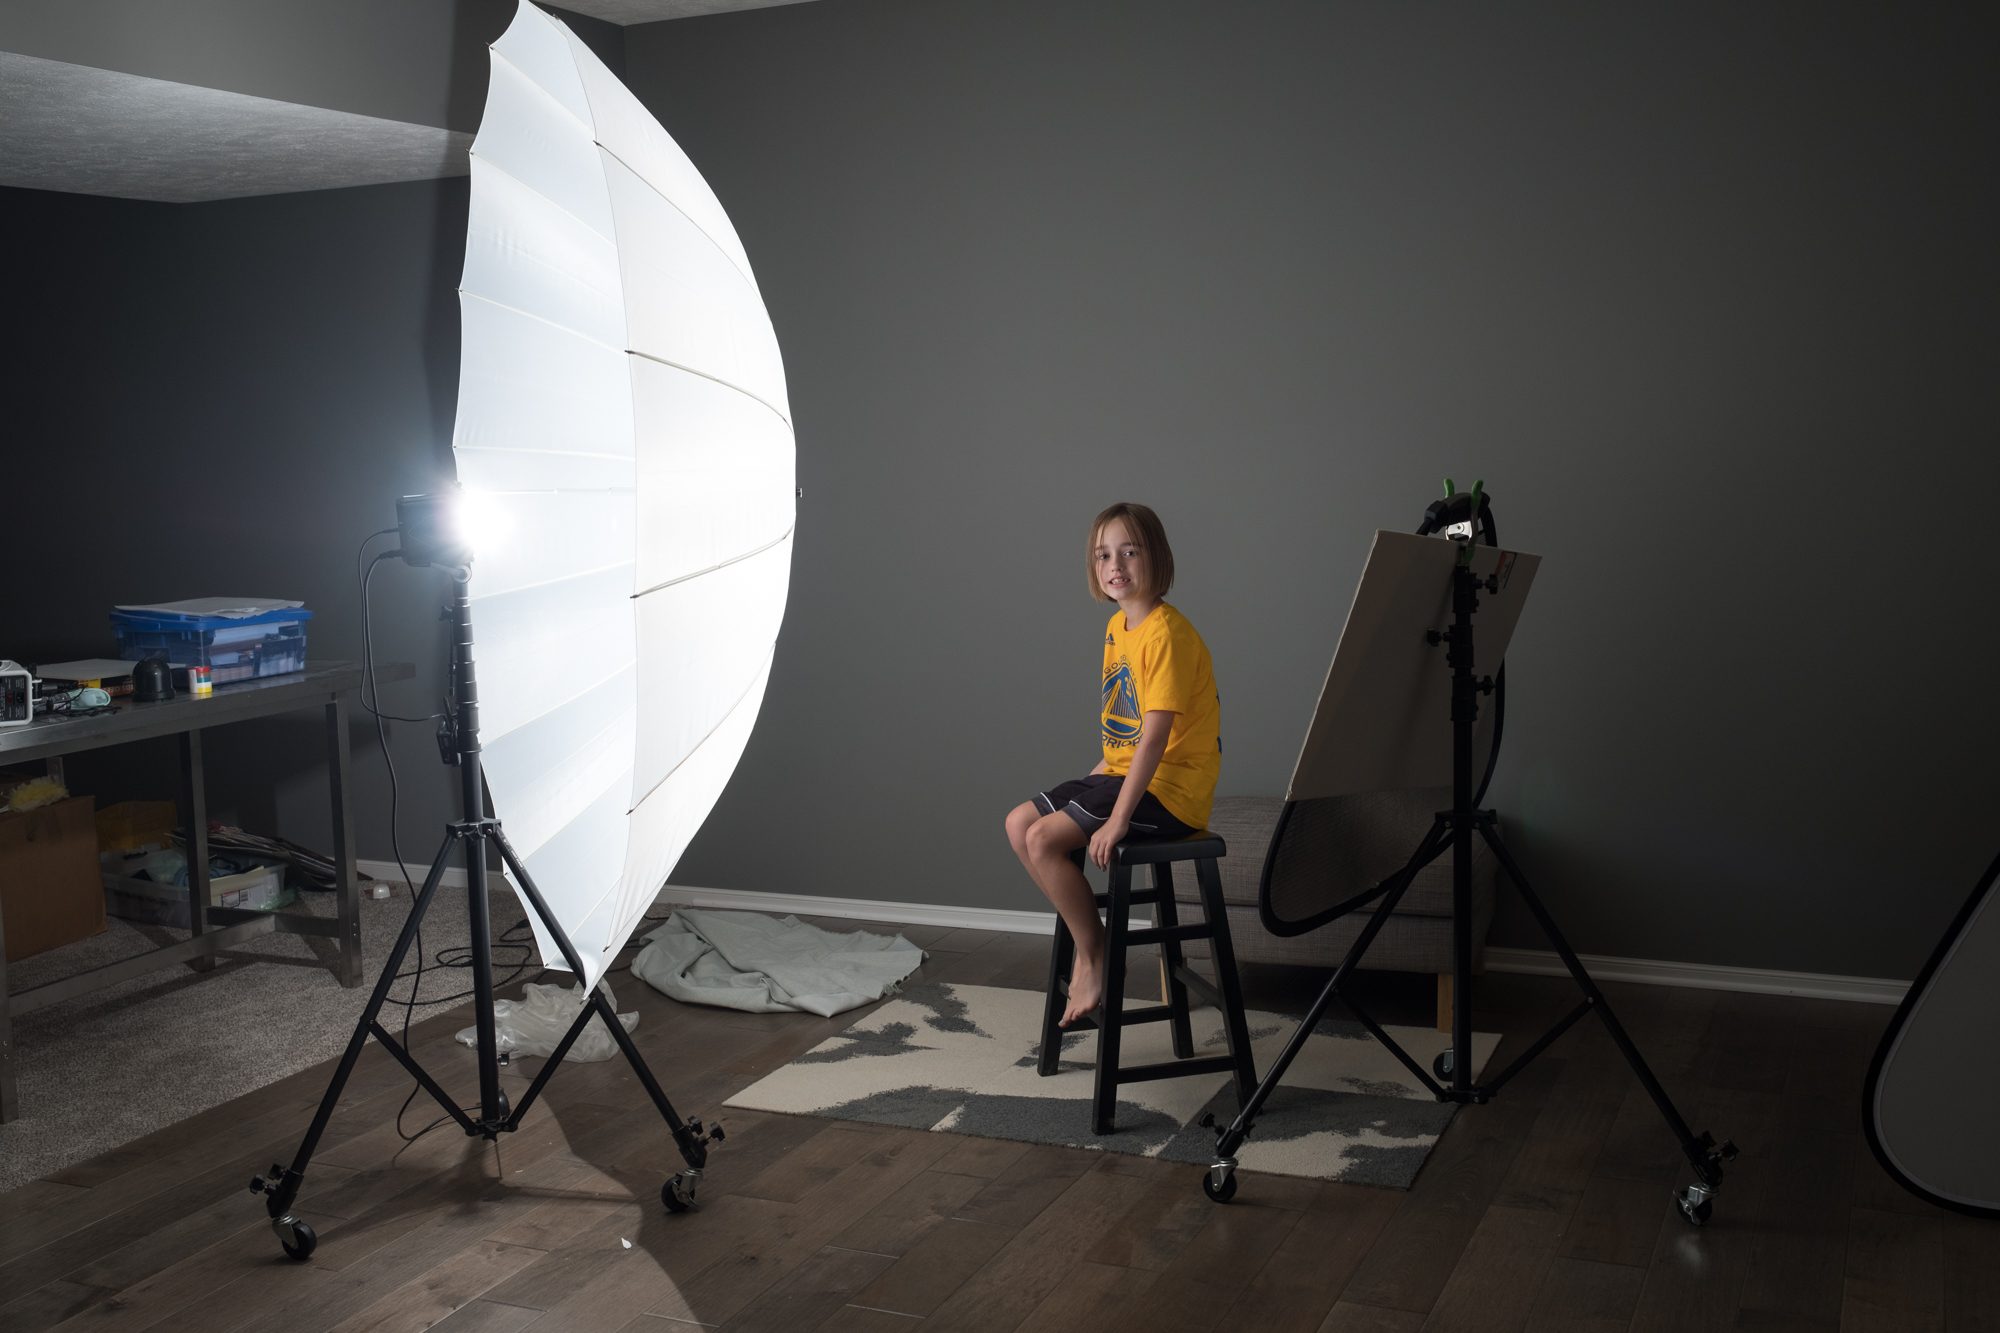
My one-light setup. © Nicole S. Young — nicolesy.com
Gear and Equipment
Here’s a quick breakdown of my lighting gear & setup: View this gear list on Kit.co
When I was creating stock photography full-time, I used my Alien Bee lights on a regular basis. I photographed a lot of people in indoor environments and needed to create my own light. I still create images for stock and have a growing portfolio on Stocksy, but until now my images have mostly consisted of food, landscape, and travel photography. But now that I’m in Nebraska—and living close to my nieces and nephews—I expect my portfolio to change.
This weekend I had the pleasure of hosting 3/4 of the kids, including two girls who love to be photographed (lucky us!). In the morning we had originally planned to do some outdoor photographs, but those plans quickly changed after an early-morning storm rolled through. So instead, I decided to set up the lights in our new (still in-progress) basement studio space and have fun photographing their portraits.
To be honest, I wasn’t even sure if we would be able to do any photographs at all. Not only did I have to search for the box with the lights (somewhere in the garage, still filled with plenty of unpacked moving boxes), but these are lights that I have not used in several years. After making my online store the main focus of my business, my photography has shifted so much that the two lights I was able to locate had not even seen the light of day during the entire 3.5 years that we lived in Portland. I wasn’t even sure if they would work! Thankfully, after I plugged them in, one of them was functional (unfortunately the other was completely fried). So the two-light setup I was hoping for now turned into a one-light setup. Sometimes you need to work with what you have, and in retrospect, I’m really pleased with how the images turned out.
-
- © Nicole S. Young — nicolesy.com
-
- © Nicole S. Young — nicolesy.com
Setup
- Main light: I positioned the light-source to the left of the model and used the giant shoot-through umbrella (PLM) to give the light beautiful and wide soft quality. I moved the light as close as possible to the model to make the light as soft as possible.
- Fill: I used either a reflector or a white board for fill light, positioned on the right and connected to a second light stand with a clamp.
- Background: We have a nice dark gray wall on the basement walls, so I opted to use that as a simple backdrop for these portraits. The umbrella I used spread the light out enough to light the background so that it retained some of the gray tones (and didn’t go completely black). The model was sitting approximately three feet from the wall.
My one-light setup. © Nicole S. Young — nicolesy.com
Gear and Equipment
Here’s a quick breakdown of my lighting gear & setup: View this gear list on Kit.co

Nicole is a photographer, published author, and educator specializing in Lightroom, Photoshop, and photography. She is best known for her books on food photography but is widely versed in various photographic genres, including landscape, nature, stock, travel, and experimental imagery.


Very nice! Make life simple and you can create anything. I use the one light method a lot. Really comes in handy if you’re limited to space. Thank you for sharing your setup.
These images show how good the quality of the X T 20 is and the great use of the lighting as well as good facial views. Nice to see an instructor creating such nice images. Great instructions for others wishing to do single light images after all, there is only one sun although it is always fun to do outdoor images via natural light but having the look of a 5 light setup. A great challenge but rewarding when accomplished. Always enjoy the information that you offer.
Both shots look really nice even with one light.
I have a light stand- Guess I need a few hundred dollars more for this simple setup…
Charlie, To replicate the exact equipment, sure. Nicole’s stands on wheels are nice to have and high-end(dish) as stands go. But you can replicate the look with an LED light, umbrella (or through a clean white sheet) and a piece of white tag-board for pretty cheap, if that’s what’s holding you back. Use what you’ve got!
Nicole; very nice and natural looking, simple lighting is always more rewarding than multiple complicated set ups; but in lighting my life totally changed with a single light on studio and on location, when I added a Bron Para 88 and sold the rest. Victor
Excellent and simple to do.
Link to wheels used on lightstand, please.
Hi Lucy! I got the light stands and casters (wheels) from this site: https://www.paulcbuff.com/lightstands.php
Congrats, Nicolessy!! Less is more. Simple lighting and explanation. Always enjoy your work especially those related to food blogging. Thanks and keep up the good work.
Thank you, Nicolesy!
On the top portrait, where is the gray spot coming from on the side of her nose near her left eye?
That’s just a shadow and her complexion.
You want a really good Flashlight app. So let’s jump on my phone and see how it works here we are on my phone and you see the flashlight app
strobe light