

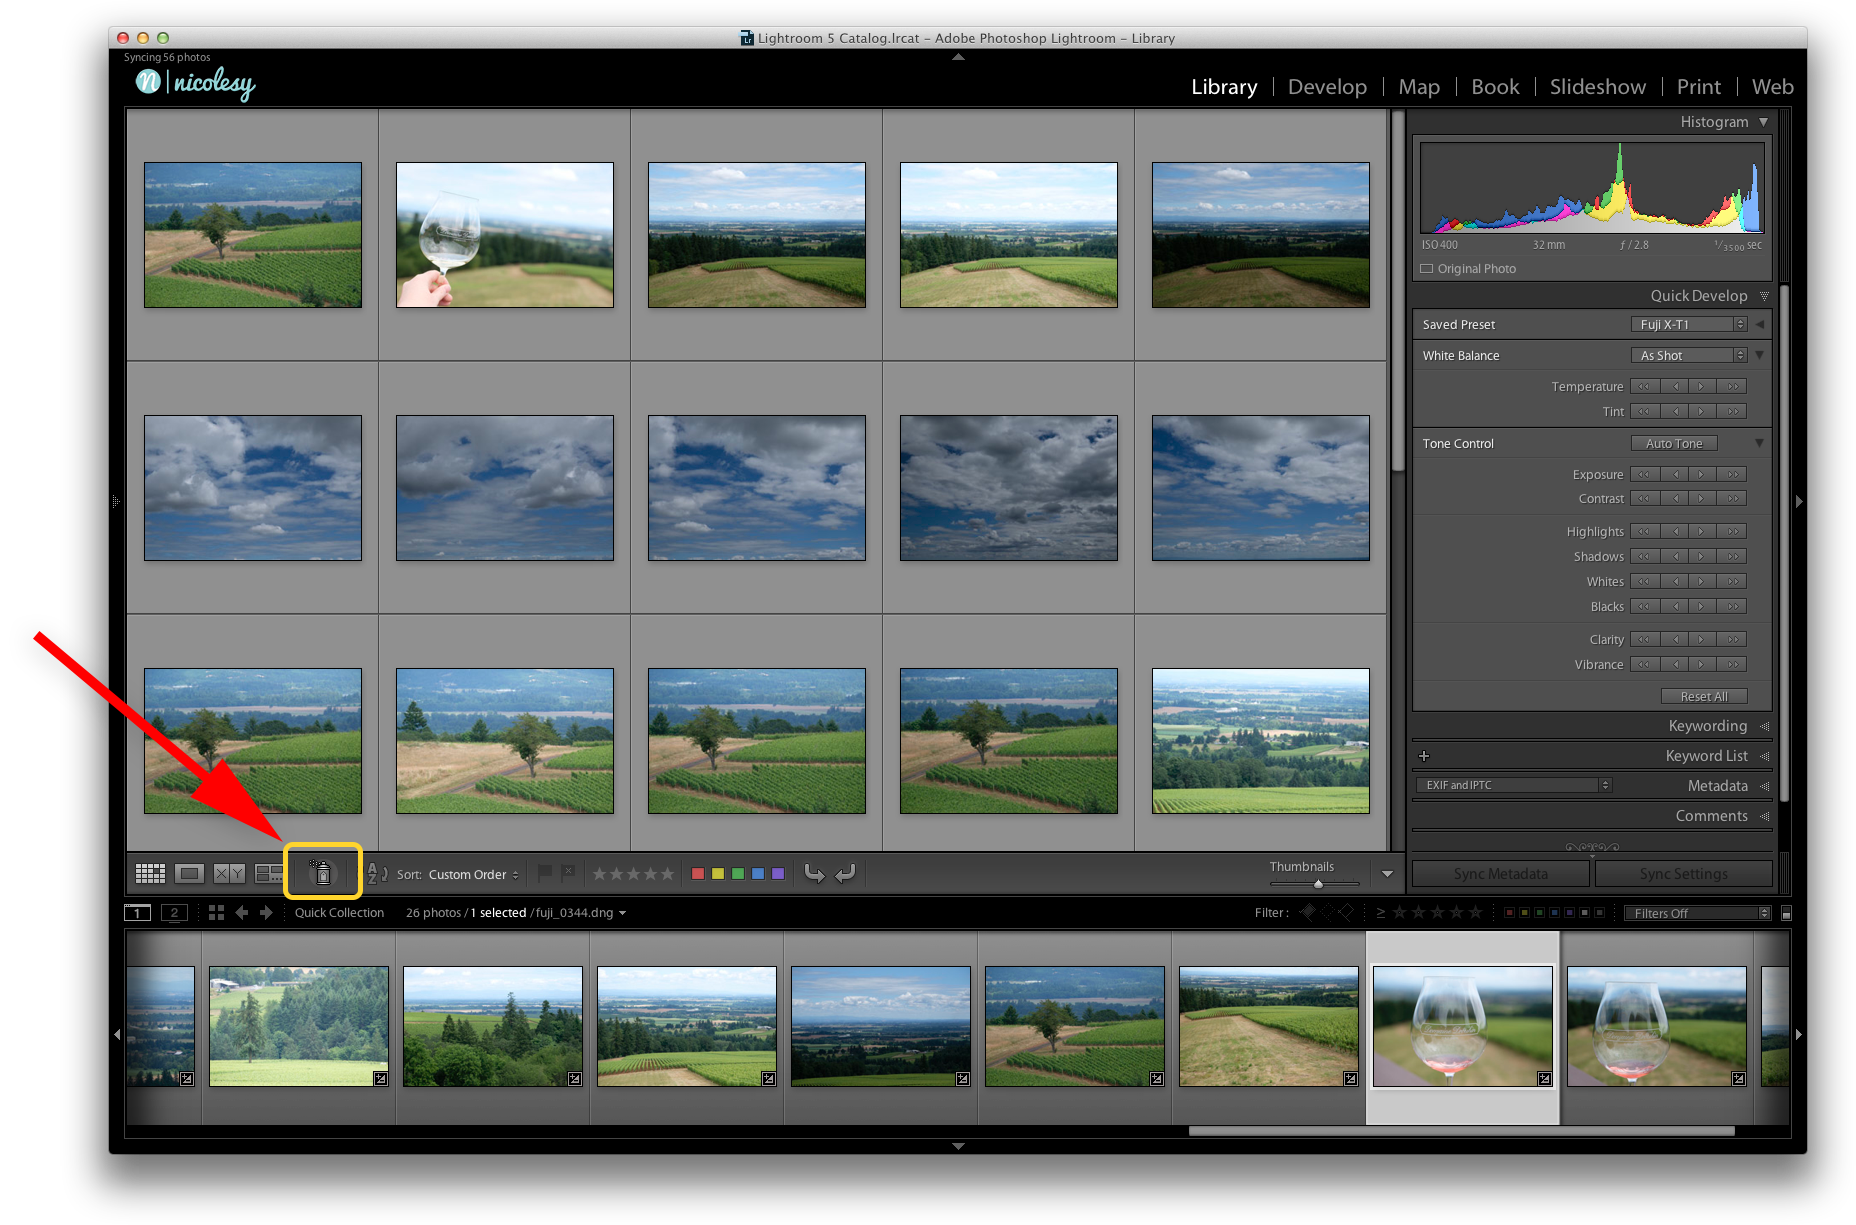
One of my favorite features in Lightroom also seems to be one that is typically under-appreciated. Have you ever noticed that little paint-can icon in the toolbar below your photos in the Library module? This feature, in my opinion, is one of the single most powerful tools in Lightroom, especially if you are an organization freak (like me).
In a nutshell, the “Painter” tool allows you to quickly apply settings to photos with one click (metadata, keywords, presets, and more). It’s great when you are scanning your photos in Grid view and want to quickly apply your settings without viewing the images up close.
Here’s how the Painter Tool works:
First, in the Library module in Grid view, click on the Painter icon in the toolbar below the preview window. (If you can’t see the toolbar, just press the T key on your keyboard.)
Next, choose what you want to “paint” on your photos. For this example, I will be painting the keyword “Clouds”.
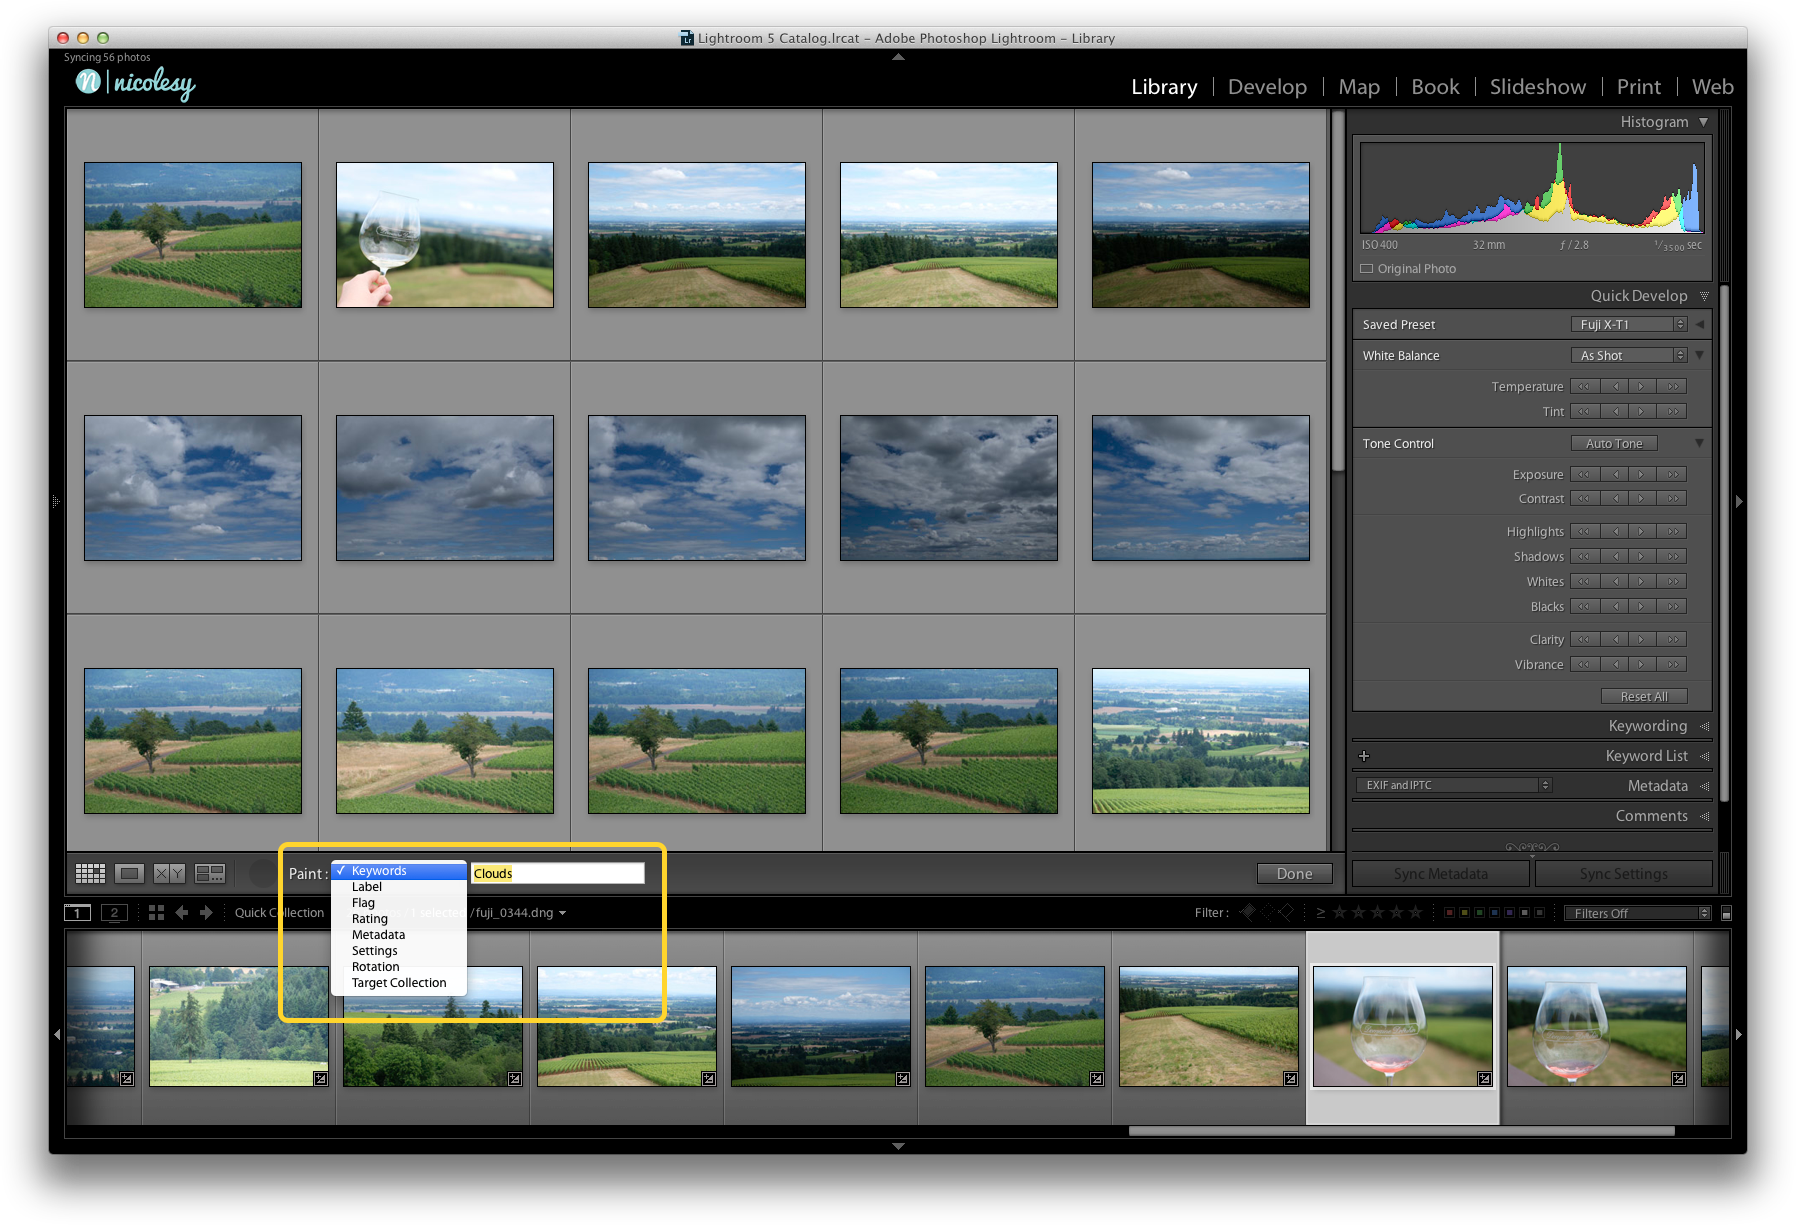
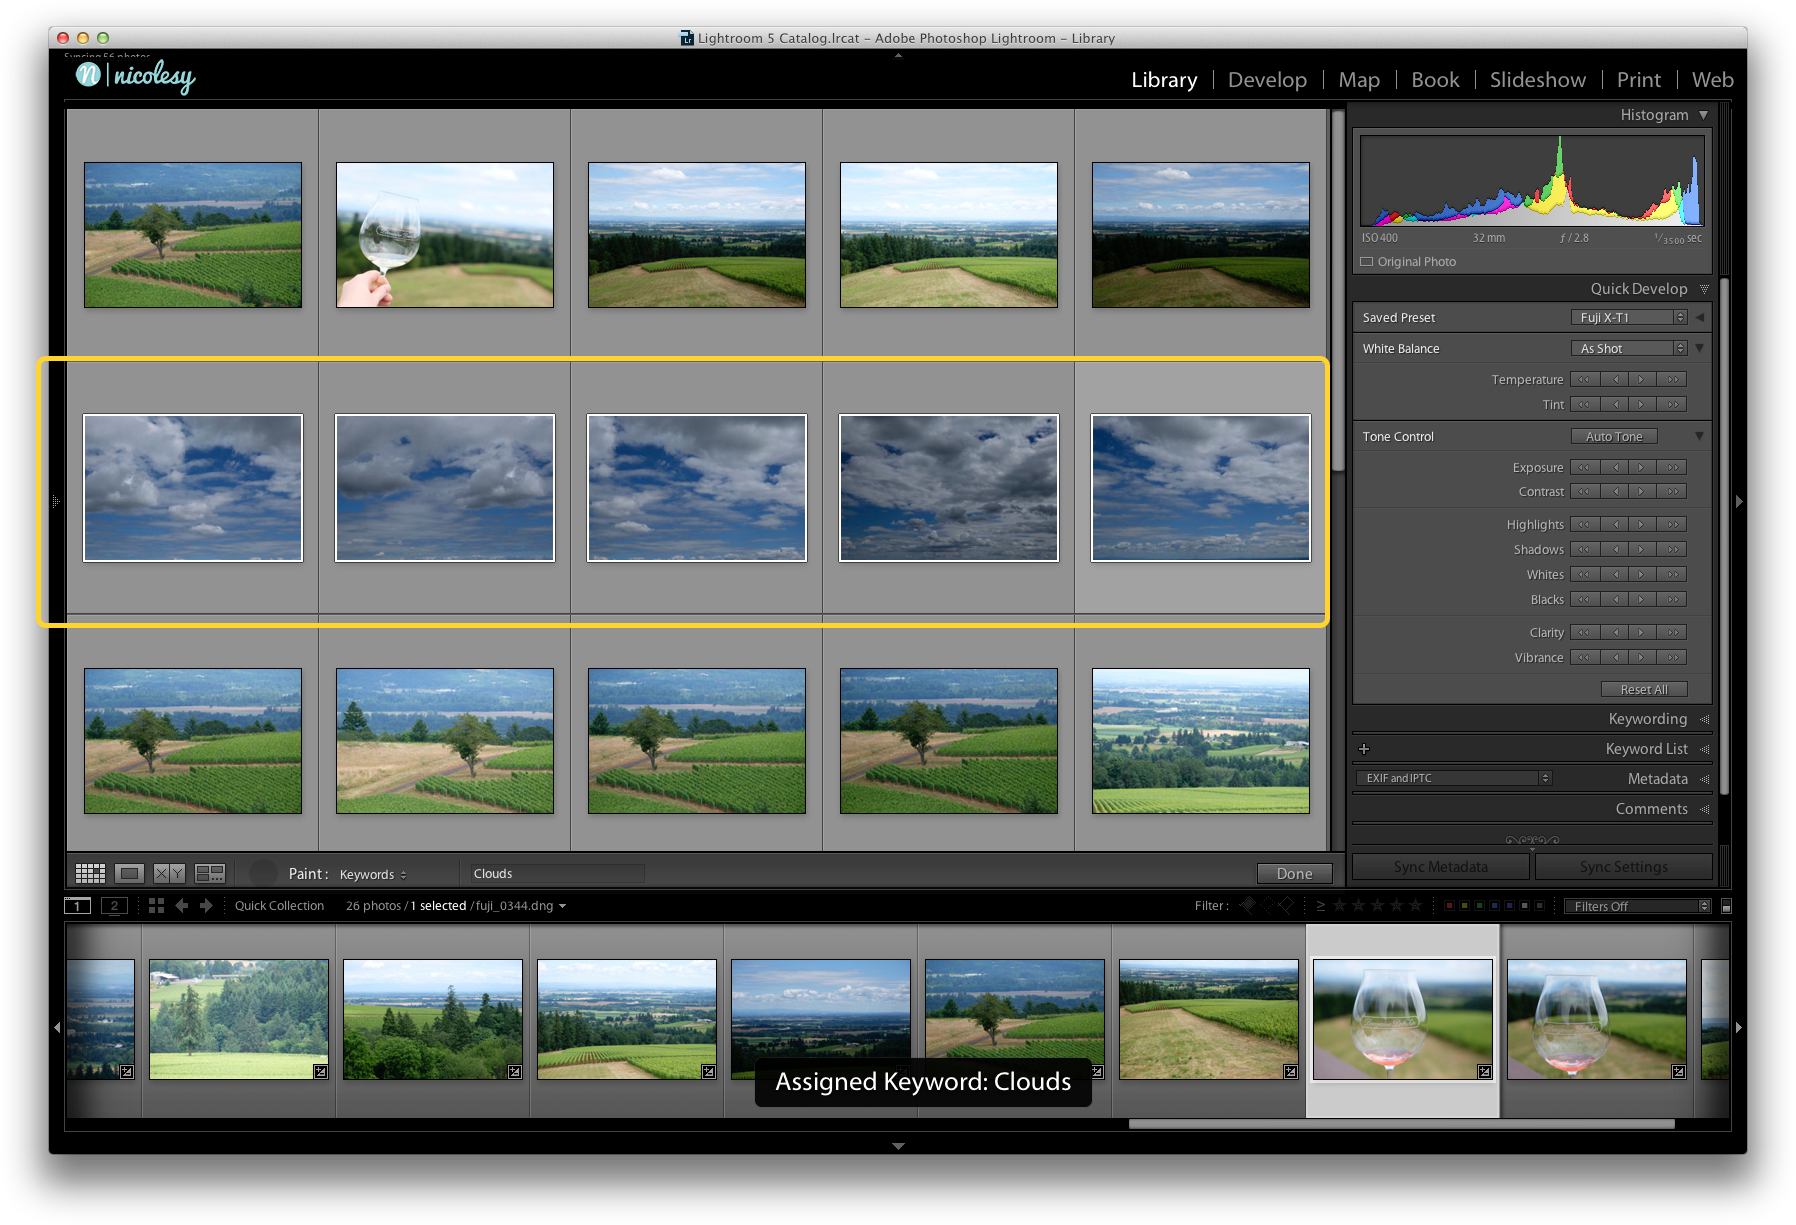
Then, click on a photo to “paint” your settings on that photo. It’s that simple!
Here are some ideas on how you can use the Painter tool in Lightroom:
- Add keywords to photos to sync with a smart collection
- Apply a specific Develop preset to files in Grid View
- Label your images with a certain color (good for organizing groups of images, such as HDR, panoramas, etc.)
- Add images to your Target Collection in Grid View
Watch this short animation to see how I use the Painter Tool in Lightroom to keyword my images:

One of my favorite features in Lightroom also seems to be one that is typically under-appreciated. Have you ever noticed that little paint-can icon in the toolbar below your photos in the Library module? This feature, in my opinion, is one of the single most powerful tools in Lightroom, especially if you are an organization freak (like me).
In a nutshell, the “Painter” tool allows you to quickly apply settings to photos with one click (metadata, keywords, presets, and more). It’s great when you are scanning your photos in Grid view and want to quickly apply your settings without viewing the images up close.
Here’s how the Painter Tool works:
First, in the Library module in Grid view, click on the Painter icon in the toolbar below the preview window. (If you can’t see the toolbar, just press the T key on your keyboard.)
Next, choose what you want to “paint” on your photos. For this example, I will be painting the keyword “Clouds”.
Then, click on a photo to “paint” your settings on that photo. It’s that simple!
Here are some ideas on how you can use the Painter tool in Lightroom:
- Add keywords to photos to sync with a smart collection
- Apply a specific Develop preset to files in Grid View
- Label your images with a certain color (good for organizing groups of images, such as HDR, panoramas, etc.)
- Add images to your Target Collection in Grid View
Watch this short animation to see how I use the Painter Tool in Lightroom to keyword my images:

Nicole is a photographer, published author, and educator specializing in Lightroom, Photoshop, and photography. She is best known for her books on food photography but is widely versed in various photographic genres, including landscape, nature, stock, travel, and experimental imagery.


