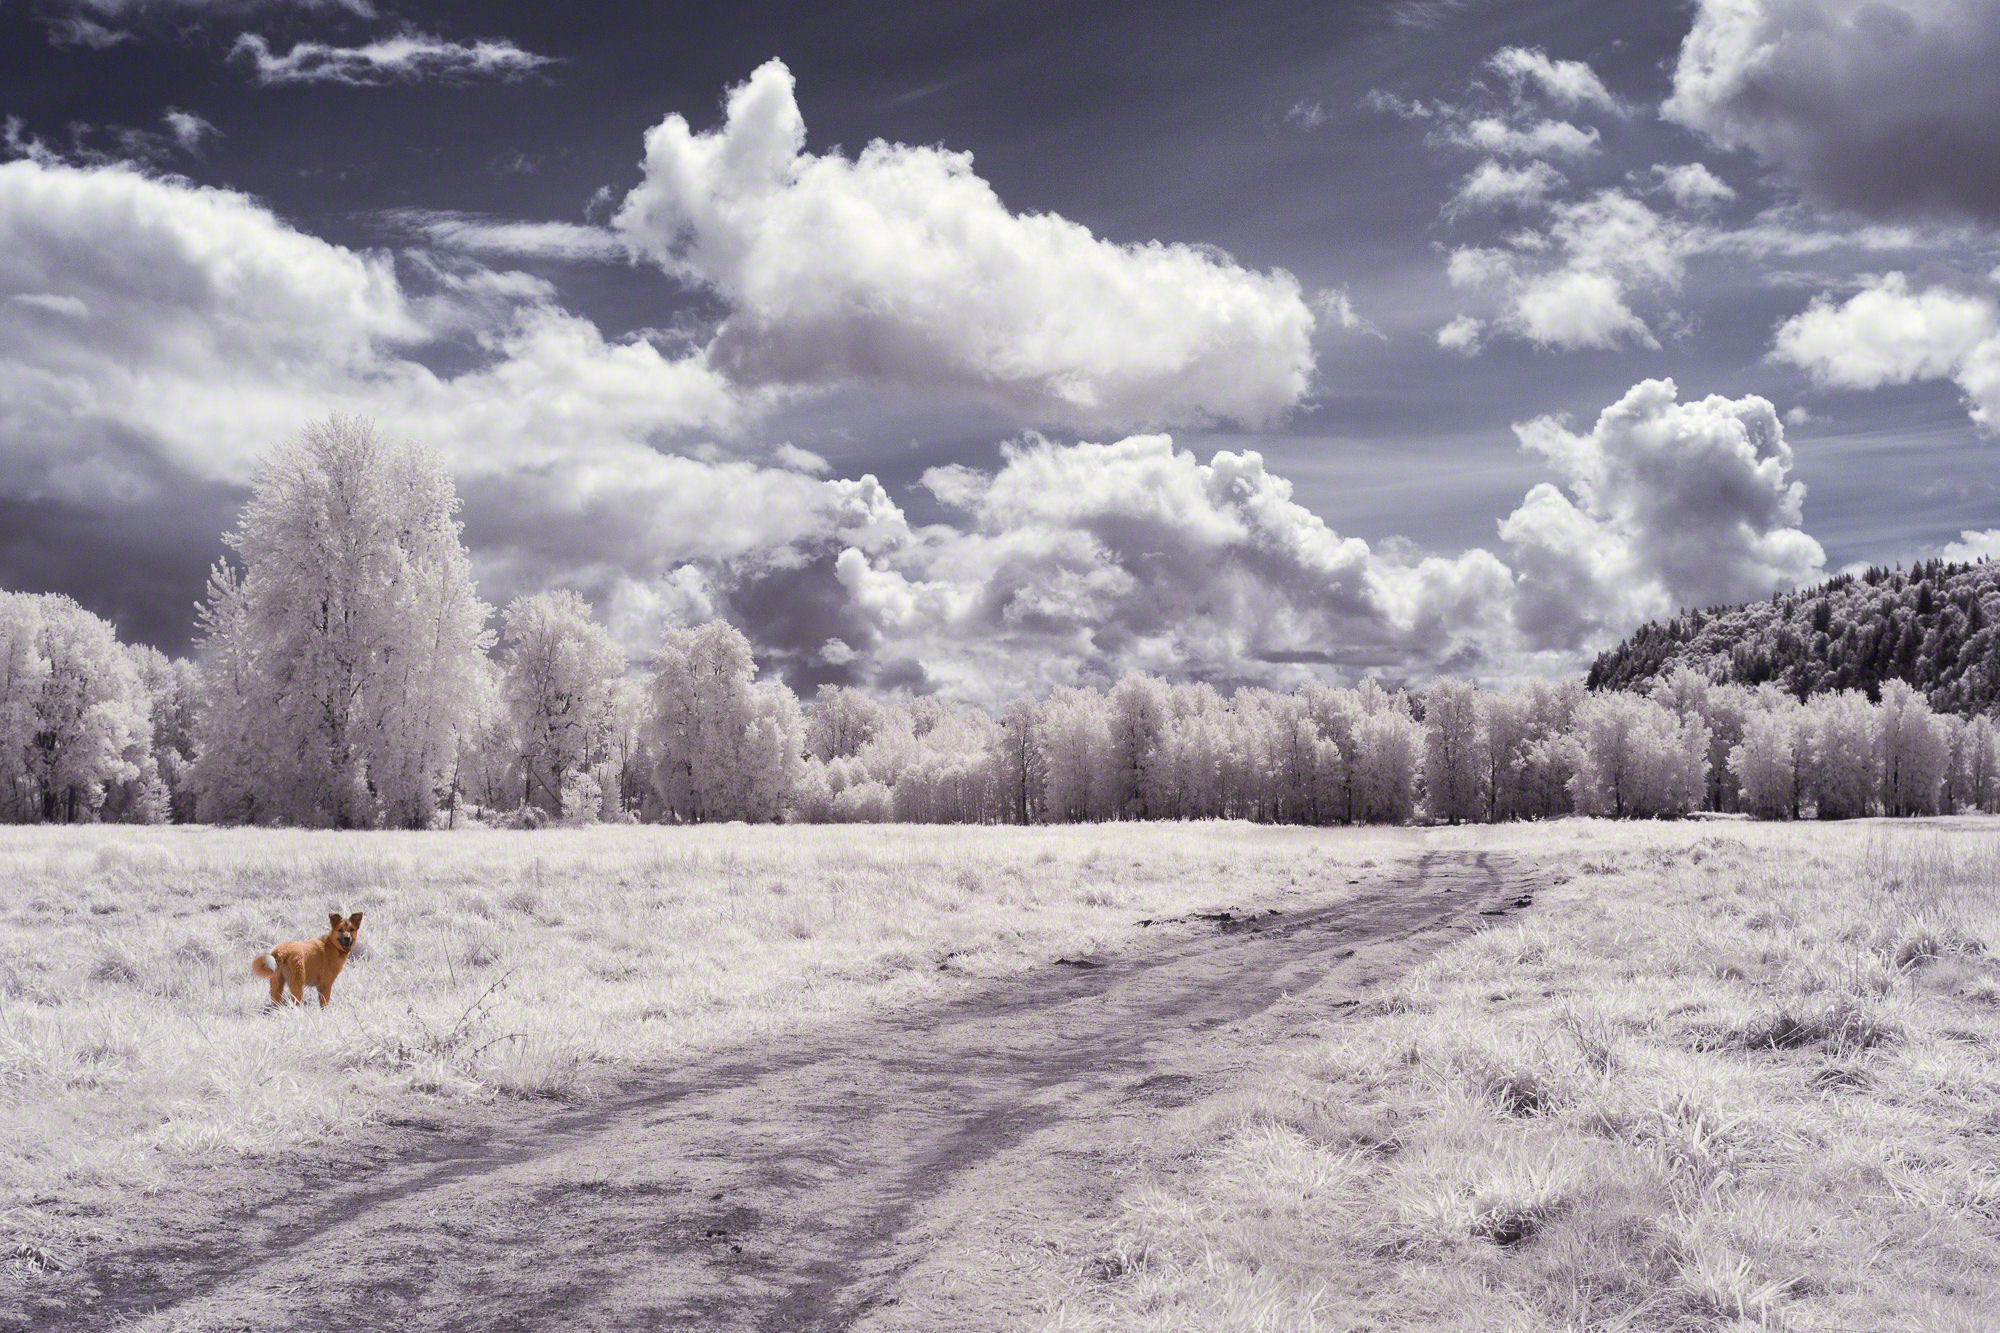
A few months back I had the opportunity to play with an infrared-converted camera, thanks to the folks over at LensRentals.com, and had a lot of fun photographing my dog at an expansive dog park just outside of Portland, Oregon. I ended up with some really great images, and wanted to share my start-to-finish processing steps with one of the photos to show some of the basics on how to process infrared images. Infrared images just don’t look so great directly out-of-camera, and there are some things you’ll want to “fix” before ending up with a final product. Here is my process (click on each photo to view large).
Step 1:
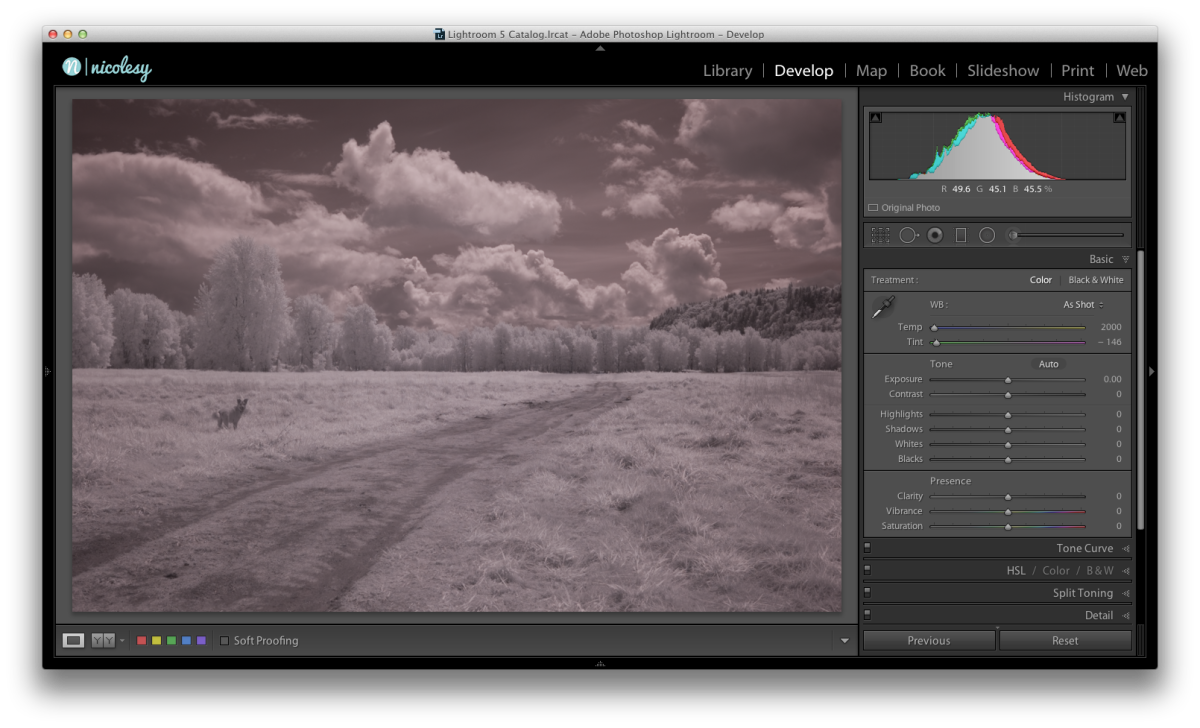
I open the image I want to work on in Lightroom. The image looks washed out and muddy, so it definitely needs some work.
Step 2:
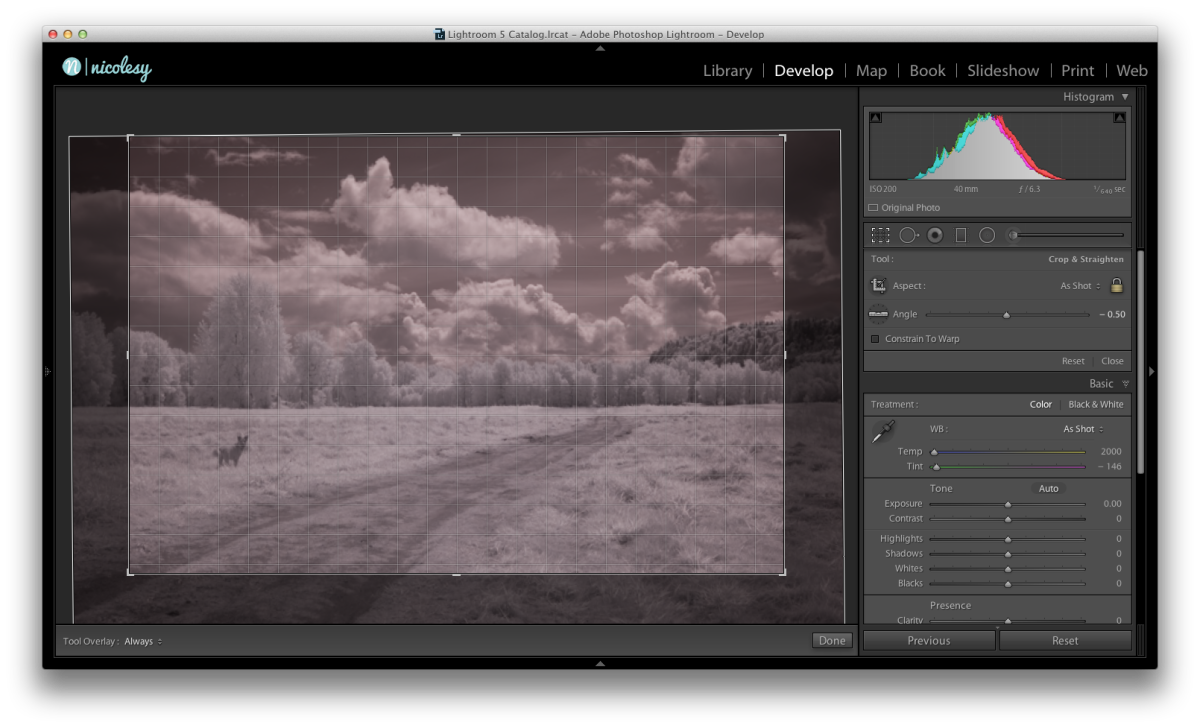
The first thing I want to do is crop it down to place my dog, Kodak, more towards the corner of the frame, and also to remove some of the foreground area.
Step 3:
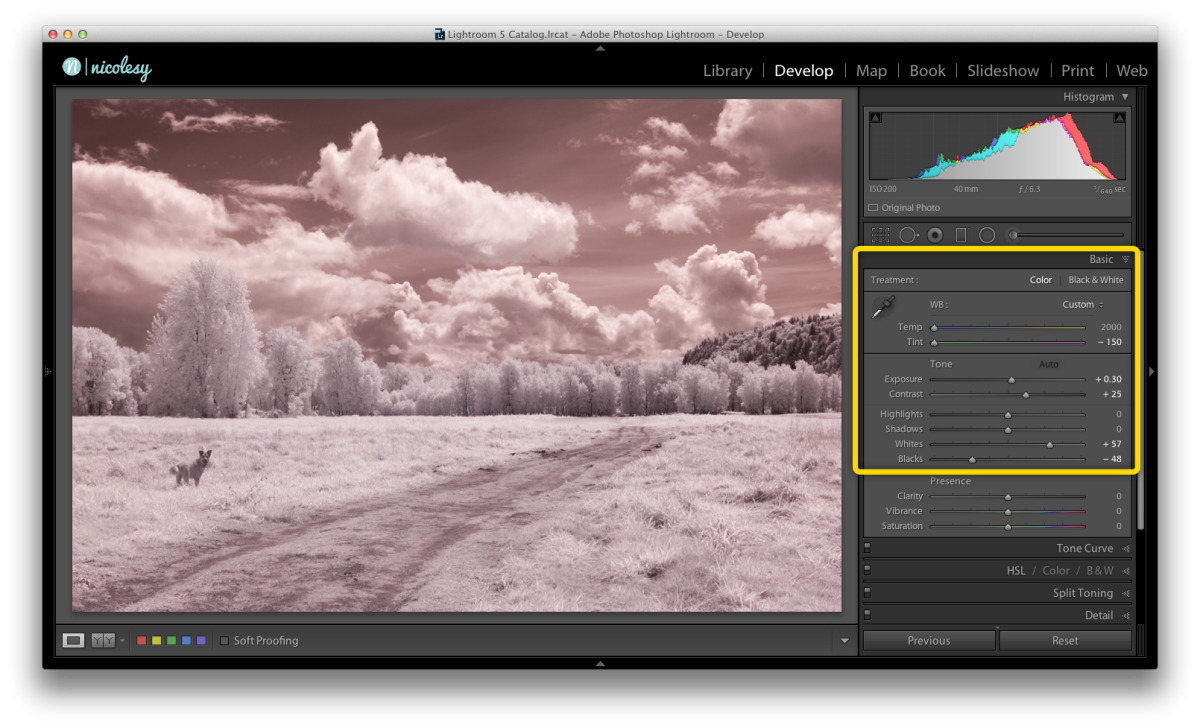
Then, I make some changes using the Basic panel in Lightroom.
Step 4:
Now it’s ready to go into Photoshop for some more processing. I use the keyboard shortcut CMD/CTRL+E to edit the image in Photoshop CC. Then, inside of the Adjustments panel I add a Channel Mixer adjustment. I change the “Output Channel” to “Red”, set Red to 0 and Blue to +100.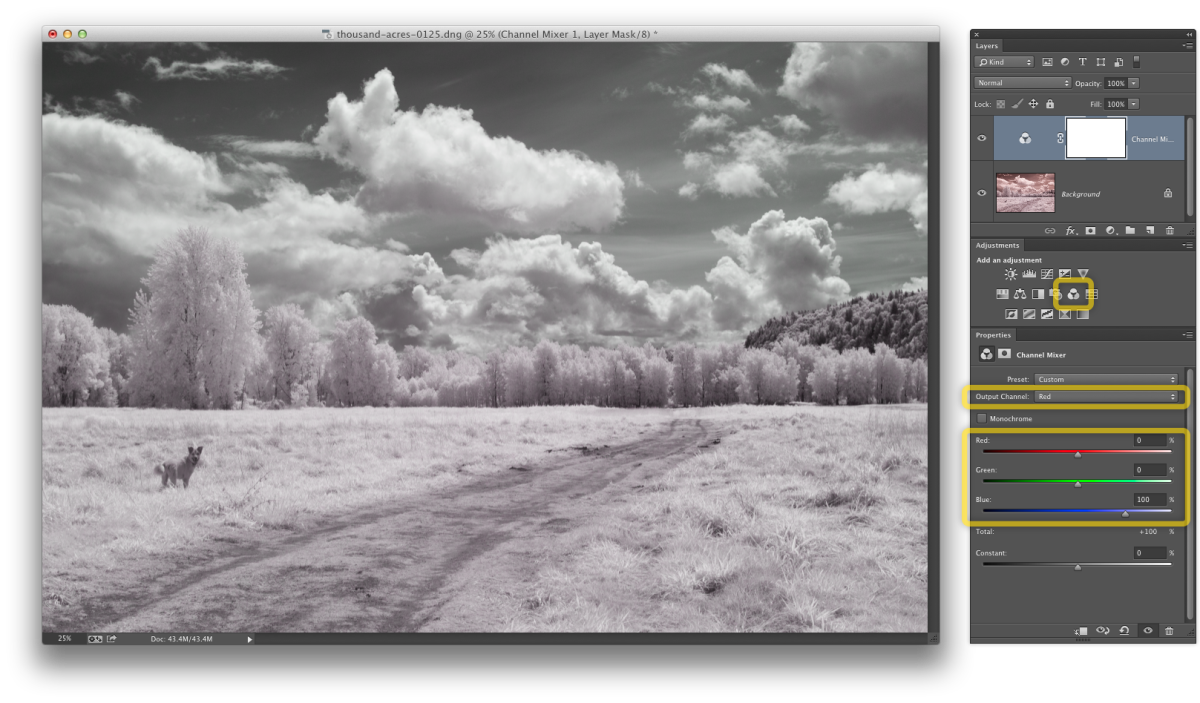
Step 5:
Then, still inside of the same Channel Mixer adjustment, I select the “Blue” Output Channel, set Red to +95 and Blue to -3.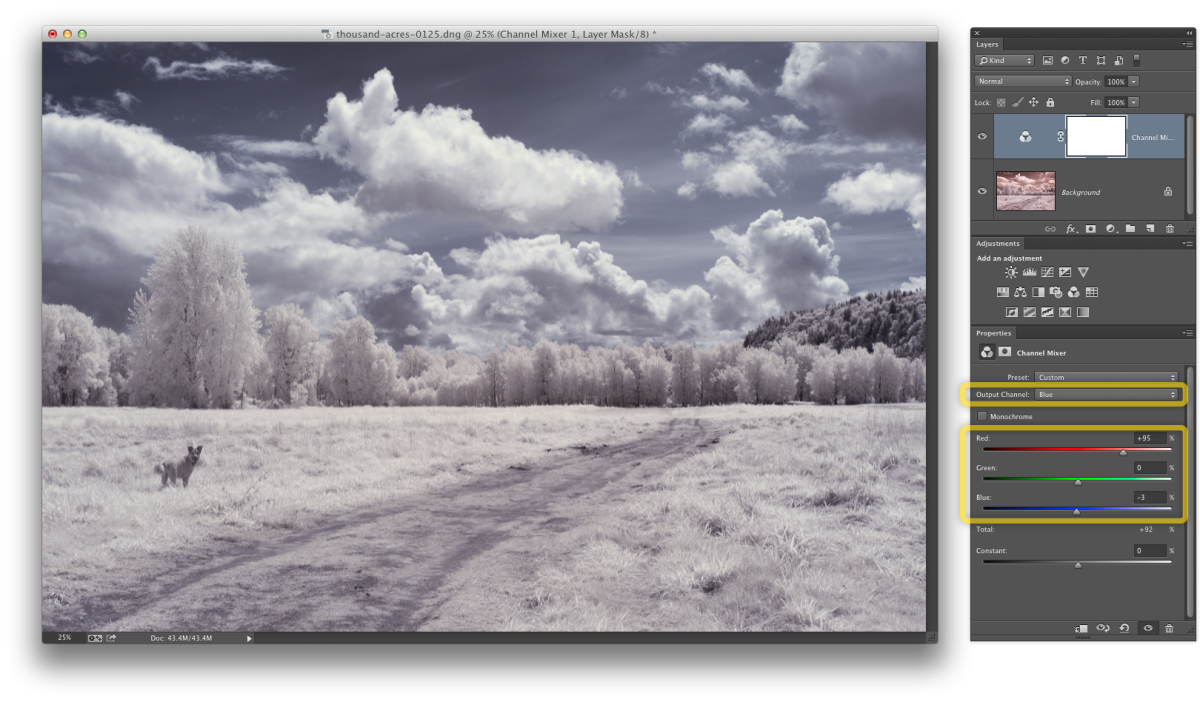
Step 6:
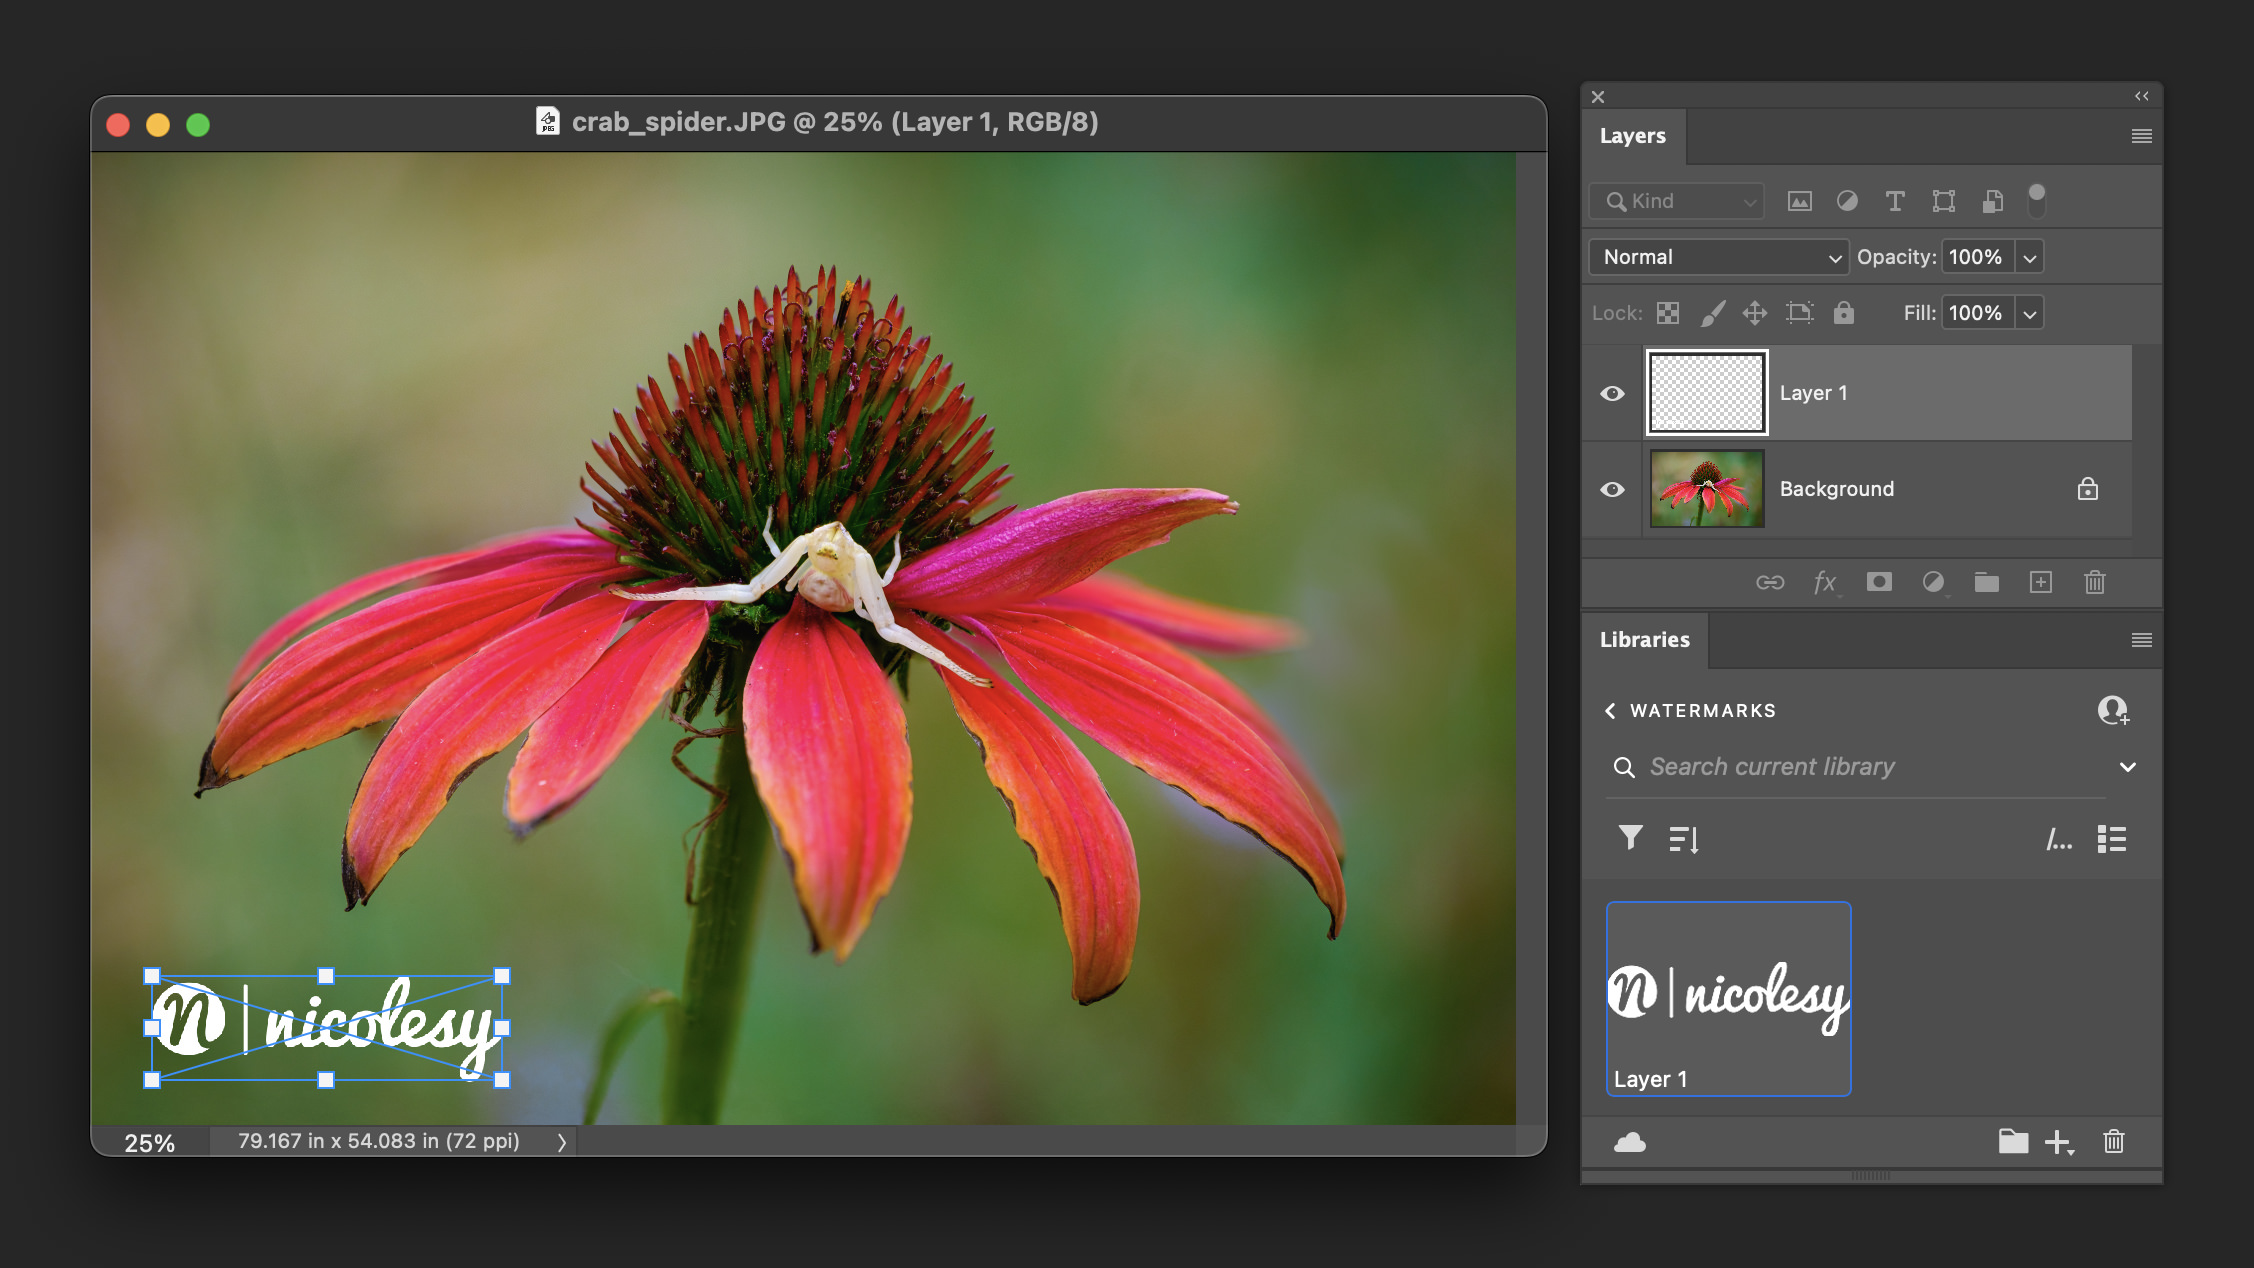
My color is fixed in the image, but I want to add a small amount of stylization to my dog. So I add a new Color Fill layer using the icon in the Layers panel, select a brownish-orange color (similar to my dog), and click OK.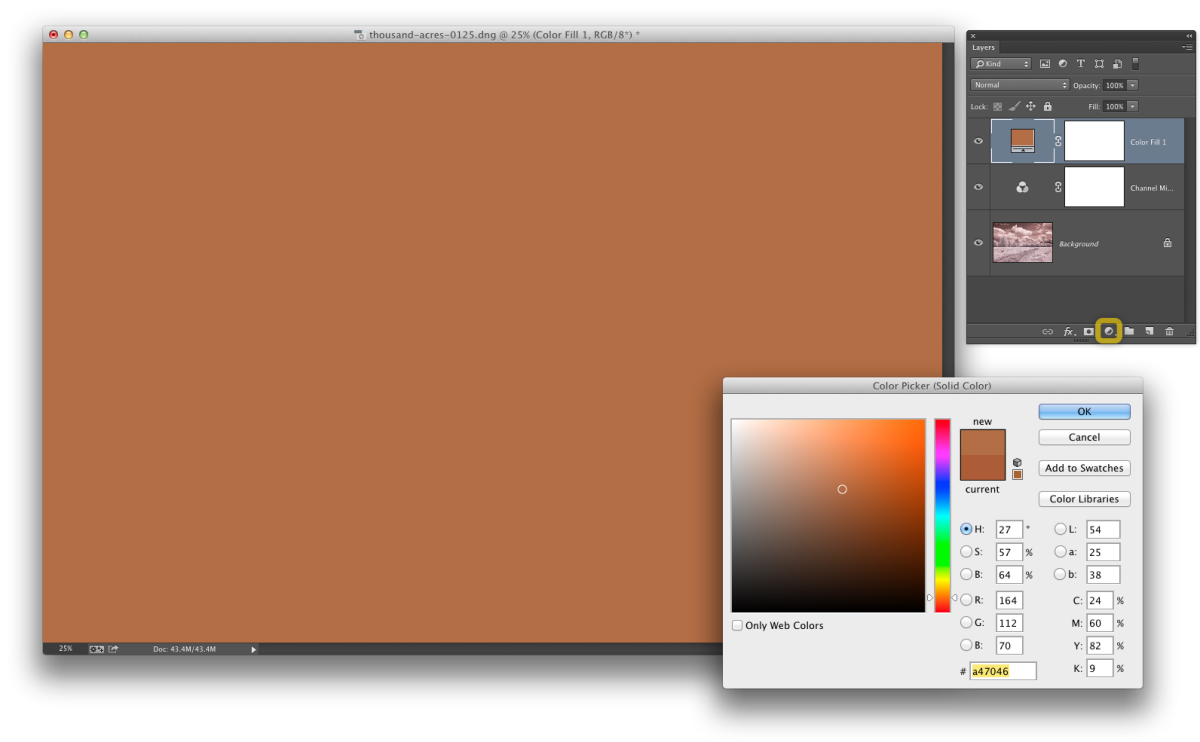
Step 7:
Then, I change the Blending Mode of this layer to “Color”, invert the mask so that it is no longer showing, and use the Brush tool to paint color back over my dog’s fur. When I’m finished, I save the image and close the file.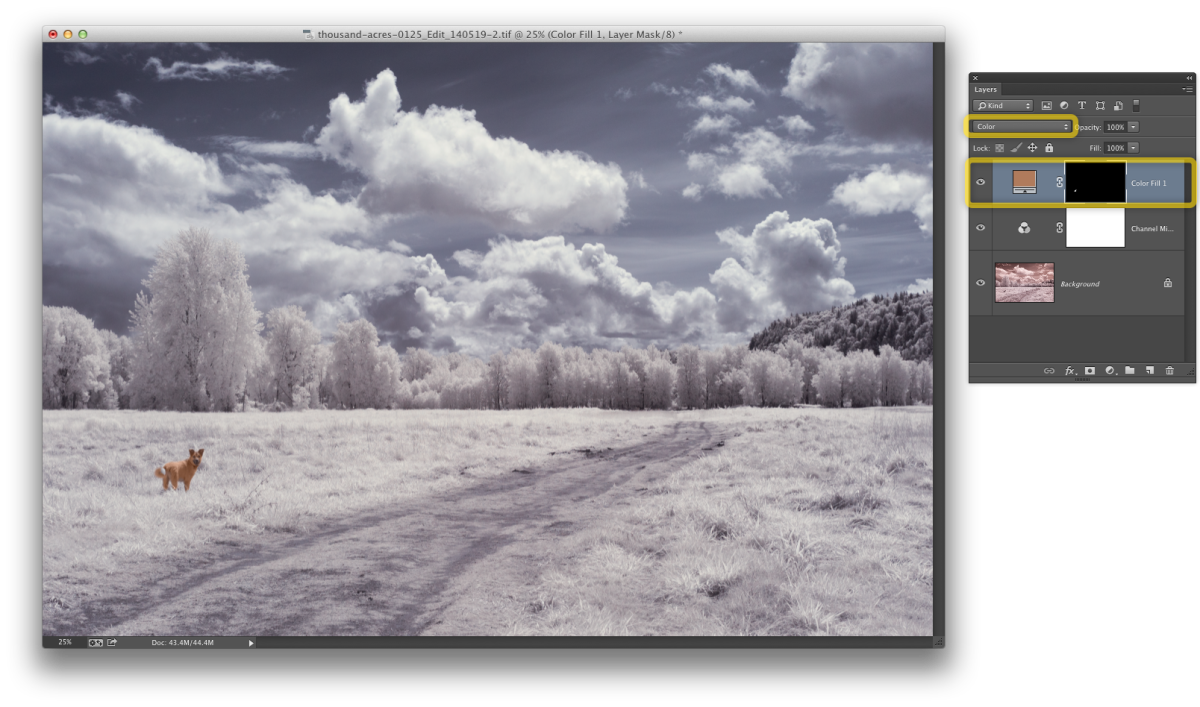
Step 8:
The image opens up back in Lightroom, where I will do a few more adjustments to finish it off.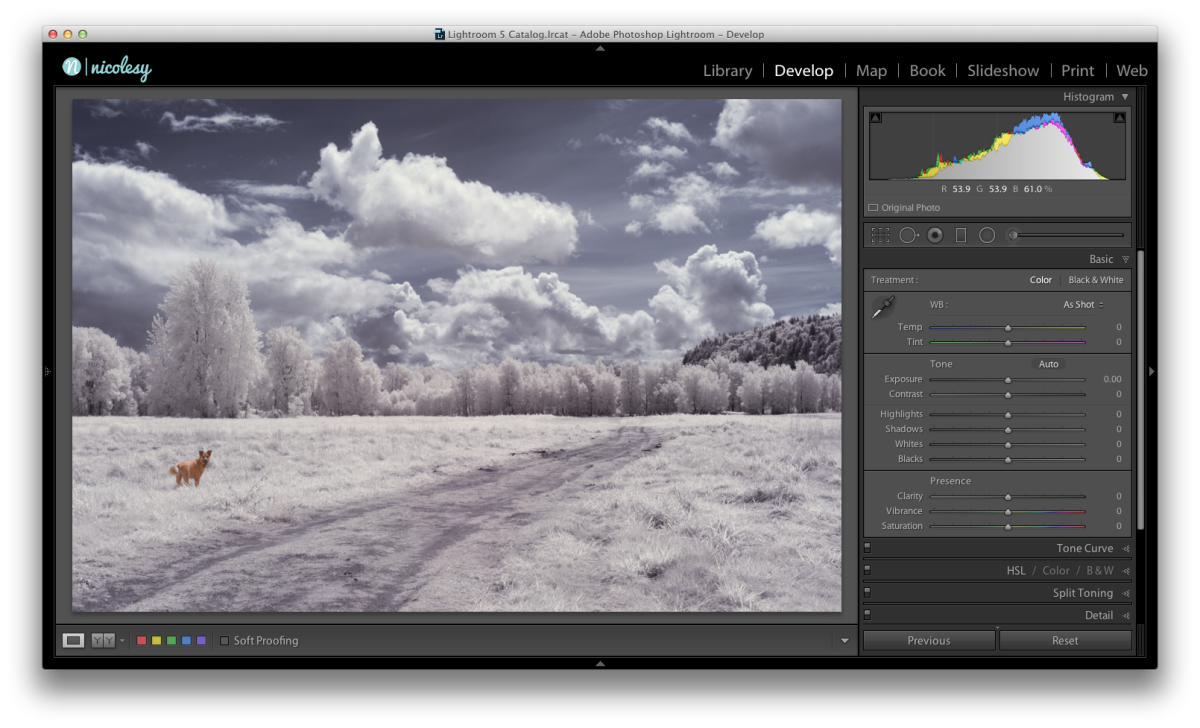
Step 9:
To finish this file, I make some more adjustments in the Basic panel to add color and contrast to the photograph.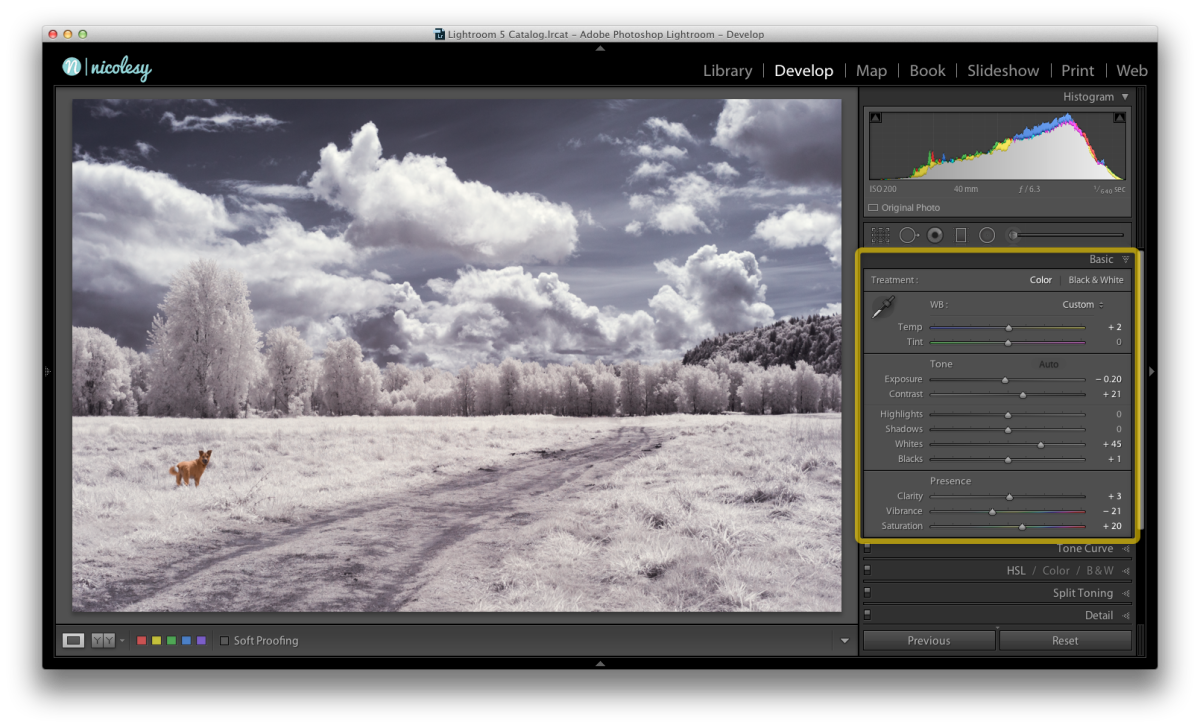
A few months back I had the opportunity to play with an infrared-converted camera, thanks to the folks over at LensRentals.com, and had a lot of fun photographing my dog at an expansive dog park just outside of Portland, Oregon. I ended up with some really great images, and wanted to share my start-to-finish processing steps with one of the photos to show some of the basics on how to process infrared images. Infrared images just don’t look so great directly out-of-camera, and there are some things you’ll want to “fix” before ending up with a final product. Here is my process (click on each photo to view large).
Step 1:
I open the image I want to work on in Lightroom. The image looks washed out and muddy, so it definitely needs some work.
Step 2:
The first thing I want to do is crop it down to place my dog, Kodak, more towards the corner of the frame, and also to remove some of the foreground area.

Step 3:
Then, I make some changes using the Basic panel in Lightroom.
Step 4:
Now it’s ready to go into Photoshop for some more processing. I use the keyboard shortcut CMD/CTRL+E to edit the image in Photoshop CC. Then, inside of the Adjustments panel I add a Channel Mixer adjustment. I change the “Output Channel” to “Red”, set Red to 0 and Blue to +100.
Step 5:
Then, still inside of the same Channel Mixer adjustment, I select the “Blue” Output Channel, set Red to +95 and Blue to -3.
Step 6:
My color is fixed in the image, but I want to add a small amount of stylization to my dog. So I add a new Color Fill layer using the icon in the Layers panel, select a brownish-orange color (similar to my dog), and click OK.
Step 7:
Then, I change the Blending Mode of this layer to “Color”, invert the mask so that it is no longer showing, and use the Brush tool to paint color back over my dog’s fur. When I’m finished, I save the image and close the file.
Step 8:
The image opens up back in Lightroom, where I will do a few more adjustments to finish it off.
Step 9:
To finish this file, I make some more adjustments in the Basic panel to add color and contrast to the photograph.

Nicole is a photographer, published author, and educator specializing in Lightroom, Photoshop, and photography. She is best known for her books on food photography but is widely versed in various photographic genres, including landscape, nature, stock, travel, and experimental imagery.

