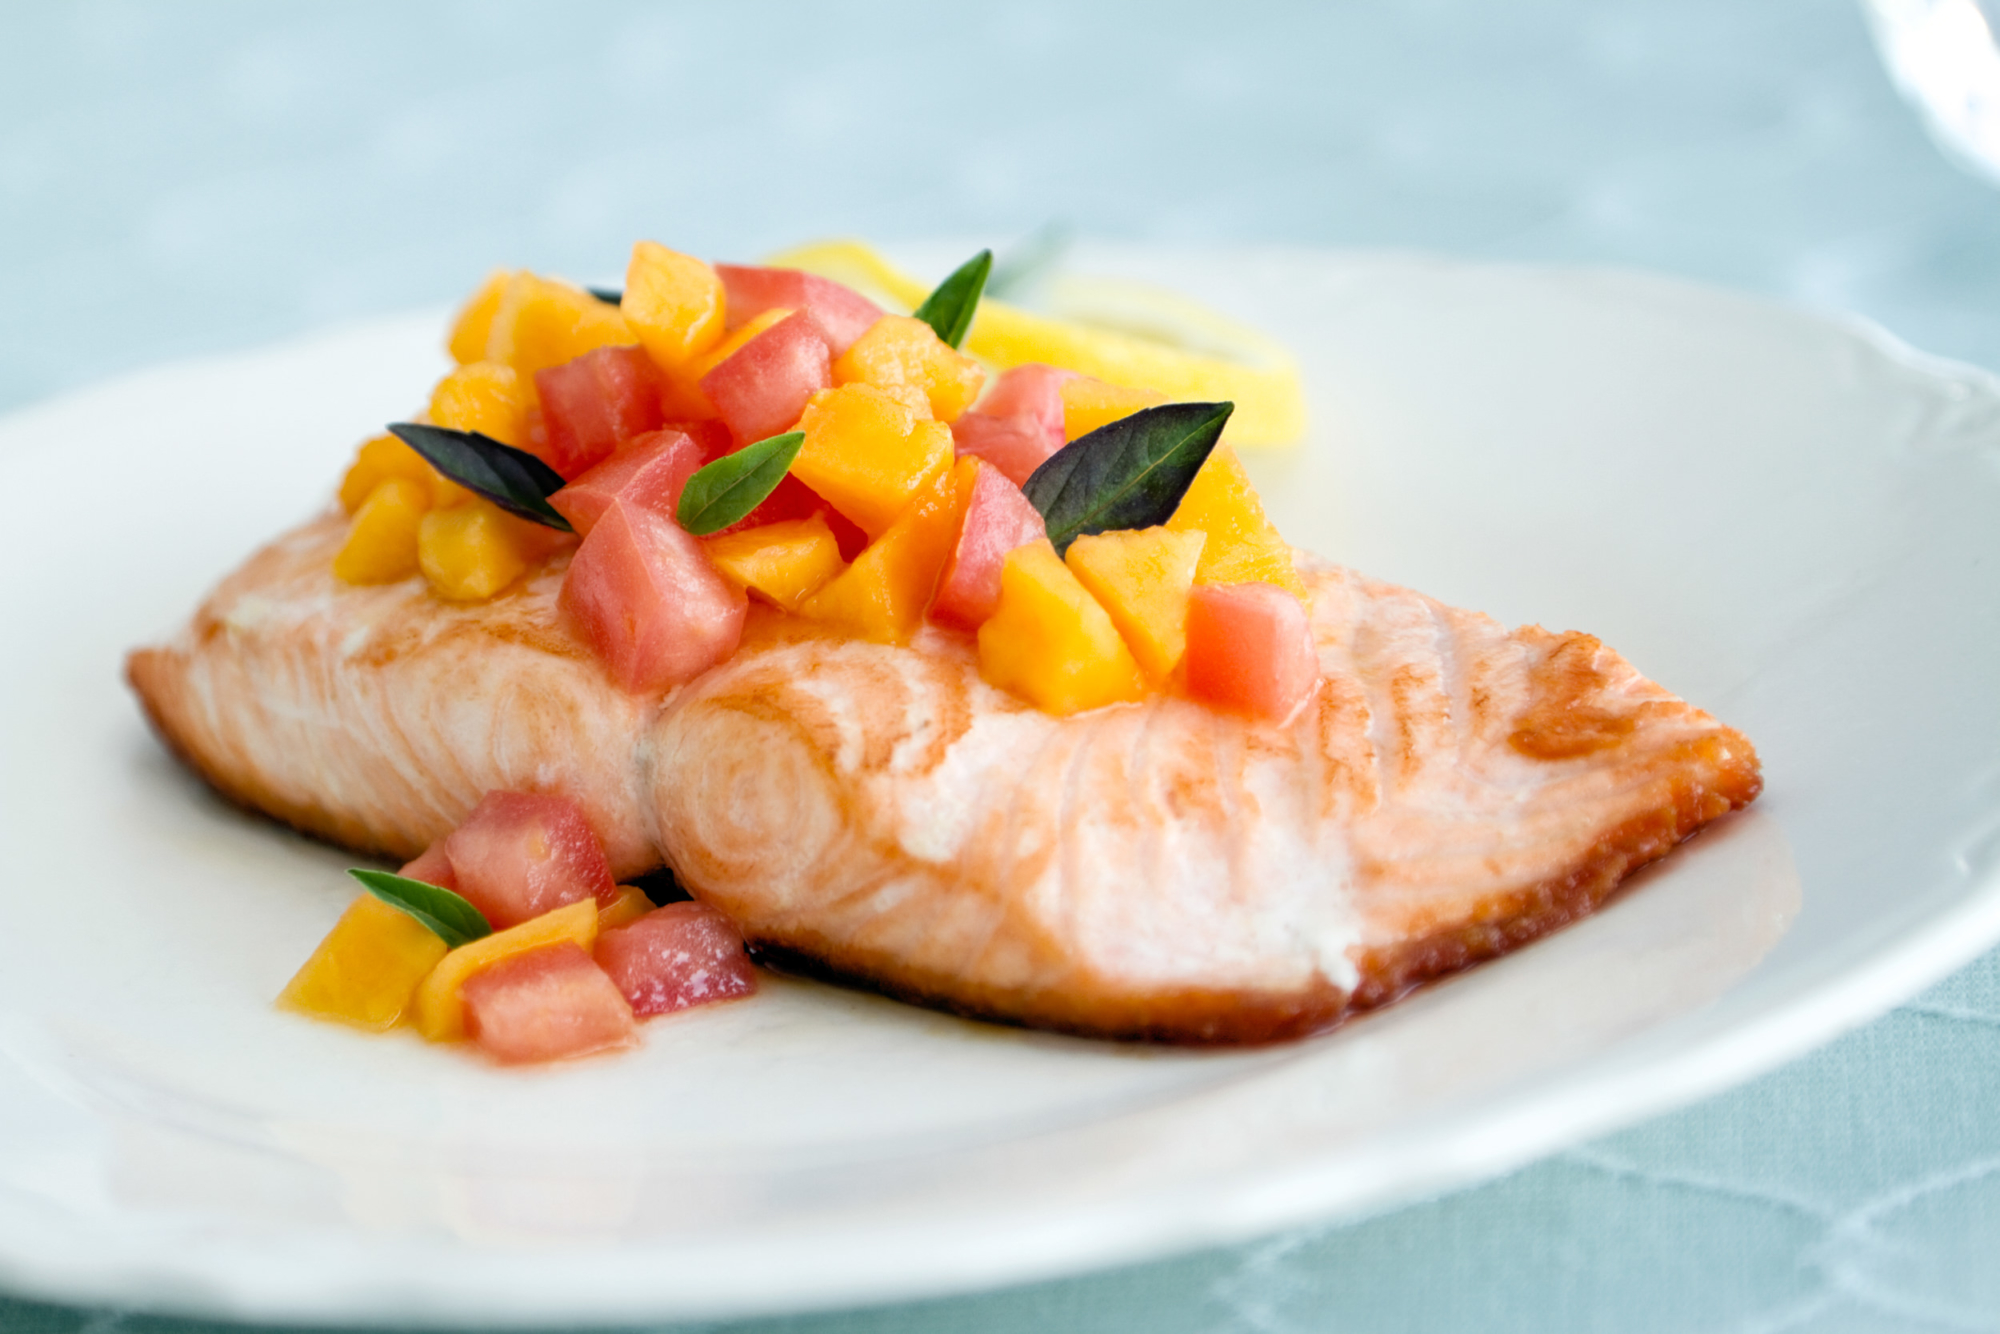
Yesterday I posted some white-balance tips for shooting food photography. In this post I’m going to go through the steps I took to edit the image. The photo used in this post is from the same shoot and is edited identically to the image in the previous post.
I reduced the images sizes in this post for format purposes … feel free to click on them to view in a larger resolution.
The images I photograph, whether they are for work or for fun, always go through Adobe Lightroom before I edit in Photoshop, and sometimes, if they are not “work” images, I will just export straight out of Lightroom and not even use Photoshop. I’ve been using the program ever since it was released and have found it to be an essential part of my workflow.
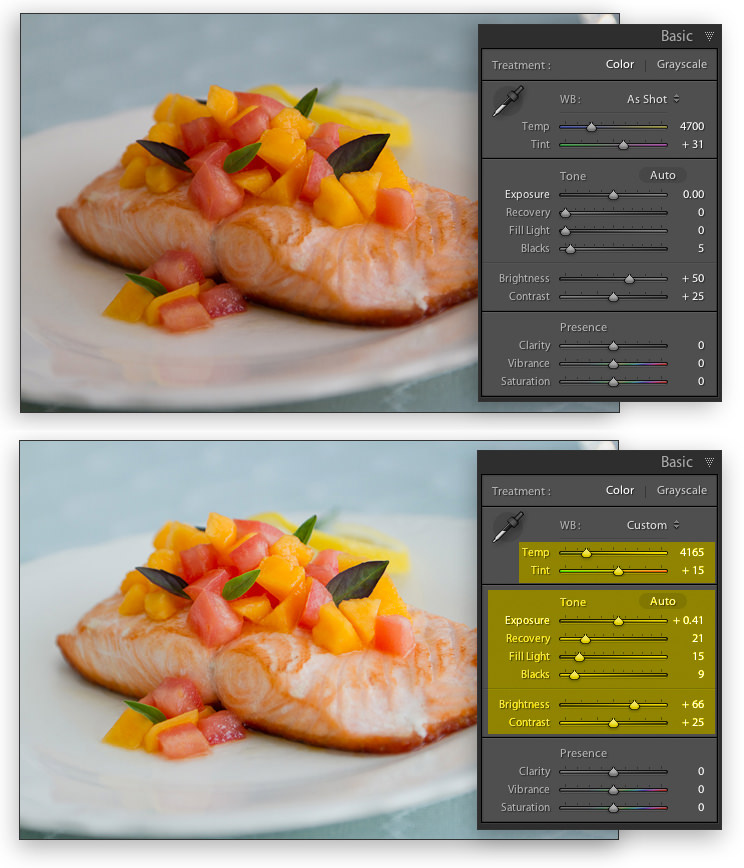
So, for this image, I started by editing the RAW file in Lightroom. I made some slight temperature and tonal adjustments (the changes are hi-lighted in yellow). Then I exported the image as a PSD file and opened it in Photoshop CS4 to do further editing.
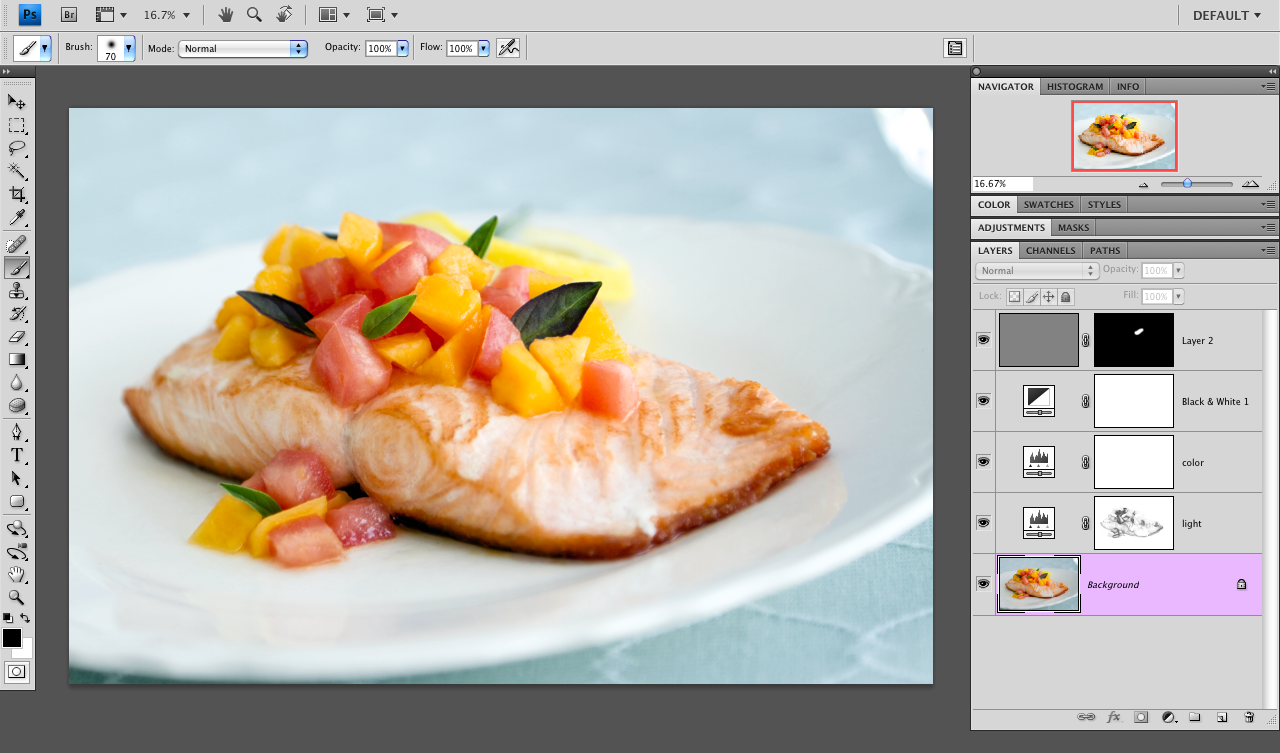
When I edit images I typically use a lot of layers. This photo didn’t need too much work to it, so it’s not as complicated when it comes to my typical work-flow. I prefer to use adjustment layers to preserve the non-destructiveness as much as possible during the editing process … and so I can go back and fix anything I missed the first time around.
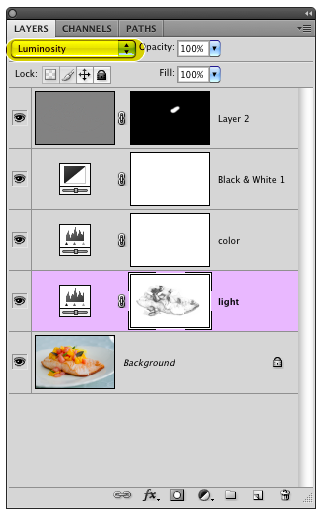
The first layer is a Levels Adjustment Layer – I named it “light” in my layers panel to the left (click here to view the actual RGB adjustments). One thing you’ll note is that, hi-lighted in yellow is the blending modes drop-down and I have it set to “luminosity“. I do this with my images so that I can do masking that will only affect one aspect of the adjusmtents, if necessary. In this particular image I didn’t want the red areas of the salmon and topping to be overly lightened (it was creating some ugly blotching in the darker red areas) so I used “SELECT –> Color Range…” to find the red areas, then I filled in the selection with black in the layer mask.
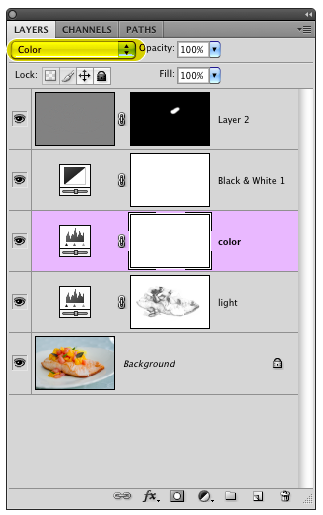

(If you want to learn more, please click here to view a quick two-minute video tutorial on this effect.)
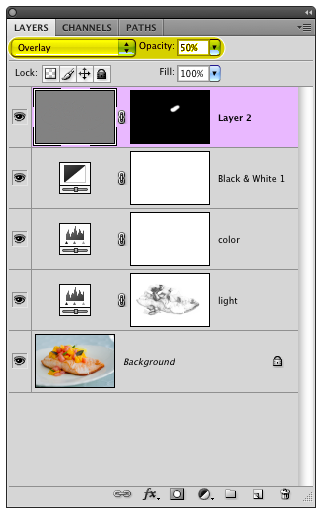
And that’s my editing process! I always save the un-flattened PSD version of the image, along with a full-res JPEG. Saving the PSD files eats up more space, but I have found it useful when I need to go back and re-edit a file (or do fun tutorials like this one).
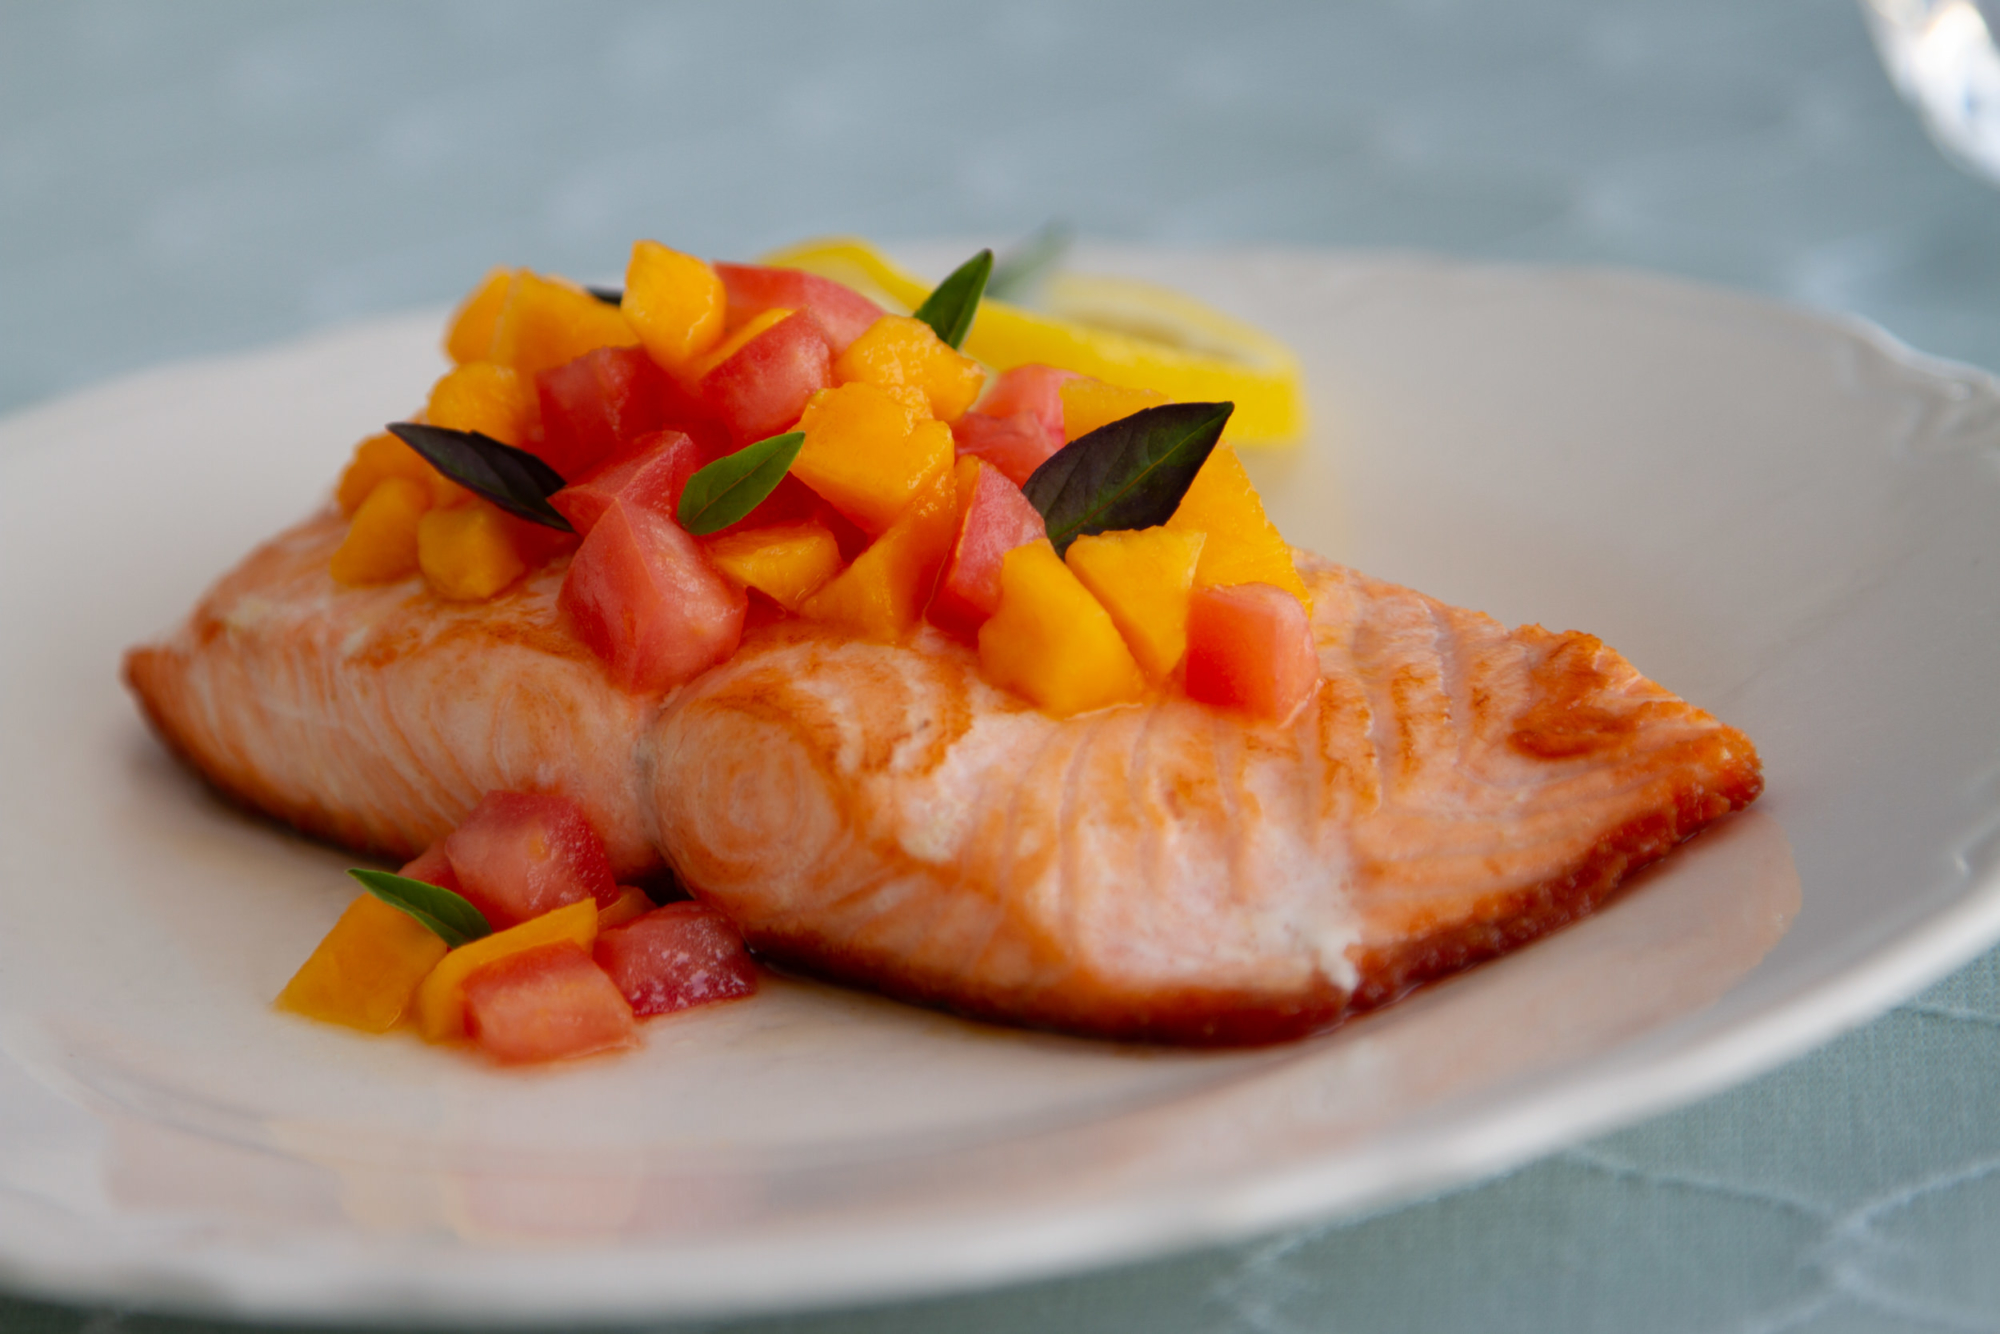
- Before
Yesterday I posted some white-balance tips for shooting food photography. In this post I’m going to go through the steps I took to edit the image. The photo used in this post is from the same shoot and is edited identically to the image in the previous post.
I reduced the images sizes in this post for format purposes … feel free to click on them to view in a larger resolution.
The images I photograph, whether they are for work or for fun, always go through Adobe Lightroom before I edit in Photoshop, and sometimes, if they are not “work” images, I will just export straight out of Lightroom and not even use Photoshop. I’ve been using the program ever since it was released and have found it to be an essential part of my workflow.
So, for this image, I started by editing the RAW file in Lightroom. I made some slight temperature and tonal adjustments (the changes are hi-lighted in yellow). Then I exported the image as a PSD file and opened it in Photoshop CS4 to do further editing.
When I edit images I typically use a lot of layers. This photo didn’t need too much work to it, so it’s not as complicated when it comes to my typical work-flow. I prefer to use adjustment layers to preserve the non-destructiveness as much as possible during the editing process … and so I can go back and fix anything I missed the first time around.
The first layer is a Levels Adjustment Layer – I named it “light” in my layers panel to the left (click here to view the actual RGB adjustments). One thing you’ll note is that, hi-lighted in yellow is the blending modes drop-down and I have it set to “luminosity“. I do this with my images so that I can do masking that will only affect one aspect of the adjusmtents, if necessary. In this particular image I didn’t want the red areas of the salmon and topping to be overly lightened (it was creating some ugly blotching in the darker red areas) so I used “SELECT –> Color Range…” to find the red areas, then I filled in the selection with black in the layer mask.


(If you want to learn more, please click here to view a quick two-minute video tutorial on this effect.)

And that’s my editing process! I always save the un-flattened PSD version of the image, along with a full-res JPEG. Saving the PSD files eats up more space, but I have found it useful when I need to go back and re-edit a file (or do fun tutorials like this one).
- Before

Nicole is a photographer, published author, and educator specializing in Lightroom, Photoshop, and photography. She is best known for her books on food photography but is widely versed in various photographic genres, including landscape, nature, stock, travel, and experimental imagery.


Many thanks for that Nicole, it was exactly what I was looking for when I asked for more detailed information.
Perfect!
Wow, this is very detailed. I didn’t know one could do all that with Photoshop layers and masking. I am in awe.
Thank you for the tutorial. Too bad I read this around lunch time and now I’m craving salmon but those are the risk of looking at food photography.